How to Use Photoshop to Create Black and White Images – Crowned Tree | Photoshop Tutorials
Welcome back to another one of my Photoshop tutorials! On my recent trip through Utah, I stopped literally everywhere. At some point, my buddy Luis and I stopped at a random carpark, and just by chance there was this tree in perfect line with the sunset. However, we actually parked a 5 min sprint from the tree away, so when I realised what’s there, I grabbed my tripod and the camera and run like a madman. People must have thought I am nuts the way I stormed that tree, hehe. Anyway, it was worth it and I was able to create the black and white scene I envisioned when I took the image. Remember, if you like the video, make sure to subscribe for more weekly Photoshop and Photography action!
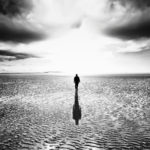
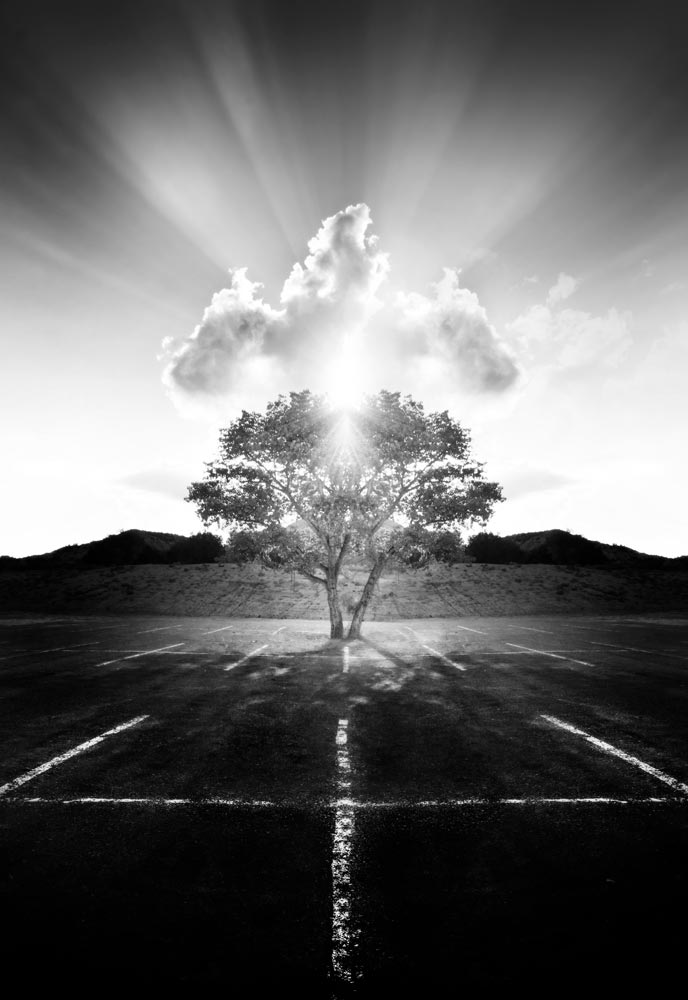
So, here is the final image:
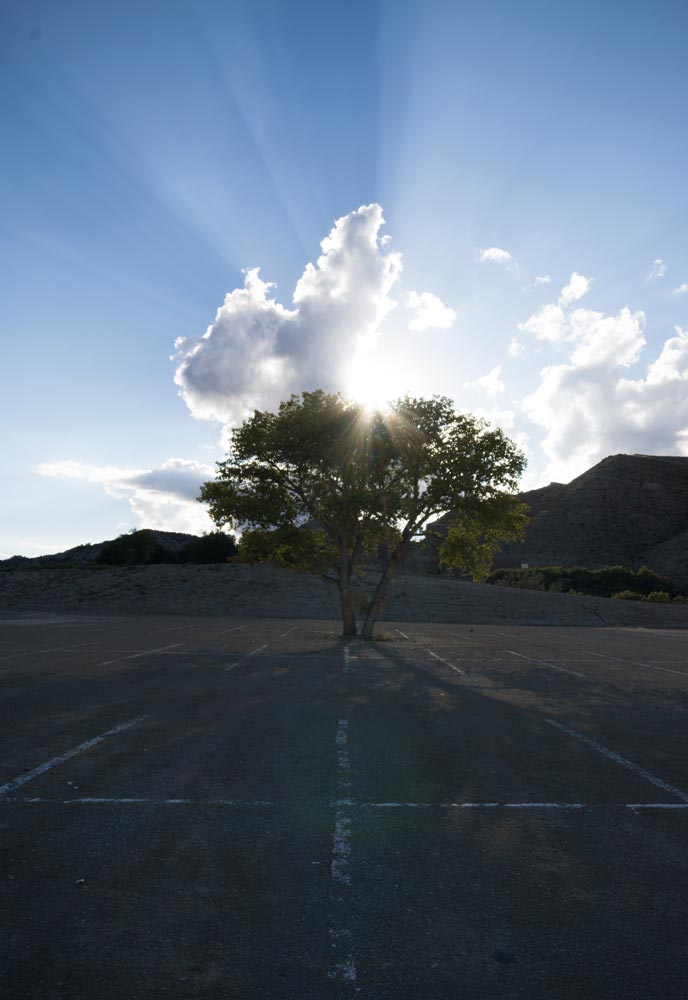
And here is the original:
Part One – Darken the Image (0:45 min)
I started out with darkening the image by clicking on the little Curve Adjustment Layer symbol and dragged the curve down a little. Once done, I used a brush (B on the keyboard) and a layer mask to bring the effect through where I need.
If you have not used layer masks before, have a quick look at one of my previous photoshop tutorials on the matter!
I did this darkening a couple of times throughout the processing, which is quite normal for when I process a black and white image. However, darkening alone will not do – I also brightened the tree area using the same Curve Adjustments, only that I dragged the curve up instead of down.
Part Two – Make the Image Black and White (2:10 min)
There are some ways to make an image black and white – I started by creating a stamp visible (CMD+Alt+Shift+E) which created a layer that has everything on it that is visible on the screen. Having this new layer selected, I hit CMD+Shift+U, which desaturated a layer fully, therefore taking out all the colour. Once done, I used some more curve adjustments to lighten and darken some areas in the fresh black and white (BW) image. At this point, I wanted to make sure that we have good symmetries in the image, which is why I shifted my attention to the tree and its position in the image.
Part Three – Reposition the Tree (3:15 min)
I wanted to move the tree slightly to the left – for this, I created another stamp visible (CMD+Alt+Shift+E) and hit M on the keyboard to get my Marquee Tool. With that, I drew a selection around the top half of the image and hit CMD+J to make a copy of my selection onto a new layer. Using the Move Tool (V) and my arrow keys, I moved the tree into place.
There was now a fine line between the top image and the background image – I used a layer mask and my brush to remove it. Another issue that arose thanks to the tree move was that the shadow did not fit anymore; it looked off. To resolve this, I created a new layer (CMD+Shift+Alt+N) and hit S to get the clone stamp tool. Then I selected an area without shadow as a source (Alt+Click) and drew over the shadow of the tree, effectively removing it. Using a dark brush, I then just drew a new shadow, hehe.
Part Four – Create the Mirror Effect (7:30 min)
It was time to mirror the left half of the image to the right. For that, I hit M on the keyboard and selected the left site. I then hit CMD+J again to copy this selection onto a new layer. Once done, I flipped it over and repositioned it.
Just like before, I then used a layer mask and the brush to blend the two halves together nicely.
Part Five – Create a Dramatic Effect (9:45 min)
Once the images were blended well, I created a stamp visible once more (CMD+Alt+Shift+E). I then went to Filter-Camera Raw Filter and used the clarity slider (to the right, of course). After hitting Ok, I used a layer mask to hide the effect in some places.
A big part of the image are the white lines in the very foreground. To make these pop way more, I used a Levels Adjustment layer, where I played around so long until the lines really stood out. I did this twice in the video and even more times in the original processing, hehe.
With this done, there were only minor changes left. I cleaned up some dots on the ground using the Patch Tool (J or Shift+J), with which you can just draw a selection around something and drag it onto the background which you want to copy. Smart!
Remember, shortcuts make your life easier and can speed up your processing a lot! Here is what I used in this image and most of my Photoshop tutorials:
CMD+Alt+Shift+E to create a stamp visible
B for the brush
X to change between background and foreground colours
CMD+I to invert anything
CMD+J to duplicate a layer or a selection
M to get the Marquee tool
CMD+Alt+Shift+N to get a new layer
If you like my images, make sure to check out my portfolio!
Don’t forget to get out there and take some pictures yourself! I hope you enjoy my Photoshop tutorials and I see you next time.