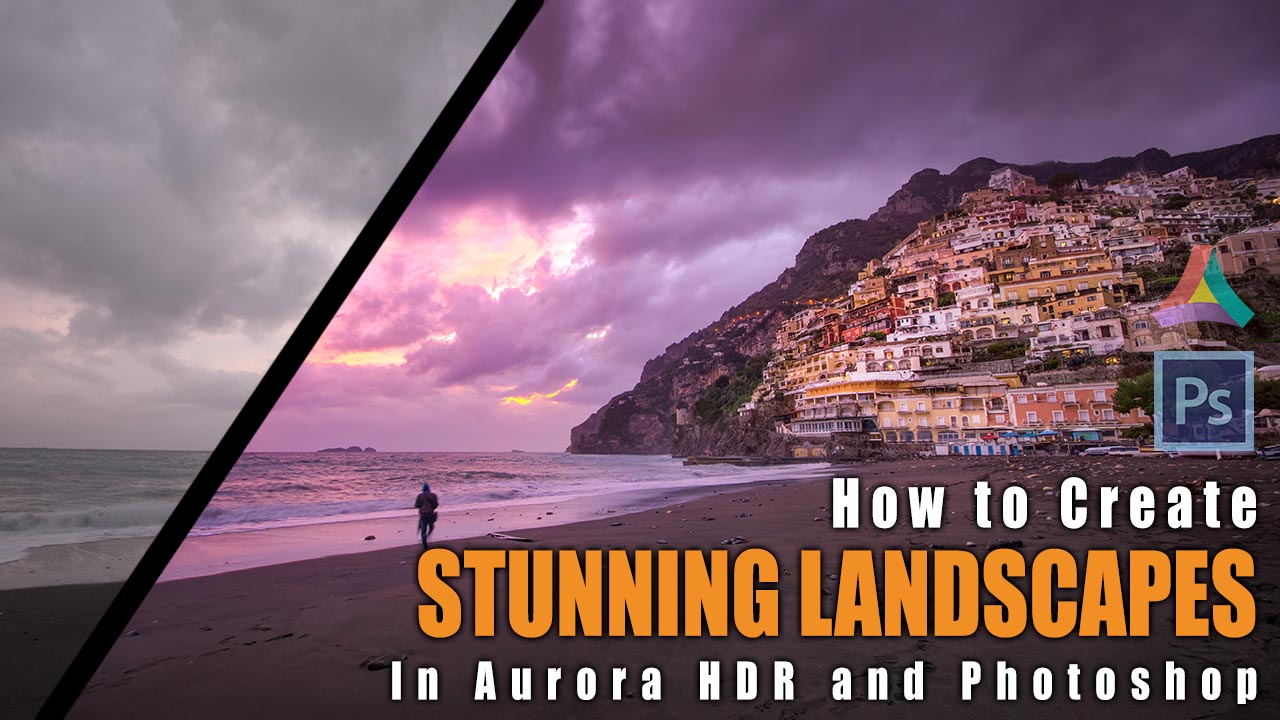
How to Create STUNNING LANDSCAPES in Aurora HDR and Photoshop – Example: Positanos Miracle Sunset
Welcome to another example on how to create stunning landscapes in Aurora HDR and Photoshop! Today we will dive into the world of HDR photography once more – as an example, we will use one of the images that I took recently in Positano, Italy, and we will boost the colors and create a beautiful lighting situation in no time and hassle-free. In this tutorial, I am using Aurora HDR 2018 and Photoshop.
If you have never heard about HDR photography, then check out this article that explains everything that you need to know – a great place to start before you learn how to create stunning landscapes in Aurora HDR and Photoshop.
Also, if you like the Aurora HDR software and want to know more, check out my review here – if you love it, use the promo code ‘LETSIMAGE’ at checkout to get 10% OFF. So, let’s jump right in!
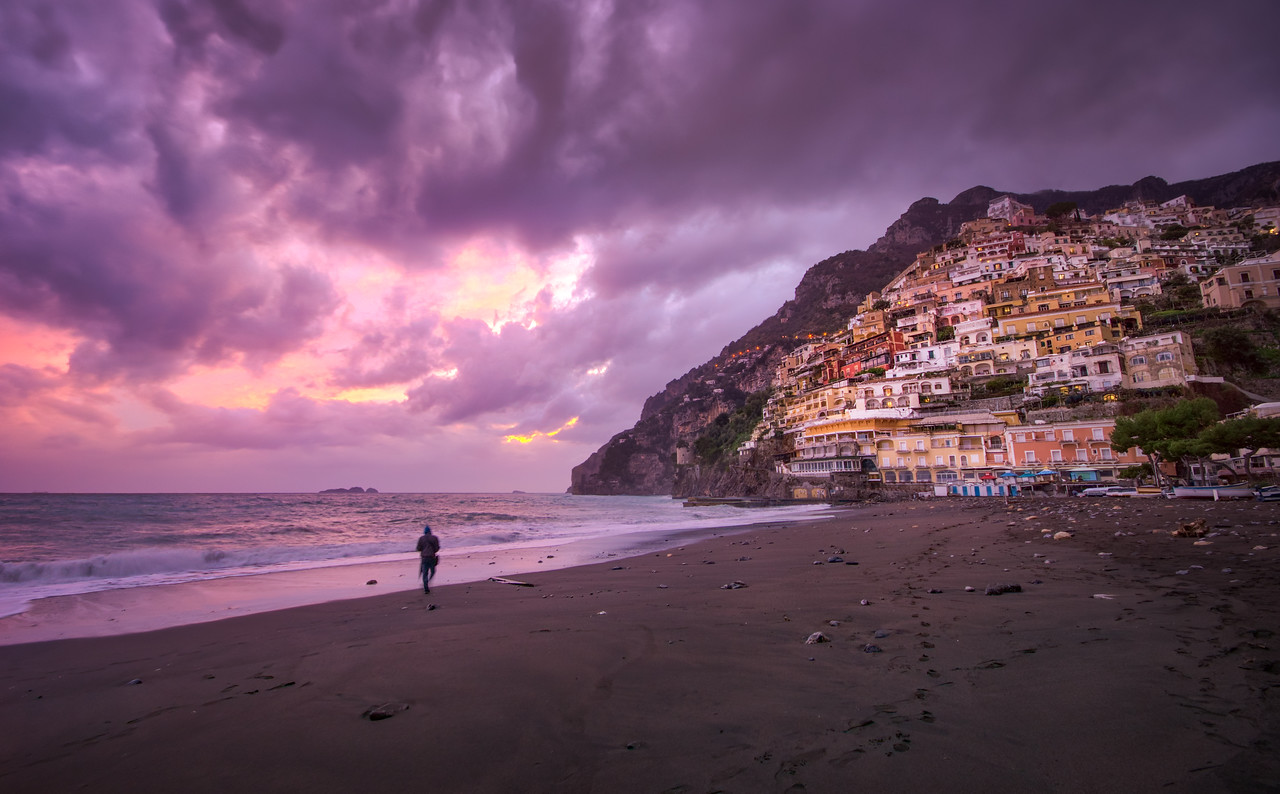
Here is the final image:
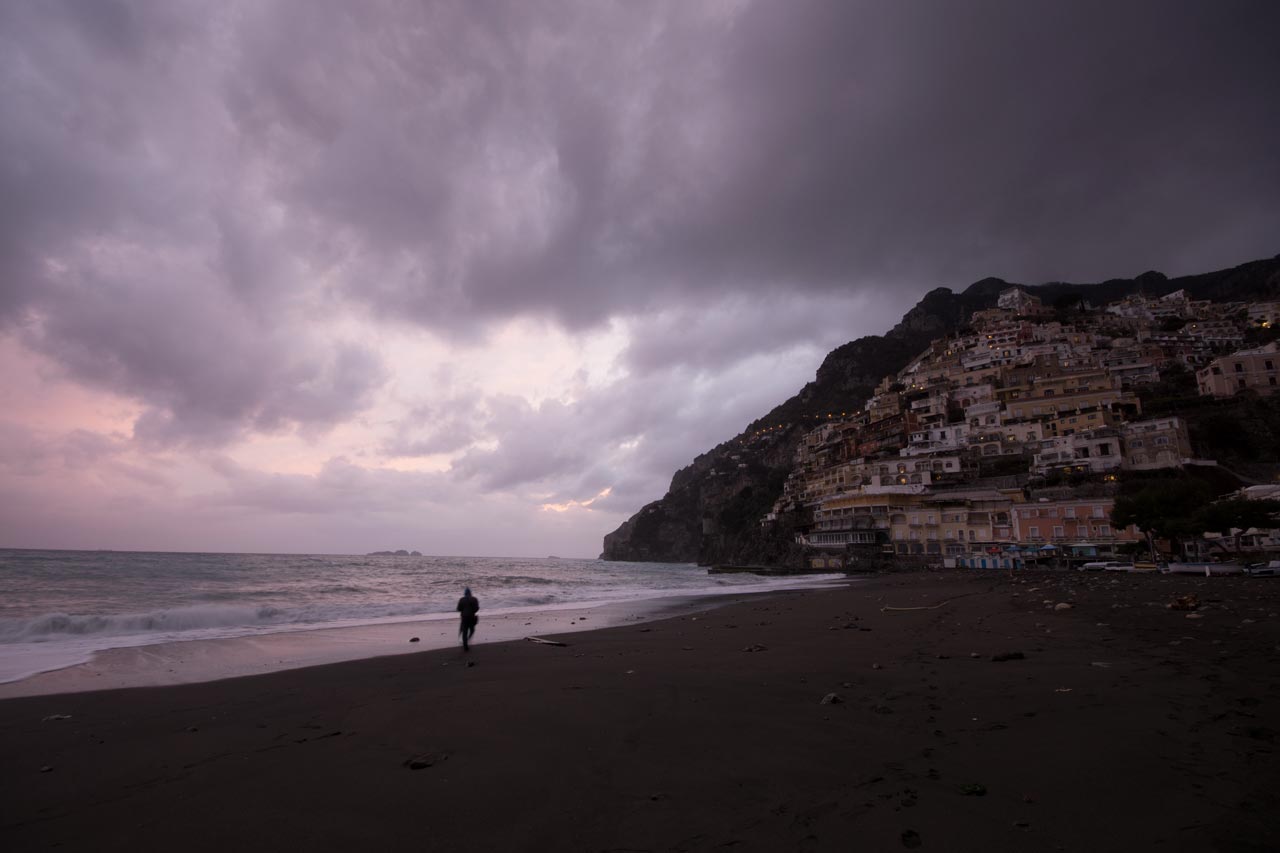
Here is the original (0-Exposure) image:
Step One – The Aurora HDR Editing and HDR Merge (1:20 min)
Aurora HDR is the best HDR software I have ever seen – it is in fact so simple, that there is not even a point of writing every single step in text version here. To summarize it, I simply added a little bit of saturation to the sky area and a little bit of contrast – all of which is being done by using simple sliders. I then imported the image into Photoshop CC right from the Aurora menus. Awesome!
Step Two – Colour the Sky in Photoshop (6:00 min)
While the HDR image that came out of Aurora was already quite amazing, I wanted to boost it a little more in Photoshop. This is what it is all about to learn how to create stunning landscapes in Aurora HDR and Photoshop. Starting out, adding color to the sky was super fast and easy. For this, I created a hue/saturation layer and selected the little ‘colorize’ button. After selecting a nice purple, I reduced the opacity of the layer and hid the effect by inverting the layer mask (CMD/Ctrl I). I then used a very large brush with a low opacity to brush the effect into the image.
This created a relatively uniform purple color in the sky – but to add some color dynamic, there is the need for more! So, I repeated the above step in the exact same way. but this time I selected a nice orange. I wanted to make sure the effect is only visible in the mid tones, so I double clicked on the layer and used Photoshop Blend-If function to do exactly that. Then, just like before, I hid the layer by inverting the layer mask and used a brush to paint it only into the sky. Done!
Step Three – Change the Light in Photoshop (5:45 min)
To draw some more attention to the town and the sky, I needed to adjust the light a notch. For this, I used one curve adjustment layer where I darkened the image down and another where I brightened it up again. I then used a layer mask to brush the darkness into the edges of the image and the brightness into the center.
To darken the edges further, I wanted to add a nice vignette to the image. This can be done very fast by using the camera raw filter. For this, we first need to have a layer that has ‘the image’ on it – so, after hitting CMD(Ctrl Alt Shift E (this creates a so-called stamp visible with all the information on it) I went to Filter-Camera Raw Filter and there to the Vignette section. A few adjustments there and it is done!
Remember, shortcuts make your life easier and can speed up your processing a lot! Here is what I used in this image and most of my landscape and outdoor Photoshop tutorials:
B for the brush
X to change foreground colors
CMD I to invert
CMD Alt Shift E to get a stamp visible
On a Windows PC, just replace the CMD with Ctrl.
I hope you liked this post on how to create stunning landscapes in Aurora HDR and Photoshop! If you are just getting started with HDR photography, check out my ever-evolving and complete beginners guide here. If you are new to Photoshop, you can have a look at my complete review here.
If you like my images, make sure to check out my portfolio! Also, if you like photography, get out there and shoot! Anything, anytime.