How to Fix an Underexposed Photo in Photoshop – Example: Sunsets Center | Photoshop Tutorial
Welcome back! Today’s image is all about working with underexposed images in Photoshop. Before we jump in and I tell you how to fix an underexposed Photo in Photoshop, let me tell you how the image came to be.
Some of my friends and I recently spent some time in Utah, and of course, we visited all the national parks we could during our stay. One of them was the Arches National Park, a truly amazing place for a photographer. After spending the whole day in the park, we spent some minutes watching the sunset at the exit and went then onwards to find another great spot to see if we can see some amazing night scenes. We found one – but by that time it was freezing cold and we decided to keep the stay brief – meaning I had to hurry to take the picture. And so I did. With a high ISO and short time, I took a shot into the dark and hoped for the best.
I was greatly amazed when I later checked the shot in Photoshop – the image, while extremely underexposed, still had a lot of detail – a perfect opportunity for me to show you how to fix an underexposed Photo in Photoshop.
Remember, if you like the video, make sure to subscribe for more weekly Photoshop and Photography action!
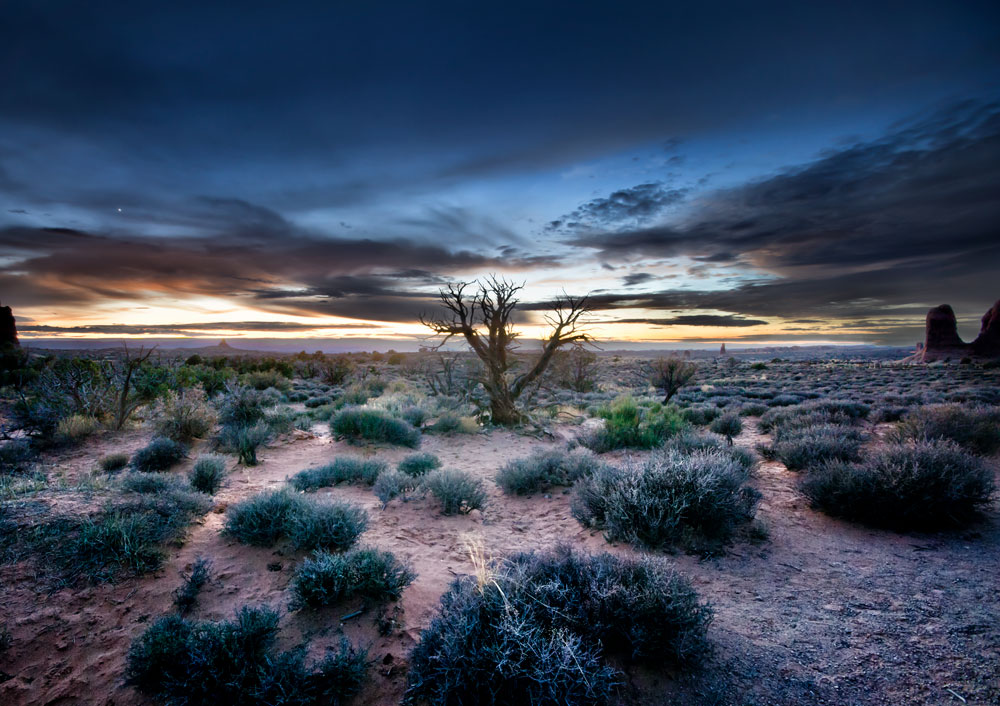
So, here is the final image:
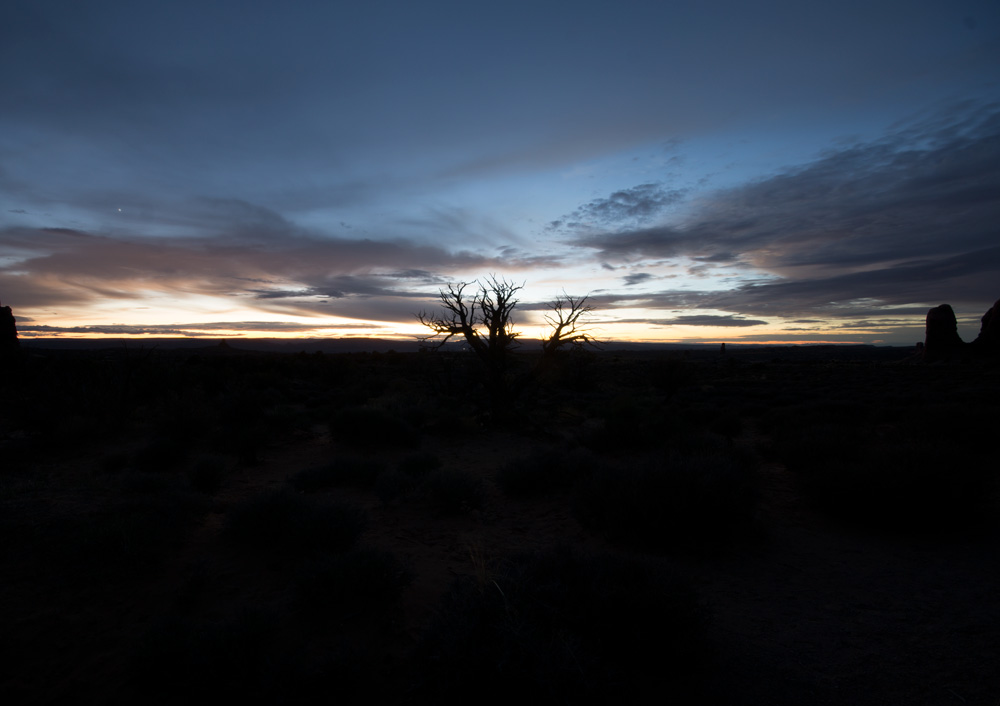
And here is the original:
Part One – Recover Details from the Underexposed Foreground (1:30 min)
When I opened up the image the first time, I thought all is lost as there did not seem to be any detail in the image at all. However, thanks to shooting in RAW and therefore retaining a lot of information, I was able to retrieve what I thought was lost.
There are several ways of recovering the detail – the two easiest ones I show in this Photoshop tutorial – starting out, I used a curve adjustment layer, where I just dragged the curve up until I saw a foreground. This was a moment of revelation, seeing all the details come back! Similarly, you can also use a levels adjustment layer and drag the sliders to the left, which will to essentially the same thing.
Once the foreground had the illumination that I wanted, I had to make sure I do not also have this in the sky – otherwise, it would be far too bright there. To do so, I hit G on my keyboard to get the gradient tool, and on a white layer mask, I dragged with the tool from top to bottom. As I had a perfectly straight horizon, this worked just fine 🙂
Part Two – Remove Lens Flare and Fix the Color (3:50 min)
Having the tree in the middle of the image was great, but due to the low quality when zooming in about 150%, the colors of the tree were a little off. Further, there was a super annoying lens flare just at one of the amazing branches of the tree – we have to fix this, it is a problem that you will face often when learning how to fix an underexposed Photo in Photoshop!
For the lens flare, I started out by creating a new layer (CMD+Shift+Alt+N) and changed the blending mode to color. After doing this, I took a brush (B), selected a nice color from an actual branch (hold Alt to select when the brush is active), and painted this over the part of the branch that looked odd. Lens flare can exist for two reasons – color and brightness. Now that we took care of the color, we have to take care of the brightness. For this, I used a simple curve adjustment layer, which I then selectively brushed through using a layer mask.
By the way, if you have never worked with layer masks, check out this video to get started:
I used the exact same technique to remove other strange colored areas in the tree, making sure it has a nice brown, as trees are supposed to have!
Part Three – Remove the Noise (7:10 min)
Removing noise in Photoshop can be done using a variety of ways. In fact, one of my first videos was about this, so instead of writing it all again, have a look here to quickly grasp the concept (the sound is not perfect, I did not have a proper mic back then haha). Noise will be a constant companion when working on underexposed images, so you might as well get all the techniques now in this how to fix an underexposed Photo in Photoshop tutorial.
Part Four – Lighten the Centre of the Image (10:00 min)
To draw extra attention to the center of the image, I created a simple curve adjustment and increased the general brightness a notch. Once done, I hit CMD+I to invert the layer mask on the adjustment and used a white brush to bring it out in the center. After this, I made a copy of the layer (CMD+J) and hit CMD+I to invert the layer mask. I then went into the adjustment itself and decreased the brightness a little. The two adjustment complement each other, and you will see that the center is nice and bright, while the rest of the image is darkened down.
Apart from some minor adjustments, that was it! That is all there is to rescue underexposed images in Photoshop.
Remember, shortcuts make your life easier and can speed up your processing a lot! Here is what I used in this image and most of my Photoshop tutorials:
B for the brush
X to change between background and foreground colors
CMD+I to invert anything
CMD+J to duplicate a layer or a selection
CMD+Alt+Shift+N to get a new layer
G for the gradient tool
On a Windows PC, just replace the CMD with Ctrl.
If you like my images, make sure to check out my portfolio!
Don’t forget to get out there and take some pictures yourself – time for some photography in the states? Have you been to Utah yourself? Show me your images!! I hope you enjoy my Photoshop tutorials and this image in particular and I see you next time.