How to Process Photos in Photoshop – Example: The Canals of Venice I | Photoshop Tutorial
Welcome back! Today, I will take you to beautiful Venice, Italy. I only had the chance to spend a weekend there, but it turned out to be a weekend packed with chances for awesome images. The great thing about going there around the end of January is that the city is relatively empty during that time, making it great fun to walk through all the tiny streets and overlook the vast number of even smaller canals. The downside was the temperature – it was freezing indeed.
That aside, today I will show you the first of many images from there, starting off with a simple picture from one of the canals – thanks to the gondolas, one can stop at every bridge to wait for a nice shot with these guys, and in fairness, they do make any picture greater, hehe.
Today is going to be all about simple clean up in Photoshop, where I show you how to increase colors, adjust the brightness of different areas, and how to create things like custom vignettes. Have fun while learning how to process photos!
Remember, if you like the video, make sure to subscribe for more weekly Photoshop and Photography action!
So, here is the final image:
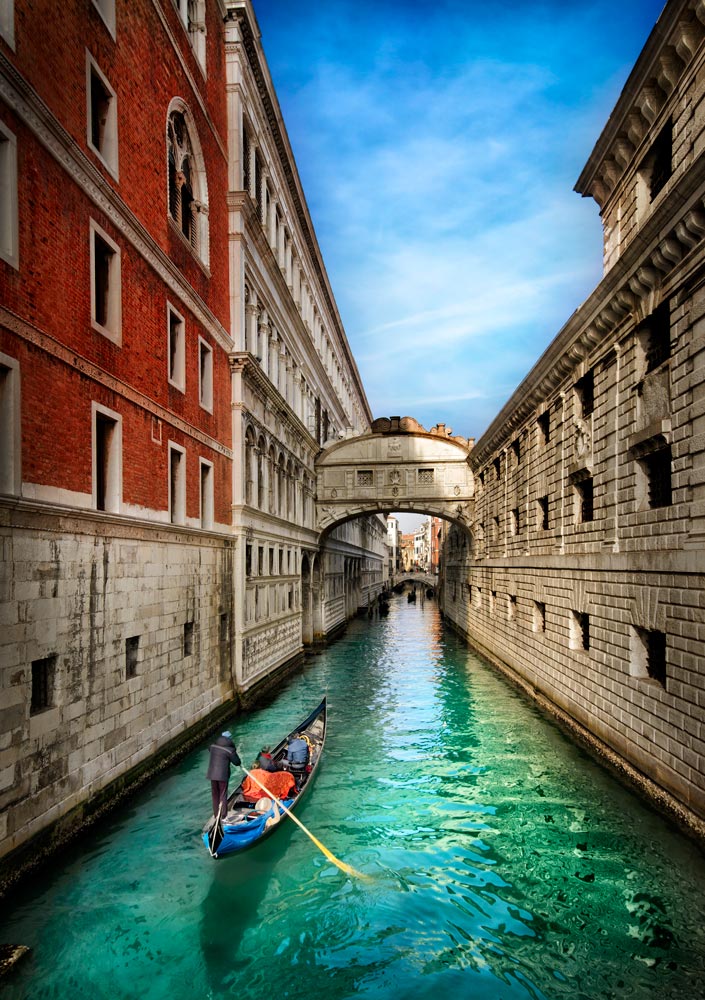
And here is the original:

Part One – Recover the Sky in Photoshop (2:30 min)
This image is not an HDR image for a change, but I still wanted to make sure that the sky is nicely visible. For that, I used a curve adjustment layer to first check if there are any information retained in the sky – and I got lucky because decreasing the brightness in the sky showed me that there are indeed a lot of information! Great, so, I used the quick selection tool located on the left-hand site to draw a selection of the sky. Once done, I clicked on the curve adjustment layer symbol, which loaded the selection into a layer mask for that curve adjustment. I just dragged the curve down and the sky came back into the image.
You have not worked with Photoshops layer masks before? Check out my quick tutorial on how to use layer masks in Photoshop first here. Great tool when learning how to process photos!
Part Two – Increase the Brightness of the Water and Change the Color of the Building (3:45 min)
Now, the next step was to increase the brightness of the water a little bit – ultimately, my idea was to place as much attention on the boat and the water as possible. I used a simple curve adjustment layer to do so. The building on the left had a somewhat nice red color, so I used the chance to bring that color out even more by creating a hue/saturation layer.
Once I created the layer and increased the saturation, I hit CMD+I on the keyboard to hide the adjustment (because I inverted the layer mask). I then used a white brush with an opacity of 20% to bring the effect back into the building.
Part Three – Increase the Tonal Contrast of the Image with Nik (11:00 min)
The Nik collection is an awesome tool and I would recommend to have that installed within your Photoshop, too! It is a free plugin, which allows you to use a variety of filters – and filters save time. In my case, I first created a stamp visible (all information on one layer) by hitting CMD+Alt+Shift+E on my keyboard. With this new layer selected, I went to Filter-Nik-Color Effex Pro-Tonal Contrast. There, I just played with the setting until I was happy, after which I used a layer mask to bring the effect out where I wanted.
Part Four – Create a Vignette in Photoshop (14:00 min)
As one of the last steps, I felt like darkening down the edges of the image to make sure the attention is placed on the boat. In this case, I did this twice, using different ways (as most things on the road of how to process photos).
First, the automatic way – after creating a stamp visible (CMD+Alt+Shift+E) I went to Filter-Camera Raw Filter-Effects. There, I adjusted the vignette button to darken the edges. After hitting Ok, I used a layer mask to remove the darkness from areas where I did not like it, such as the boat area.
Second, the manual way – for this, I created two complementary curve adjustment layers, one where I reduced the brightness and one where I increased it. Using a combination of a black and a white layer mask, I placed brightness on the boat and darkness around it – neat little thing to do! Have a look at the video to see what I mean, hehe. That was all there is to edit this image in Photoshop!
Remember, shortcuts make your life easier and can speed up your processing a lot! Here is what I used in this image and most of my Photoshop tutorials:
CMD+Alt+Shift+E to create a stamp visible
B for the brush
X to change between background and foreground colors
CMD+I to invert anything
CMD+J to duplicate a layer or a selection
CMD+Alt+Shift+N to get a new layer
CMD+G to group things
On a Windows PC, just replace the CMD with Ctrl.
If you like my images, make sure to check out my portfolio!
Don’t forget to get out there and take some pictures yourself – time for some photography in Italy? Have you been to Venice yourself? Show me your images!! I hope you enjoy my Photoshop tutorials and this image in particular and I see you next time.