How to Use Photoshop to Edit Your Landscape Images – Example: Zion Below
Welcome back! During my trip through Utah, I did some heavy walking through the many amazingly beautiful national parks there. This one, called Zion, was indeed the hardest as the paths I walked were real. As in real hard. Nevertheless, it has been one of the most stunning walks I have done – ever! Just awesome for landscape photography and photoshop tutorials later haha. Never heard of Zion? Read more about this amazing Park here.
The best part was that there are different hiking trails in that park, one leading up to the most famous spot called the Angels Landing. We arrived late in the park which is why we decided not to do this one (4h!). Instead, we wanted to use a shorter trail – BUT, as, apparently, we were not able to read the map properly, we did actually start the long 4h walk. We ended up running back after reaching 80% of the top as we had to grab the last bus which could get us to our car! Remember, if you like the video, make sure to subscribe for more weekly Photoshop and Photography action!
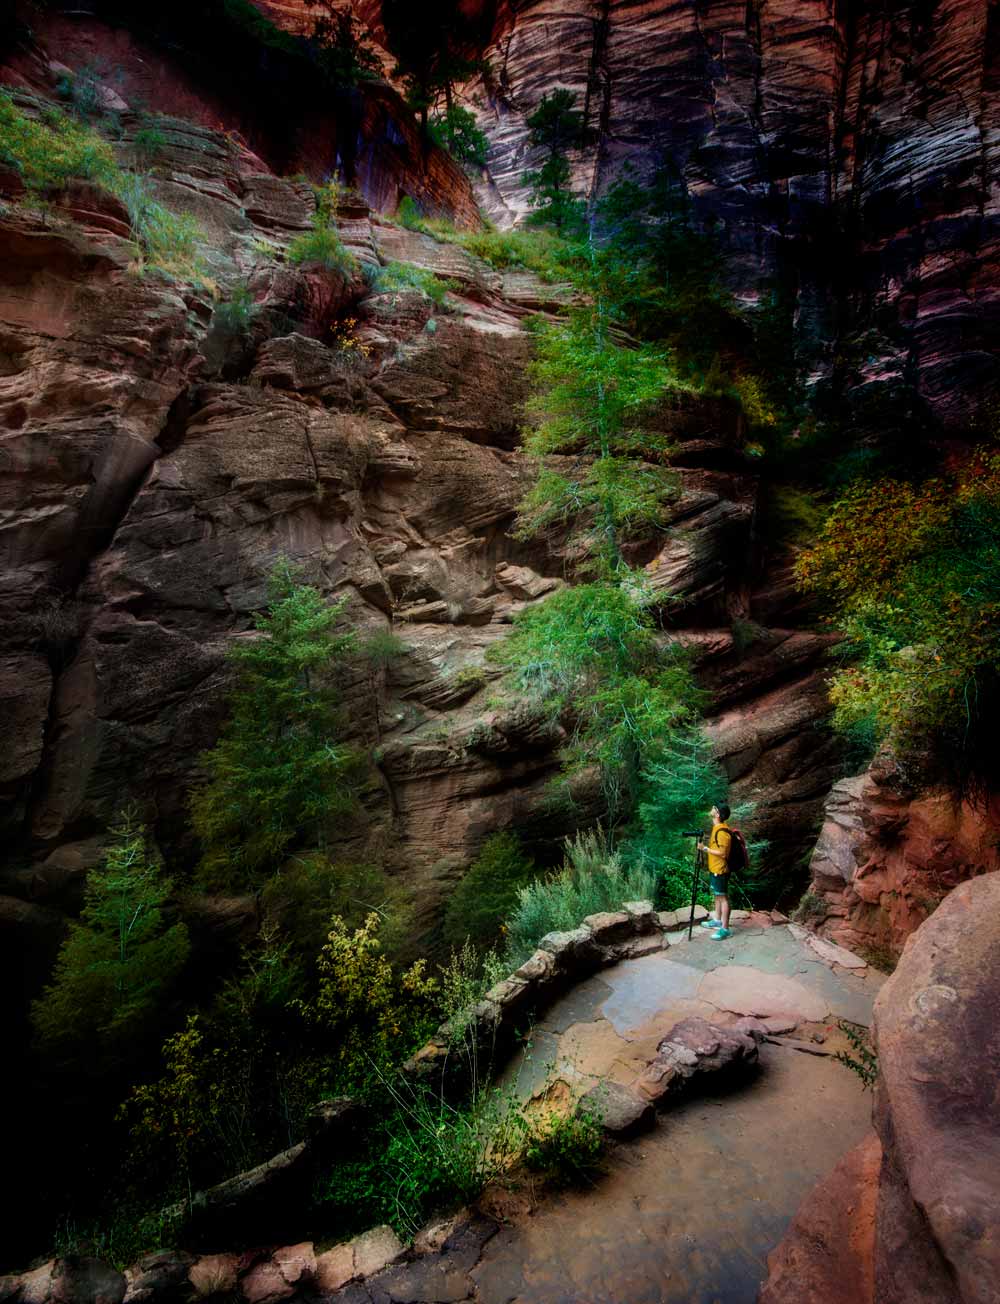
So, here is the final image which I recreate during this Photoshop tutorial:
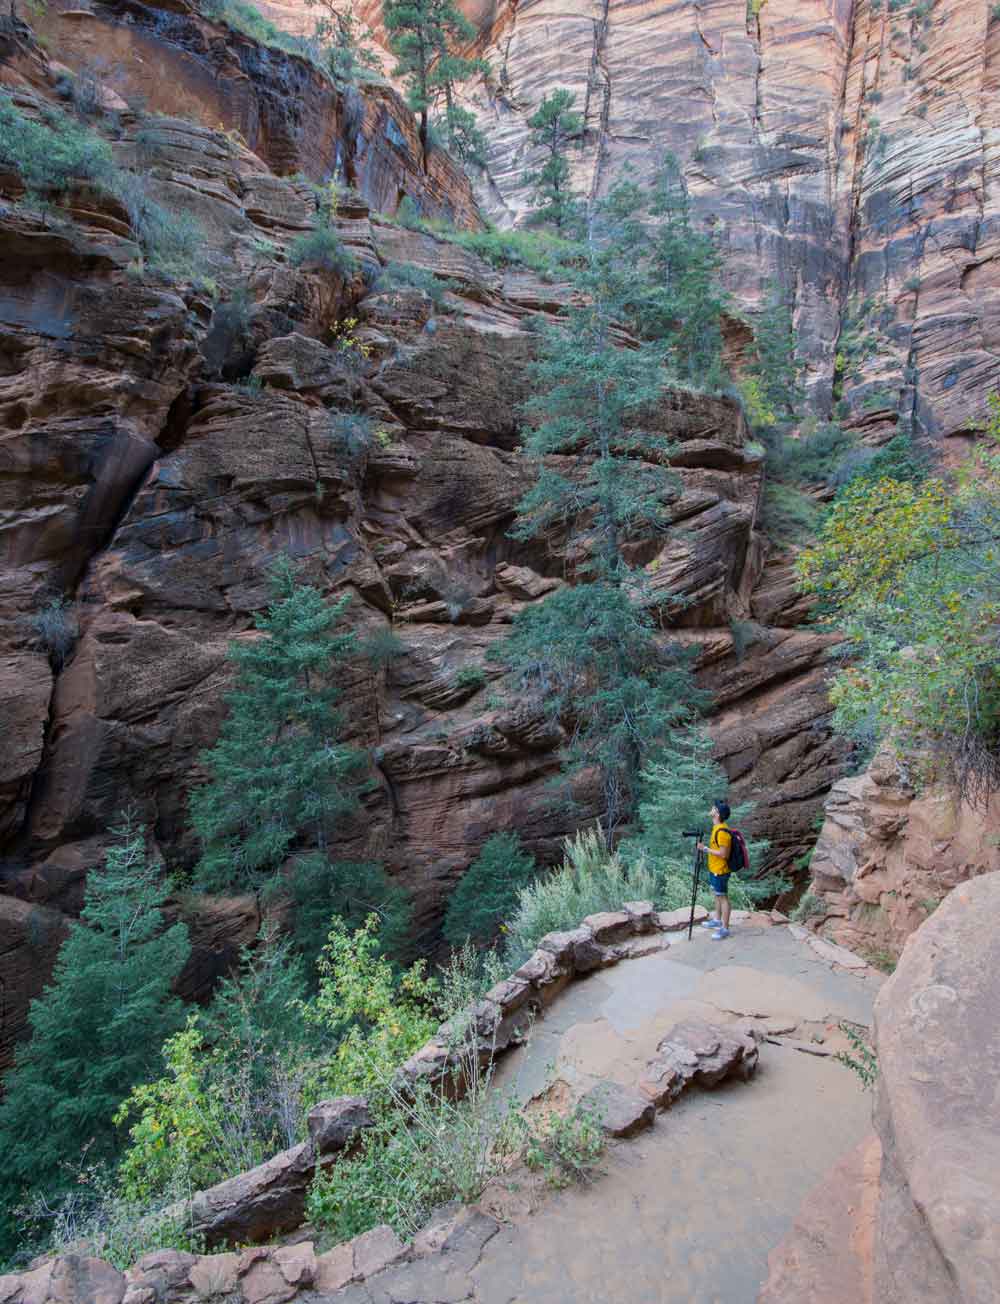
and here is the original:
Part One – Darken the Photo in Photoshop (0:30 min)
Initially, I spent quite some time darkening the image to make sure the attention is on my buddy Luis and not on all the surrounding rock. So, I started out with duplicating my background layer (CMD+J) and changing the blending mode to Soft Light. Then I went to Filter-Blur-Gaussian Blur and gave it a blur of around 20px. Once done, I copied the layer twice more and grouped them (CMD+G). I then created a layer mask by clicking on the little Japanese flag symbol in the lower right, inverted the mask to hide the effect everywhere (CMD+I) and used a brush (B) to bring it back in some parts of the image.
By the way, have you worked with layer masks before? If not, let me explain how they work here.
However, after doing this, I realised that I need even more darkness in the image, especially around the corners of the image. Therefore, I created a Curve Adjustment Layer as well as a Levels Adjustment – As described before, I hid the effect first and then used a brush and a layer mask to bring it back in the areas where I needed them.
After working on the image for a while, I realised that I need even more darkness (happens quite often in my Photoshop tutorials) – I created a stamp visible (a copy of everything on a new layer, CMD+Alt+Shift+E) and changed the Blending Mode to Soft Light as before. I then went to give it a nice blur as before and created a layer mask. To create some sort of focus point, I used my Pen Tool (P, 9:20 min) to draw a selection around Luis and the rocks – these were the parts which should not be affected by the Soft Light layer. Did you know that you can apply a Blur not just to a layer but also a layer mask? This is what I did to blur my adjustment and make it blend in better.
Part Two – Add Colour to the Plants in Photoshop (3:12 min)
Because the plants in the background were conifers, they had this blue-ish tone which is usually quite nice, but in this case, I wanted to have more of a fresh and soft green. To make sure I can change the colour of the plants without affecting the rock, I created a copy of everything that was visible (CMD+Alt+Shift+E) and went to Select-Colour Range. This opened up a little window and gave me an eye dropper, which I used to sample colours in my image. To sample multiple colours using the Colour Range selection, you can hold the Shift key and sample away, the colours will be added to the selection.
After I had a nice selection, I clicked on the symbol for a Hue/Saturation layer – the previous selection will be applied right away to the layer mask and any change I make using the Hue/Saturation layer will only affect the plants. Using the adjustment layer, I changed the Hue of the plants to a nicer green.
I love changing and adding colours in almost all of my images – check it out. When I started out, I learned these things from Aaron Nace, he is one of the top Photoshop trainers online. I recommend to check out his site Phlearn.com, you will not regret it.
Part Three – Adding a Bi-Colour Filter (12:15 min)
Every now and again during both processing and Photoshop tutorials, I am using a Filter from the Nik collection. The collection is free and I recommend to check it out – no harm in free stuff haha.
So, I created a stamp visible (CMD+Alt+Shift+E) and went to Filter-Nik Collection-Colour Effex Pro 4. There, I selected the Bi-Colour Filter and played around with the Opacity of the effect a little until I was happy. After some waiting and hitting Ok, I was good to go with the effect. Well, I did use layer masks to remove the effect from areas where I did not like them, such as the lower left corner for example.
Part Four – Fix Luis (the Shirt Colour I mean!; 14:00 min)
When using an Orton Effect (changing the soft light blending mode (or some other) and applying a blur), colours sometimes become oversaturated. It is good practice when learning how to use Photoshop and working on such an image with a lot of colour to leave it for a while and come back later to make sure that all the colours are set correctly, i.e. that nothing is glowing like after an accident in a power plant.
So, I just created a quick Hue/Saturation layer and used a layer mask to make sure I remove some of the colour from Luise’s shirt. This was all that needed to be done to create this image, with minor variations haha – but this always happens when I try to create the same image twice, it always looks slightly different.
Remember, shortcuts make your life easier and can speed up your processing a lot! Here is what I used in this photoshop tutorials – I hope it helps you to learn how to use Photoshop 🙂
CMD+Alt+Shift+E to create a stamp visible
B for the brush
X to change between background and foreground colours
CMD+I to invert anything
CMD+J to duplicate a layer or a selection
CMD+Alt+Shift+N to get a new layer
Shift+Backspace to fill a selection with black or white
CMD+Alt+G to clip a layer to the one beneath
If you like my images, make sure to check out my portfolio!
Don’t forget to get out there and take some pictures yourself! I do hope you enjoy my Photoshop tutorials and they help you to understand how to use Photoshop, I see you later!