How to Use Photoshop to Enhance Your Nature Images – The Forgotten Stairway | Photoshop Tutorials
Welcome back to another one of my Photoshop tutorials! I am happy to talk a little about one of my images taken on my recent trip to Utah, USA. On a weekend trip, my buddy Luis and I have decided to visit a place called the Kanarra Creek Falls. We did hear that it is a pretty intense walk, where you will have to be prepared to get completely wet. Casting this aside, we went in normal street gear and begun a 1.5h walk through a forest. This forest path, however, was only the first step in a walk that would lead into a river. Having the waterfall in mind, we did not have any choice other than moving through this water (cold!) to reach the cave with the fall.
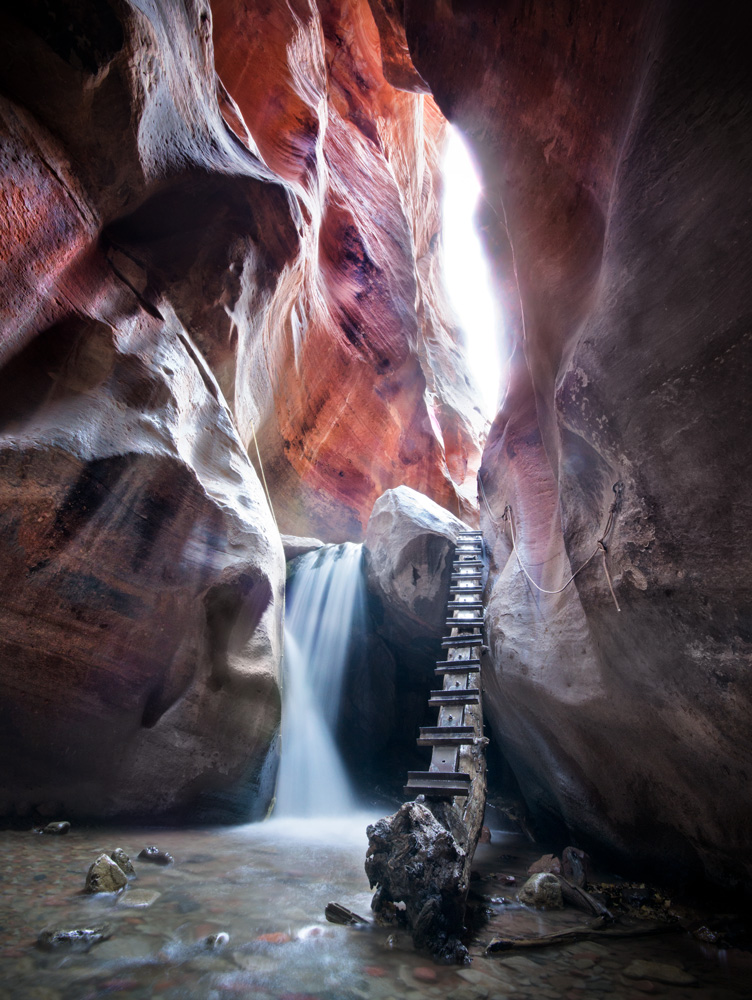
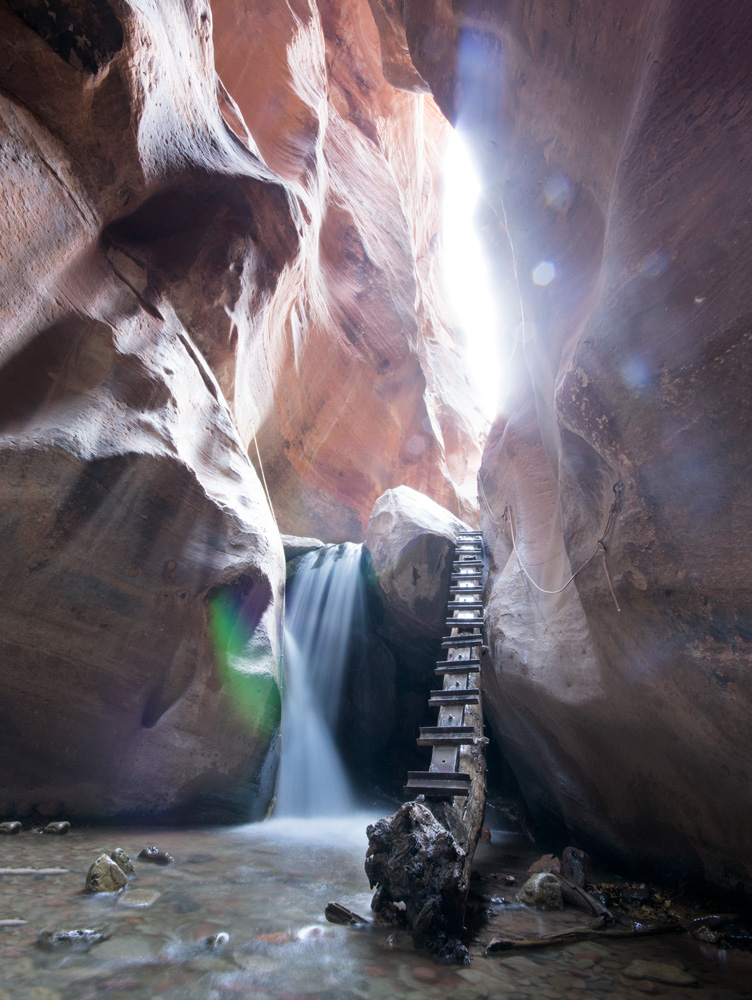
Once we arrived, it felt like being in another world. The red rocks enclosed us fully, and the magic waterfall which presented itself to us created a scene straight out of any fantasy book. On the right, there was a tree that had been rebuild to be some sort of rudimentary stairs to climb on top of the fall. A rope on the site was all that one could use to get some sort of security when climbing the slippery steps. Great when you carry a tripod, camera bag, and camera!
In the end, I managed not to through any of my equipment into the water – a fact I am still very proud of considering I climbed up that tree far too often to find the perfect spot for a picture. And the picture was perfect to create one of my Photoshop tutorials! Remember, if you like the video, make sure to subscribe for more weekly Photoshop and Photography action!
Here is the final image:
And here is the original:
Part One – Remove the Lens Flare and Water Drops (3:00 min)
A lens flare is mostly annoying and has to go. Same here. On the left site of the image, I had a large green spot, so let me explain how to remove it in Photoshop.
A lens flare can be removed by fixing the light or the colour in the affected area – or both. I started with the colour and created a new layer (CMD+Alt+Shift+N) and changed the blending mode to Colour. From there, I used the brush (B on the keyboard) and changed the colour in the area with the flare. You can choose a colour of the surrounding by pressing and holding Alt (you will get the eye-dropper symbol). I did the same thing for all water sprinkles.
Once this was done, I used the Patch Tool to remove the water sprinkles fully. This required that I created a so-called stamp visible, meaning that I copy everything that is visible onto a new layer (CMD+Alt+Shift+E) – this is needed for the Patch Tool to work. For the flare itself, I just had to create a curve adjustment where I decreased the brightness. I then inverted the layer mask (CMD+I) to hide the adjustment. Using a white brush I could then select where I need the darkened layer to appear.
If you have not heard about layer masks before, it is time to check this article to get started.
Part Two – Increasing the Colours and Changing the Lighting (10:00 min)
After the flares and sprinkles had been removed, it was time to move on to the next phase – increasing the colours and getting back that nice red of the rocks, just the way I saw it when I was there. I do colour changes in most of my Photoshop tutorials, love it! So, I started with a simple Hue/Saturation layer where I increased the Saturation a lot. I hid the adjustment using CMD+I and used a brush to bring out the effect where I needed it (rocks rock! Pun…). Similarly, I used a Curve Adjustment Layer to darken down some areas I felt were too bright.
I also needed some more clarity in the image itself, so I went to create a stamp visible (CMD+Alt+Shift+E), followed by Filter-Camera Raw Filter. There, I increased Clarity and Vibrance a notch. Using the layer masks as described before, I made sure the effect is only visible where I felt it would be great.
Part Three – Using the Nik Collection in Photoshop to Increase the Structure of the Rocks (15:40 min)
To increase some of the nice patterns in the rocks, I created a stamp visible (CMD+Alt+Shift+E) and went to Filter-Nik Collection-Colour Effex-Tonal Contrast. The Nik Collection is a free and awesome plug which I like to use every now and again, especially for the tonal contrast filter. I then used a layer mask to bring the effect through into the image.
By the way, the first time I heard about this plugin was when looking at work from Trey Ratcliff – he is a great landscape/travel photographer who uses mainly the HDR method to create his images, such as myself. You can read more about HDR here, but also check out Trey’s work here!
Part Four – Create a Vignette Using Curve Adjustment Layers in Photoshop (20:00 min)
There are many many possibilities to lighten up the centre of an image. I chose to use the Curve Adjustment layer in this case. So, I created a Curve Adjustment and increased the brightness a little bit. I then hit Shift+M (Ellipse Tool), with which I drew a selection in the centre of the image. Hitting Shift+Backspace, I filled the selection with black and then hit CMD+I to invert this. Having the layer mask still selected, I then went and used a Gaussian Blur as described before. Once this was done, I just had to duplicate this Curve Adjustment Layer (CMD+J) and decrease the brightness. Once the layer mask had been inverted once more, all was perfect!
Part Five – Creating a Soft Orton Effect (23:00 min)
I wanted to have some more magic in the rocks, which can easily be done using a soft Orton Effect. To do this, just create a stamp visible (CMD+Alt+Shift+E) and change the blending mode to Soft Light (for example). Then, go to Filter-Blur-Gaussian Blur and adjust the blur to your liking. Using a layer mask, one can choose where to show the effect.
Remember, shortcuts make your life easier and can speed up your processing a lot! Here is what I used in this image and most of my Photoshop tutorials:
CMD+Alt+Shift+E to create a stamp visible
B for the brush
X to change between background and foreground colours
CMD+I to invert anything
CMD+J to duplicate a layer or a selection
Shift+M to get the Ellipse tool
CMD+Alt+Shift+N to get a new layer
Shift+Backspace to fill a selection with black or white
If you like my images, make sure to check out my portfolio!
Don’t forget to get out there and take some pictures yourself! I hope you enjoy my Photoshop tutorials and I see you next time.