How to Use Photoshop to Mirror an Image – Red Giant | Photoshop Tutorials
Welcome back to another one of my Photoshop tutorials! Today, I will take you with me to the Zion National Park, an amazing place located in Utah, USA. Here is the thing: I was there in bright daylight, so everything was evenly lit and looked great. There were several hiking trails and we (my buddy Luis and me) picked the longest one by mistake – which is why we had to run like mad to the car when it came to the closure of the car park and connecting buses. This was one of the saddest stories ever as the sun started to sink and all the mountains were bathed in this dark red, making them look like dark and mysterious giants.
However, I was on a bus and did not get the chance to actually take a picture of this! Hence, in this tutorial, I will show you how I recreate the scenery I saw in the evening using an image I took around lunch time – plus some extra color hehe.
Remember, if you like the video, make sure to subscribe for more weekly Photoshop and Photography action!
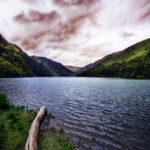
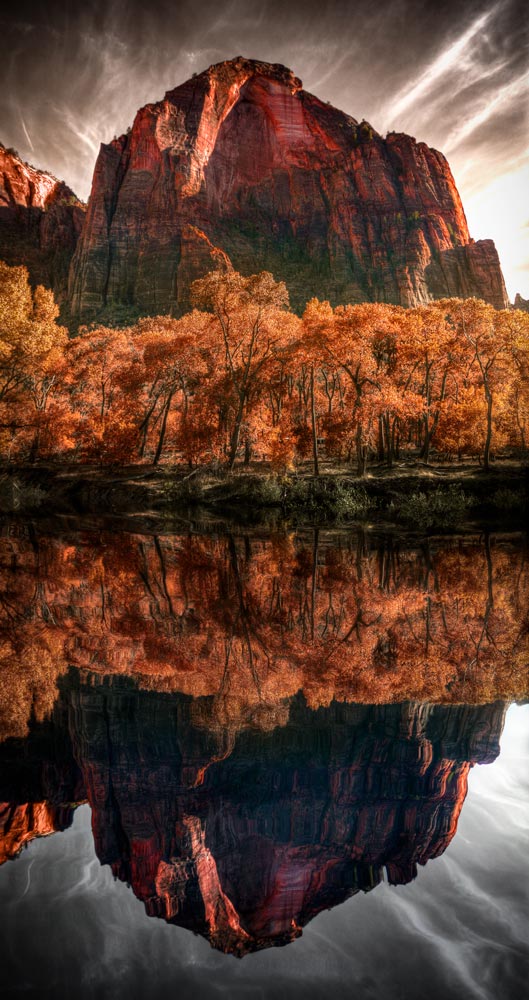
So, here is the final mirror image:
And here is the original:
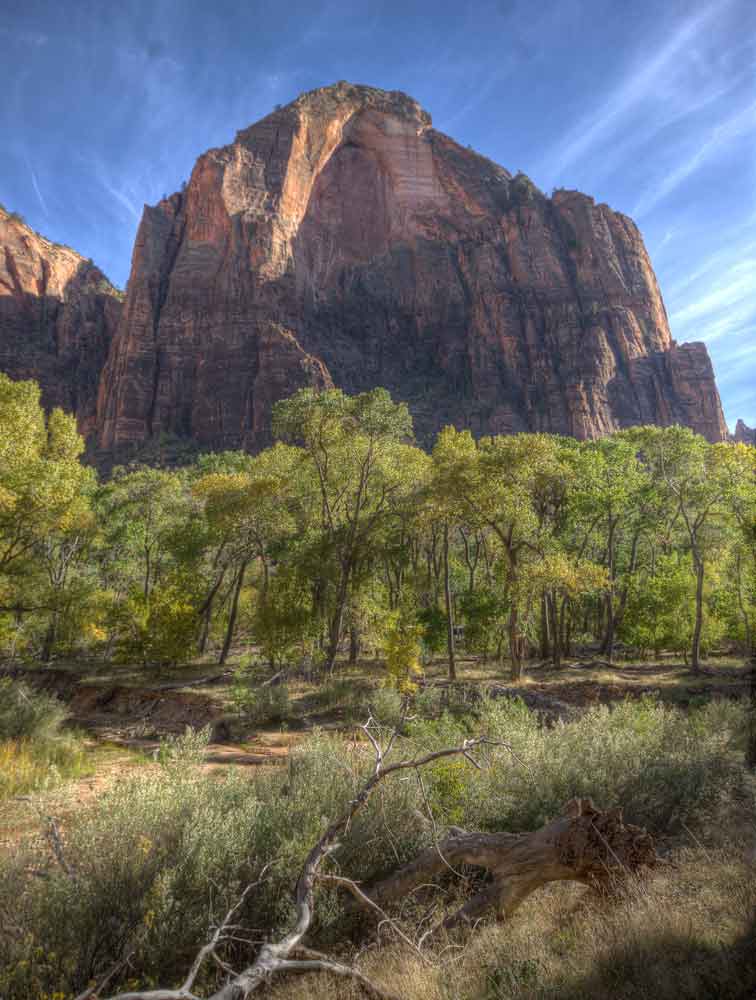
As you can see in the original, I got these branches and grass in the foreground, which did not really add anything to the image. So, let me show you how I created a reflection instead and how I changed the colors in Photoshop, stuff I do very often in my Photoshop tutorials 🙂
Part One – Create the Reflection for the Mirror Image (0:45 min)
First, we have to start off with the reflection to create our little lake. For this, I started out by increasing the canvas size – I hit C on the keyboard to get my Crop tool and dragged the lower end down to do so. Once I had a good size, I hit M to get the Marquee tool and selected the upper part, followed by CMD+J to duplicate the selection and create a new layer with it.
Now, as this has to be the reflection, I have to flip this new layer over. To do this, I hit CMD+T to get the Transform tool, followed by right click + Flip vertically. To move the layer down and into a proper position where it could be a reflection, I hit V (Move tool) and moved it down. Awesome! To make sure the upper part of the image and the new flipped over layer blend perfectly in the middle, I created a layer mask on the lower one (hit the little Japanese flag in the lower right) and used a black brush to smooth out the transition.
By the way, have you worked with layer masks before? If not, let me explain how they work here.
Part Two – Add Waves (3:25 min)
Now that we have the reflection itself, it is time to add the waves in the lower part to give it a watery look. I did not explain much about why we do each step we do in the video because the video would be far too long otherwise. However, Instead of writing all those steps, I recommend to check out this tutorial, it does more or less exactly what I did and shows you with screenshots how to follow 🙂 For us, this means onwards!
Part Three – Adding and Changing the Color (10:45 min)
Now that we have our reflection and have added the waves to it, it is time to add the color to give it the red look it has. For this, I first created a so-called Stamp Visible (CMD+Shift+Alt+E) which copies everything you can see onto a new layer. Once done, I used a plugin called the Nik Collection – this is a free plugin which can save you some time when using their filters 🙂 I suggest to check it out here.
So, once I had my layer with everything on it, I went to Filter-Nik Collection-Color Effex Pro-Indian Summer. This filter takes everything that is green in the image and changes it to orange, which by coincident was exactly what I wanted to do hehe. Without thinking much, I hit Ok – and the color was in the image.
Part Four – Darkening the Mirror Image (12:00 min)
To darken the image, I used a variety of Level adjustments, Curve adjustments, and Level adjustments again! I made sure that the lower part, which is our reflection, is darker than the above as water always absorbs a portion of the light.
For the color, we need to add more red at this point! Therefore, I used a Color Balance adjustment and increased the reds and yellows in the image. As this also made the trees go crazy, I used a layer mask to bring the effect into the mountain only. Once this was done, I used even another filter from the Nik Collection, one called Bi-Colour Filter. This applies a gradient from top tp bottom which looked nice in the top part of our image here.
Part Five – Remove Dust and Add Vignette (20:35 min)
I realized I had some dust speckles in the sky, which we can not have! But well, they are easy to remove! I created another Stamp Visible (CMD+Shift+Alt+E) and chose the Patch tool. This tool is amazing! I just drew a circle around a patch and dragged it to the site. Gone. I did this for all speckles.
To add a little bit of drama, I also added a vignette by navigating to Filter-Camera Raw Filter. There, I just moved the Vignette slider around until I was happy – could not be easier.
Remember, shortcuts make your life easier and can speed up your processing a lot! Here is what I used in this image and most of my Photoshop tutorials:
CMD+Alt+Shift+E to create a stamp visible
B for the brush
X to change between background and foreground colors
CMD+I to invert anything
CMD+J to duplicate a layer or a selection
M to get the Marquee tool
CMD+Alt+Shift+N to get a new layer
V for the Move tool
CMD+T to get the transform tool
On a Windows PC, just replace the CMD with Ctrl.
If you like my images, make sure to check out my portfolio!
Don’t forget to get out there and take some pictures yourself! I hope you enjoy my Photoshop tutorials and this mirror image in particular and I see you next time.