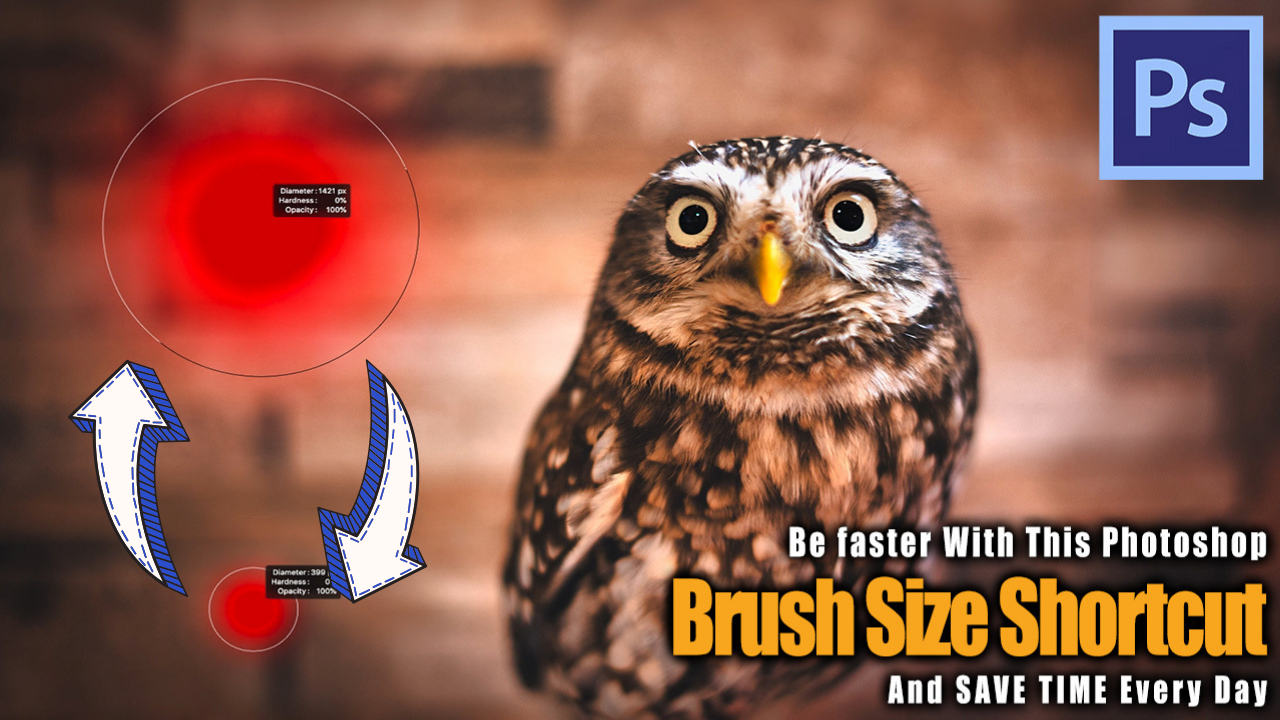
Welcome back to a quick video about the Photoshop brush size shortcut! I watch a lot of online content regarding editing for many different software – Photoshop for the most part, though. One thing that I realised is that MANY tutorials and walkthroughs I see are using the slowest way of doing something very basic in Photoshop – so let me help! Many people will likely know this already, but for those that dont, here is a super handy Photoshop brush size shortcut!
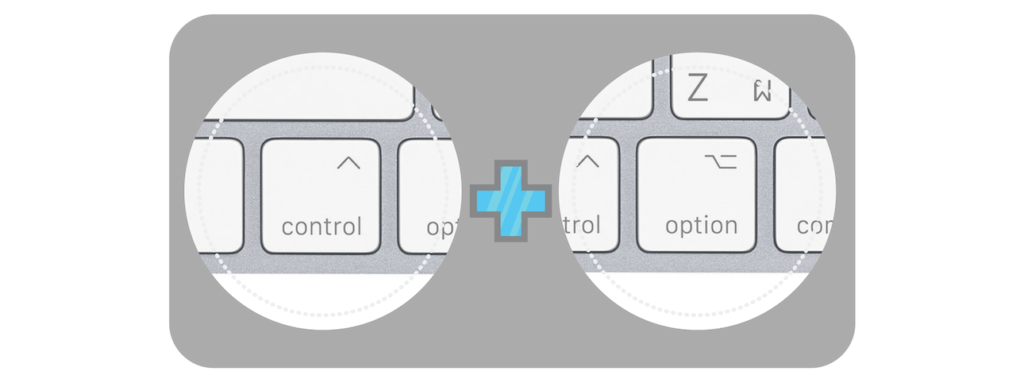
If you are on a Mac, simply hold the OPTION and CONTROL buttons, click with your mouse/keypad and drag to the left or two the right. If you drag to the right, the brush will become larger, and smaller to the left.
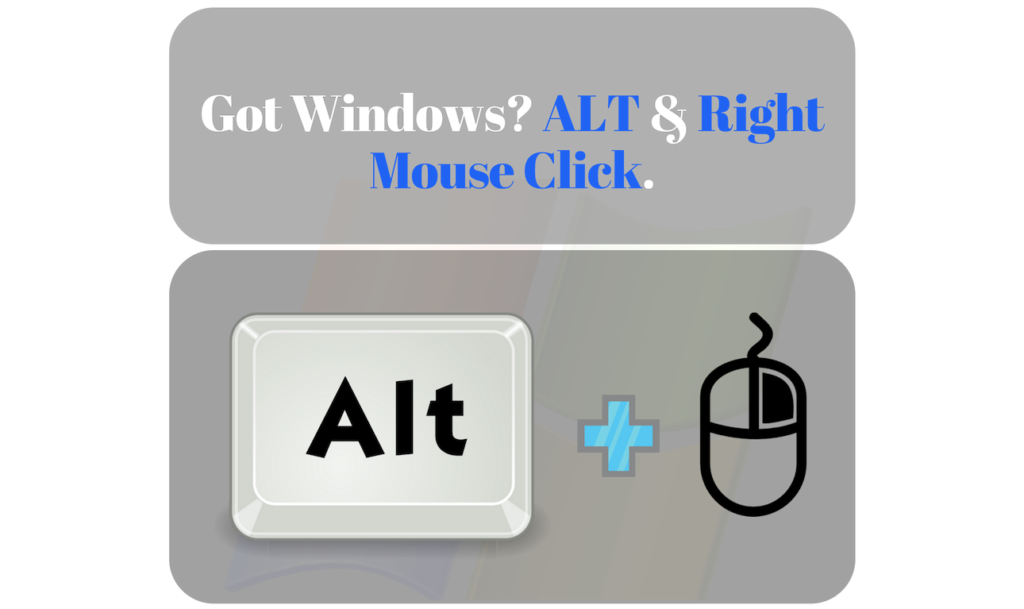
If you are on a Windows machine, first let me say sorry – but simply hit the ALT button, a right mouse click, and drag left or right as well.
Note, if you drag up or down, you can change the hardness of the brush as well! This doesn’t just work with the brush, but also with the spot healing brush tool, the clone stamp tool, the smudge tool, anything that has a radius to it really.
Why would you use a shortcut instead of the slider? It may be easier when you start out to use the interface because there are so many buttons to push that it is hard to remember what does what. However, when you get into the swing of things and you use the brush all the time, saving 2 seconds every time you have to make a change can save literally hours on a weekly basis (depending on how much you edit, of course). No need to stop,. change to the menu, check if the brush is large enough, just change on the fly!
This is just a Photoshop brush size shortcut quick tip, for full editing tutorials feel free to jump over here – and dont forget to join us on the good old Youtubes!