
Get To Know Your Cameras ISO Setting
Welcome to the third step of understanding the big three of your camera – Shutter Speed, Aperture, and ISO. This page is all about ISO, but if you are more interested in Shutter Speed or Aperture, click on the words 🙂 Otherwise head over to some examples on how to use the manual camera mode, if you are ready.
The last of our big three before we jump into manual mode is to get to know your cameras ISO setting. While shutter speed and aperture might have a ring to it that makes it a little easier to think of something – anything – when you hear them, ISO does not sound familiar at all to most people when they learn about the camera. I even heard people saying that they always leave it at auto – so here is the thing: ISO is very important and super useful and once more, once you know what it means, you will love it. So what is it?
Your Camera Sensor and Light
Your camera has a sensor that will capture the light and create the actual image that is then saved in your camera (I mentioned this before in the Shutter Speed section here). By now, we know how shutter speed and aperture can influence a picture and what the appropriate modes mean – but what about ISO? ISO is not a mode, it is an important setting when you get to know your cameras ISO setting – but one that can save your arse under certain circumstances. The sensor of your camera is sensitive to light – yes! You have the power to explain the camera that the sensor is more sensitive and therefore needs less light for a picture, or to be less sensitive, in which case it needs more light for a picture – and this is being done with the ISO setting*. Let me illustrate with an odd example.
Imagine two buckets. One bucket has large stones in it, the other one fine sand. If I take one litre of water and empty it at once into the bucket with the stones, the water will quickly be gone between the stones. This would be the equivalent to a sensitive camera sensor that needs only little light for a picture. In ISO terms, this sensor would have a high ISO. If I take another litre of water and empty it at once into the bucket with sand, the water would not be absorbed that easily, it would take a while until the water disappears into the sand. This would be the (odd) equivalent of a sensor with a low ISO setting, or a low sensitivity. I know this is an odd example, but it is relatable and I hope it helps to get to know your cameras ISO setting 🙂
So in short, a low ISO value means the sensor is less sensitive to light, whereas a higher ISO value means the camera sensor is more sensitive to light. The first step to get to know your cameras ISO setting is done!
The Measure of ISO
As always, there must be a unit or a number that expresses how sensitive the sensor is to light. And there is indeed! In this case, it is a little more simple than with the aperture though. ISO is expressed with a number between (mostly) 100 and 256000 (or even higher!). So what does this number mean? Once you have that, you are one step closer to get to know your cameras ISO setting.
100 (or 50 in some cameras) is the start of our imaginary scale. If the ISO is set to this, the sensor is the least sensitive to light. The next available setting for ISO would be 200. An ISO value of 200 means that the sensor is now twice as sensitive to light as with 100. From 200, you can go to 400. With 400, the sensor would be twice as sensitive compared to 200 and four times as sensitive as 100. You get the idea 🙂 The scale would be something like:
100, 200, 400, 800, 1600, 3200, 6400, 12800 and so on.
Wait – so the higher the ISO, the higher the sensitivity of my sensor to light, the less light is needed to take a picture… this is great! Would this mean that I can just boost the ISO and take awesome hand-held shots at night? I am afraid not because increasing the ISO comes at a price – a hard truth you have to learn when youget to know your cameras ISO setting. Magic always comes with a price. Read on.
The Price of a High ISO
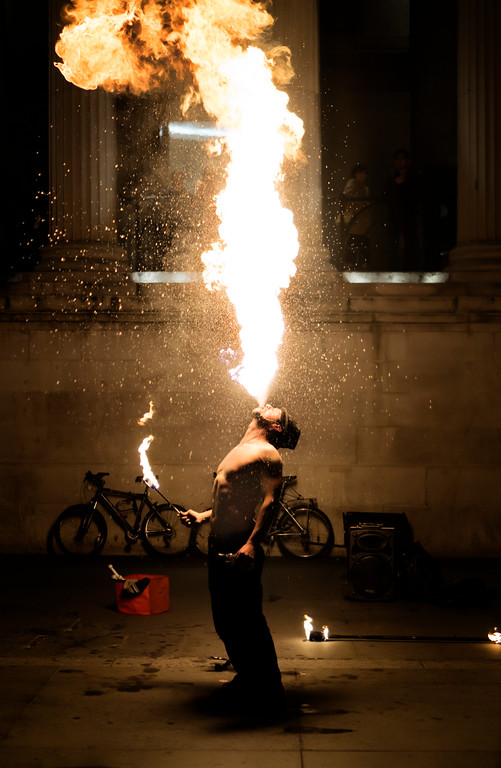
So why can you not just increase the ISO like mad and make the sensor more sensitive to light? Because increasing your ISO value comes at a cost – the more sensitive you make your sensor to light, the more artefacts you will get in your photo, known as noise. An important fact when you get to know your cameras ISO setting. Have a look at this image:
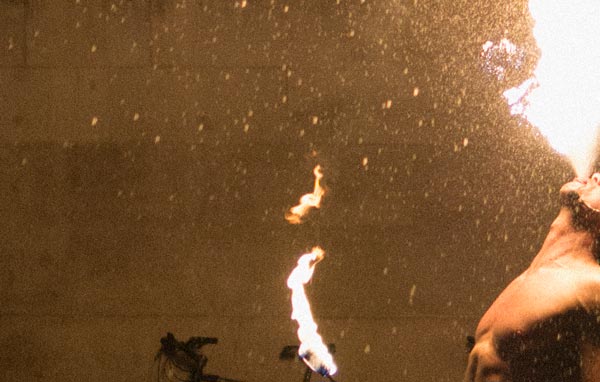
Looks nice, right? Well, before I edited it, there was a lot of noise in it, which looked like this (in the background):
Depending on the camera you have, you can securely increase the ISO on your camera to a certain extent, to something like 800 maybe, without introducing too much noise to the image. But I suggest to simply test this out! Take your cam and find the ISO setting which could look like something like this:
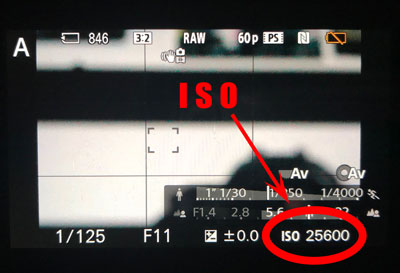
Play around to see how high you can go with your ISO without degrading your image quality too much.
Anything else?
Not really, as usual, it comes down to you giving this a try. Note, that you can take control of ISO in most camera modes such as Aperture Priority or Shutter priority mode. Just check the manual of your camera to find where exactly the setting is. To help a little more, I will throw in an example for when you want to use a high ISO, and another one when you want to use a low ISO value to get you started 🙂
When to Use Low ISO
The answer to this one is simple – whenever you can 🙂 If you can keep your ISO low then definitely go for it. This will make sure you do not have a lot of noise in the image and the quality is generally at its best.
You can also stick to a low ISO at night – just pop your camera on a tripod when you do. As the sensor will not be very sensitive to light, the camera will take a moment for the picture to be taken. More about the interaction of Aperture, Shutter Speed, and ISO can be found here, where I talk about the manual mode a little more.
When to Use High ISO
You might be wondering if it is ever worth to increase your ISO – there are situations where it definitely is. Let me give you an example.
Some time ago I was in London – I had my camera around my neck with a prime lens that had an aperture of f/1.4, so a lot of light can go into the camera. Even so, it was night and obviously dark. I shot in aperture priority mode, so I had full control of the aperture, but the camera took control of the shutter speed. When I tried to take some pictures, even though the aperture was set to f/1.4 to let all the possible light in, the camera said to take a picture it would need a shutter speed of one second. One second to take a picture at night, hand-held… is not possible. No human is able to not move at all for a whole second. So what can I do? I can not let more light in… BUT, I can increase the ISO! Once done (to something like 800), the camera was more sensitive to the little light that was there and I was able to take images. I pushed this to the extreme with the picture I showed earlier from the guy that spit fire. Once more it was super dark but I had an additional challenge – I wanted to freeze the motion to see the fire as best as possible in the resulting image. I had to bump up my ISO like mad to shoot with a shutter speed of 1/400!
I did have some noise in my image, but I gladly paid the price 🙂 Without changing the ISO, I would not have been able to take this image. See? Super useful! That is it, you have now been able to get to know your cameras ISO setting.
What is Next?
Now that you have mastered ISO, you can either jump back into either Aperture or Shutter Speed, or you venture on to the manual mode of your camera. Also, if you liked this article, why not share it or follow me on the good old YouTubes? This way, you will not miss any photography or editing tutorial in the future!
Read on here to learn about Aperture
Read on here to learn about Shutter Speed
Read on here if you are ready for the manual mode
*Note that a camera sensor really has a fixed sensitivity to light – when changing the ISO you change the gain that is being applied to an image. However, the whole thing is way easier to understand if we use sensitivity, so I used this in my explanations. Take it with a grain of salt and know there is more technical stuff around this, which is not important if you are learning the basics I believe.