Welcome back, everyone! Have you ever taken a photo that you thought is great but then you never really know how to get it to shine? In my experience, some photos just don’t turn out great, independent of how often I try to edit them the usual way.
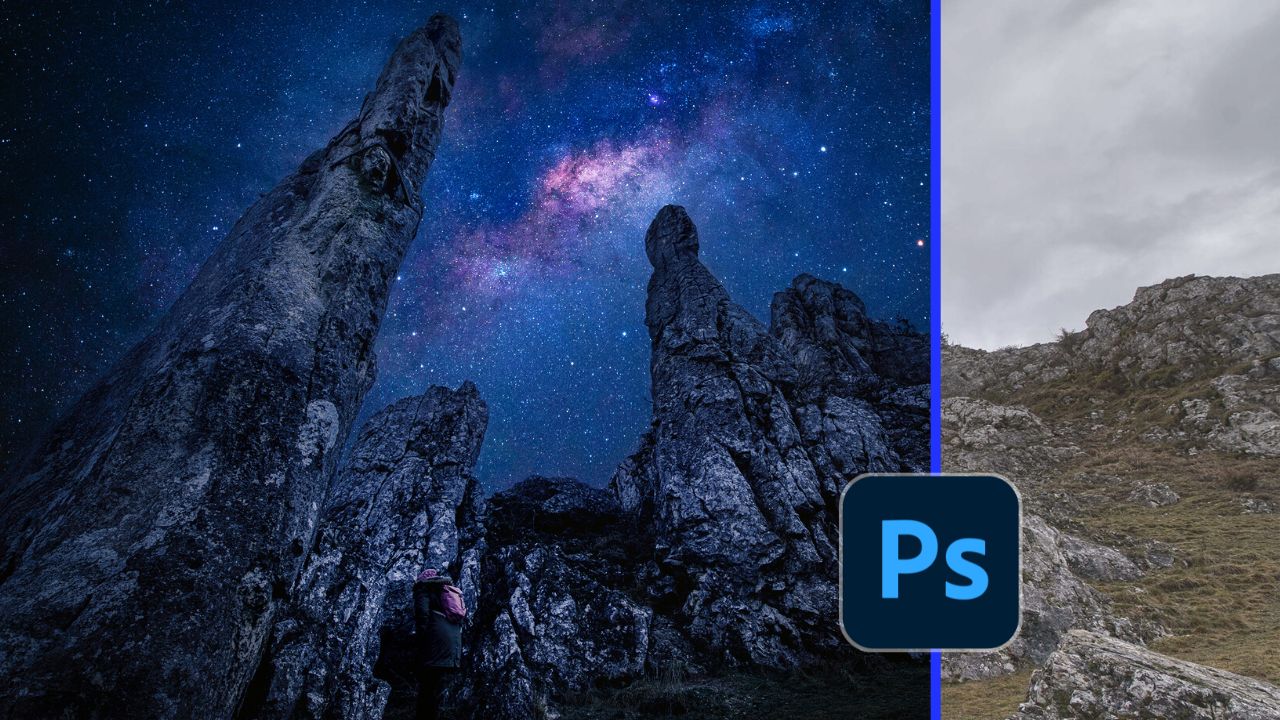
This photo was one of those – I tried editing this countless times, but never really got it to where I wanted to go (which I didn’t know). However, after being inspired by awesome photographer Stefan Tiesing, I thought – why not turn this into an awesome night photo?
So, in the above video, I show you how you can use Photoshop to change day to night. It is not as difficult as it sounds and the process itself can be quite fun! When creating a night photo from a day photo, there are some things to consider:
- Is the separation between the sky and the foreground very pronounced? The clearer that separation, the easier it is to swap the sky.
- Does the color of the foreground match the night photo after editing? Having a foreground with a yellow tone and a blue sky doesn’t work and the eye will reject it – we don’t want that, so make sure the colors match!
- Is the foreground dark enough for the image to be realistic? If the foreground is too bright, the eye will also reject the image – so make sure it’s dark enough. It’s night, after all!
To turn day into night in Photoshop, I usually have three steps: 1. Add in the sky, 2. Adapt the foreground, and 3. Global adjustments. They are marked as chapters in the video. Try it out and turn your next ‘meh’ image into a super cool night scene!