
How to Use Photoshop to Turn Day to Evening – The Magic Port | Photoshop Tutorials
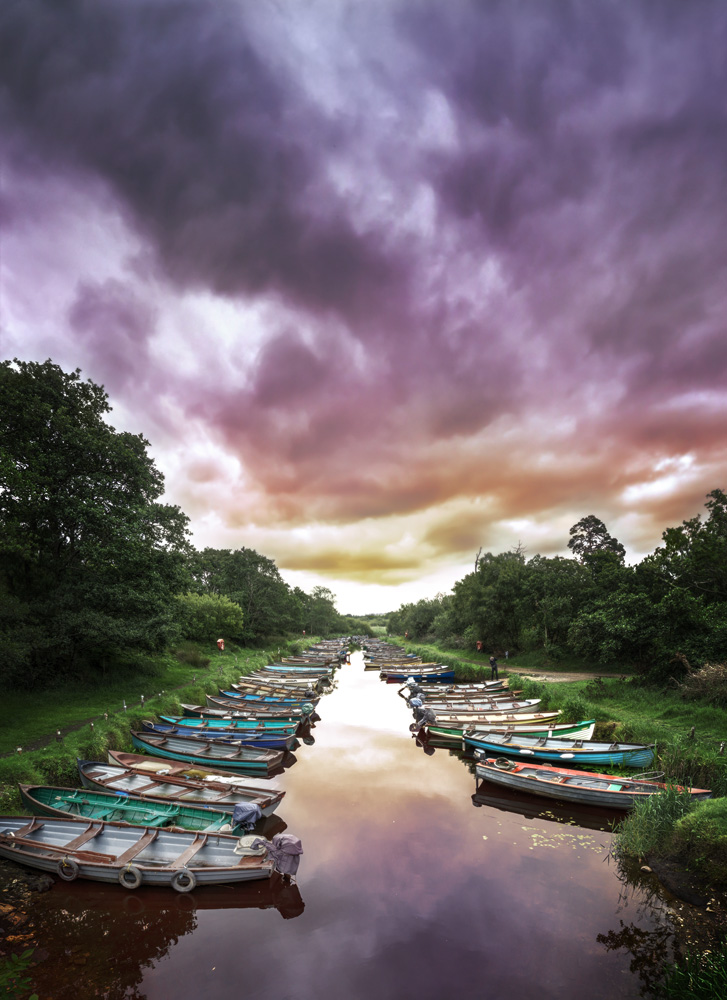
Welcome back to another one of my Photoshop tutorials! As you may have read in the recent posts, I am still working on images I took while travelling through Ireland. I think I will be, for a while haha. This time, I found this lovely scene with hundreds of boats just sitting in this tiny river – and when I saw it, I just knew this would look so much better as an evening scene. I haven’t actually tried to convert one daytime into another, but I feel I was rather successful by doing so. So today, I will show you how to turn day into evening in Photoshop. At least my version of doing it 😉
Remember, if you like the video, make sure to subscribe for more weekly Photoshop and Photography action!
So here is the final image:
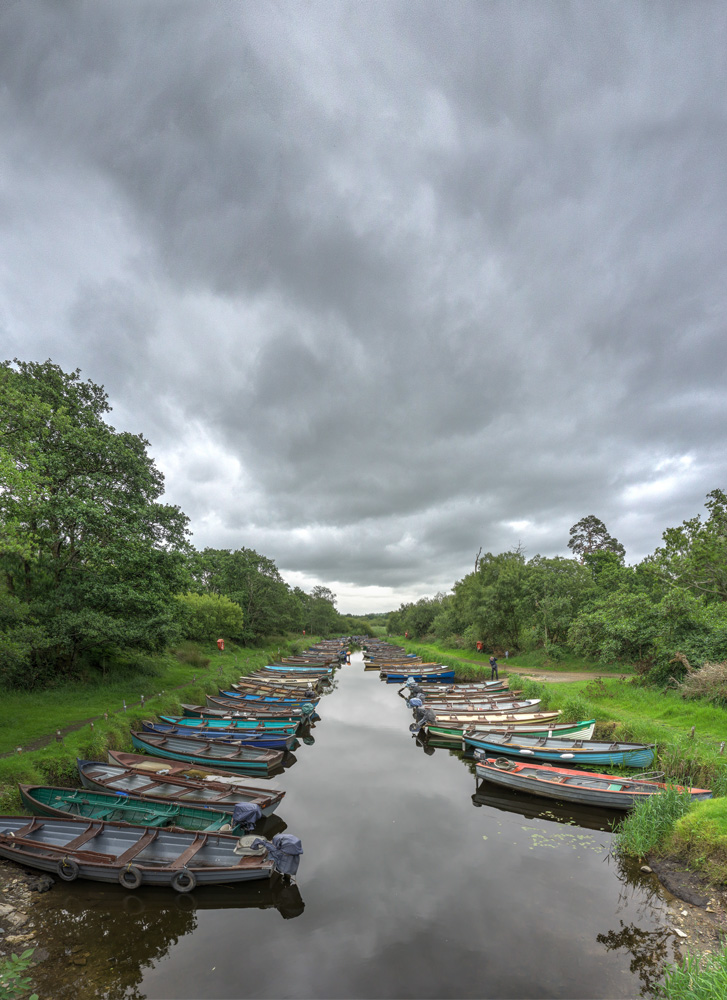
And here is the original:
I love playing with colors in Photoshop – so the processing of this image was super fun for me. I recommend trying doing something similar – even if it does end up looking unreal, it may still look super beautiful! So let’s go through the Photoshop processing step by step like always in my Photoshop tutorials.
Part One – Creating the Original
Before jumping right in, I’d like to mention that this is an HDR image – if you have never heard of HDR photography, just read this to get a general idea 🙂 Briefly, it means that three pictures of the same composition were taken, where each image had a different exposure. Later, in a software called Photomatix (for example), these images can be combined to get the best of three exposures into the same image. Awesome, right? Check out Trey Ratcliff, one of the best!
Part Two – Adding the Sun (00:50 min)
What do we need for an evening scene? A sunset would be kind of helpful! So, to insert a light source into the image, I went to Filter-Render-Lighting Effects-Point Light. You can drag and drop the light around until you are happy and then simply hit Insert. To make sure this additional brightness is not everywhere in the image, I first created a layer mask (never heard? Watch this to get going ;)) by clicking on the little Japanese flag symbol just beneath the layer thumbnails. Then I hit B on the keyboard to get the brush, and with a black colour I hid the effect where I didn’t like it.
Part Three – Adding nice Contrast and Clarity
The image was a little bit dull, but it is easy to help that. I started out with creating a so-called stamp visible, which copies everything you can see onto a new layer (CMD+Alt+Shift+E). Then I went to Filter-Camera Raw Filter and increased the clarity a notch. This adds some nice mood to the image.
Part Four – Create the Sunset Colours in Photoshop (4:15 min)
Have you ever seen a really nice magical sunset? When the sky has a mixture of red, yellow, purple and blue? I have on occasions, but not too often. Anyway, let’s go and add the colours we want. After creating three new and empty layers (CMD+Alt+Shift+N or the new layer symbol), I hid the top two and selected the first one. I hit G on the keyboard to get the gradient tool and selected a nice yellow colour I liked. Then, after setting the blending mode of the layer to colour, I used the gradient tool from the bottom upwards to add the yellow. Far too much colour as you see, so in order to make the colours visible where the actual sun is, I created a layer mask, inverted that layer mask (no visible effect) and used a brush to bring the colour back to the light source we had added previously. I did the same with the next two colours. Should you ever try to do something similar, make sure that you blend the colours into each other using layer masks and the brush as best as you can. Once you have your final image and you realise that the colours are not blended nicely, you can also just create a stamp visible (CMD+Alt+Shift+E), set the blending mode to colour, and go to Filter-Blur-Gaussian Blur to force them to blend into each other, hehe. Then you could use a layer mask to get the effect where you want it.
Part Five – Create the Evening (12:00 min)
There was far too much light in the image at this stage. So, I used a series of Curve and Level Adjustment Layers to darken things down a little bit. In this particular case, it was especially important in the grass – I made sure I have some little bumps of brightness, but also some areas with shadow. This way it looks more believable (at least in my humble opinion).
Part Six – Creating a Vignette (17:00 min)
To make sure I draw the attention of the viewer to the nice sunset itself, I created just a little bit of a vignette. There are many ways of doing it – you could for example create a stamp visible (CMD+Alt+Shift+E) and go to Filter-Camera Raw Filter and use the simple Vignette slider. I used something a little different here: I used a Curve Adjustment layer to darken the whole image down. Then, with the mask selected, I hit Shift+M on the keyboard to get my Elliptical Marquee Tool and marked an area around the centre of the image. I then hit Shift+Backspace and filled the select area with Black. After hitting CMD+D (deselect everything), I hit CMD+I to invert the mask on the adjustment layer. Well, that creates a bright circle in the middle, but doesn’t look like a nice vignette. So, with the mask selected, I went to Filter-Blur-Gaussian Blur and blurred the circle a lot! This makes the transition of our self-made vignette nice and smooth.
Part Seven – Remove the Noise (21:00 min)
A little bit if noise in the sky would be Ok, but there was so much that I just had to remove it. This had a nice side-effect, which was that the clouds looked smooth after the ‘treatment’. So, after a stamp visible (CMD+Alt+Shift+E) I went to Filter-Camera Raw Filter-Detail and moved the noise slider all the way to the right. I also had to reduce the Luminance Detail Slider to make it work. Well, after that was done, the only thing left to do was to create a layer mask and brush the effect into the sky.
Part Eight – Bring some Detail Back into the Sky (23:20 min)
After the noise removal, one could argue that the sky had lost some of it’s detail. I brought some of this back by using a light Orton Effect – I created a stamp visible (CMD+Alt+Shift+E) and changed the Blending Mode to Soft Light. After a little bit of Gaussian Blur, I got some details back! As always, I made sure the added effect is just visible in the sky using a layer mask and the brush.
All done, this was all there is to turn a normal day shot into a magical evening shot. Remember, shortcuts make your life easier and can speed up your processing a lot! Here is what I used in this image:
CMD+Alt+Shift+E to create a stamp visible
B for the brush
CMD+Alt+Shift+N to create a new empty layer
CMD+I to invert anything
CMD+J to duplicate a layer or a selection
C to Crop
If you like my images, make sure to check out my portfolio!
Don’t forget to get out there and take some pictures yourself! I hope you enjoy my Photoshop tutorials, see you next time!


Hmm is anyone else encountering problems with the pictures on this blog loading? I’m trying to determine if its a problem on my end or if it’s the blog. Any suggestions would be greatly appreciated.. A fraction calculator Superb data, Thanks.
Hi Oliver, thats the worst news I had all week 😀 I checked on 3 computers since you commented, but can’t see any issue. The pages load within some seconds and all images are there. What is the exact problem you have? Are they not loading at all? Or do you have the little symbol saying the image just won’t be loaded?
Greetings and thanks for your comment!