How to Use Photoshop to Edit Landscape Images – The Sheep’s Mountain | Photoshop Tutorials
Welcome back to another one of my Photoshop Tutorials! Today I will talk a little bit about another HDR image taken down in the south of Ireland. Never heard of HDR? Read this first! I loved the whole composition – the crops in the foreground, the happy little sheep on the happy little grass (Bob Ross reference check) in the middle and this amazing mountain vista in the back. So today, I will show you another example on how to use Photoshop to edit your landscape images. Remember, if you like the video, make sure to subscribe for more weekly Photoshop and Photography action!
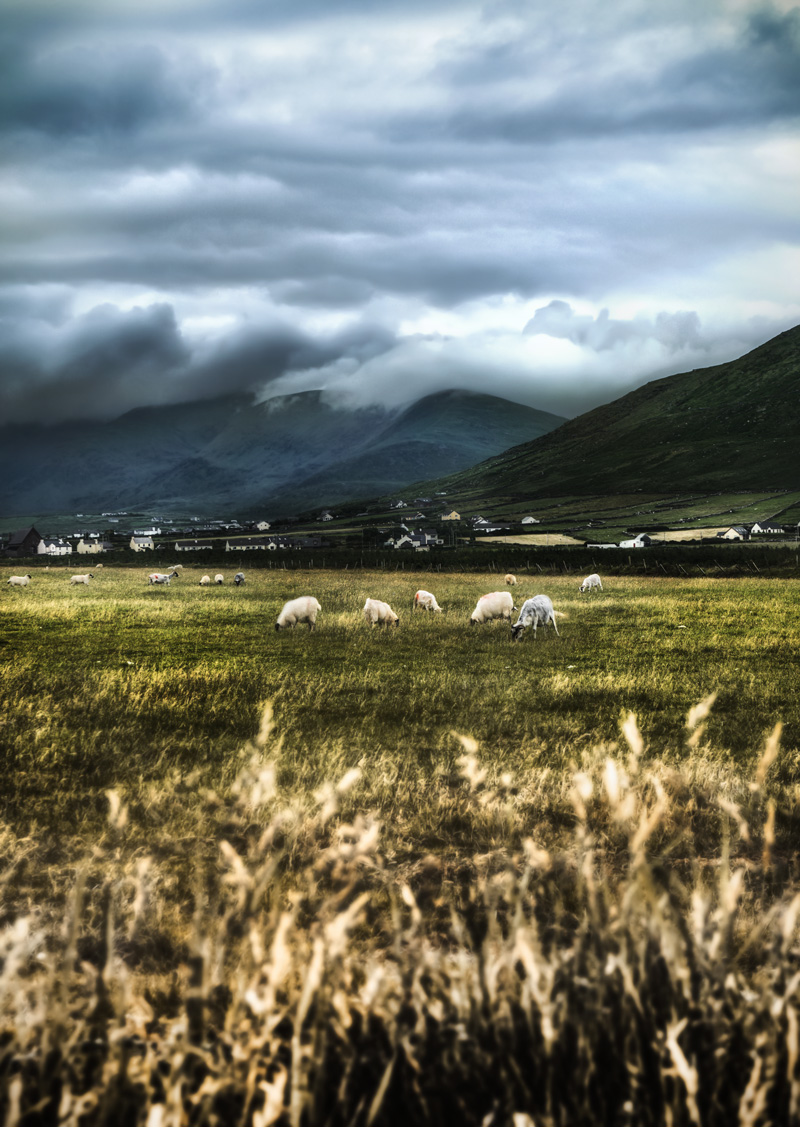
So here is the final image:
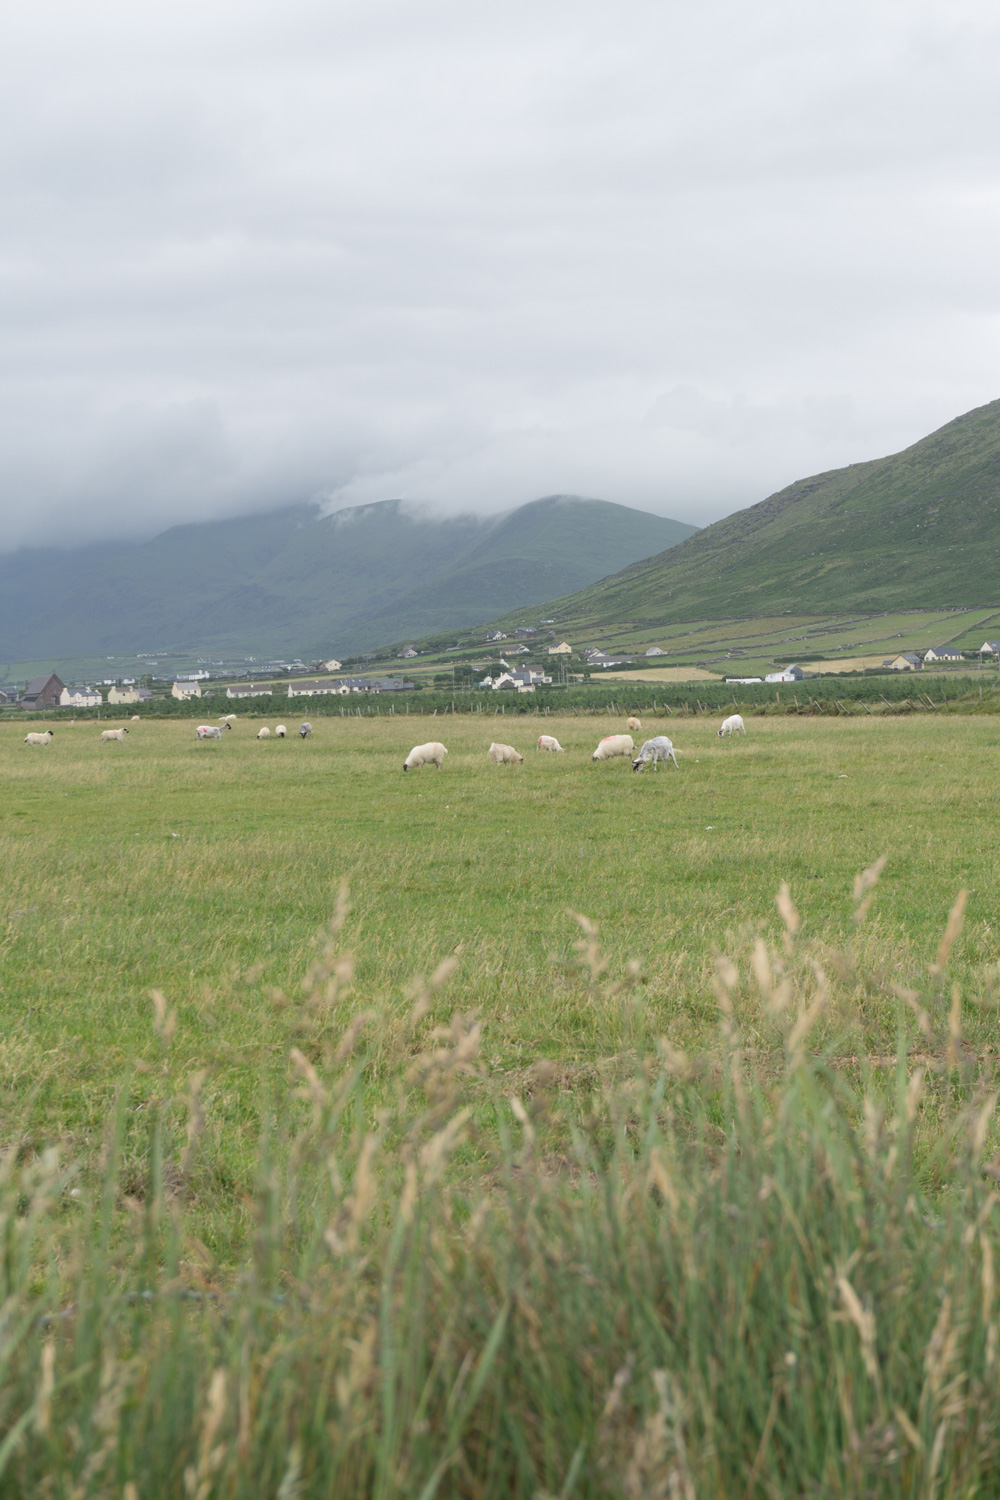
And here is the original:
Part One – Add Tonal Contrast (0:35 min)
Before doing anything, remember to copy your background layer, just in case you mess something up hehe. This can be done by hitting CMD+J on your keyboard. Then, with the new layer selected, I went to Filter-Nik Collection-Colour Effex-Tonal Contrast.
The Nik Collection is a free plugin! I mostly just use one of the filters they have (the tonal contrast one), but there are other interesting ones – I recommend to download it 😉
So, I didn’t even look at the exact options on the right, I just hit Ok. It works most of the time. I didn’t want the effect to be visible everywhere, but just in the sky and the mountain region. This is Ireland. These are mountains! So, I selected the layer with the effect and created a layer mask by clicking on the little Japanese flag symbol just below the layer thumbnails. Then I hit CMD+I to invert and therefore hide the effect everywhere. Hitting B, I got the brush and used a white colour to make the effect visible in the sky and the mountains.
If you haven’t worked with layer masks before, read this first to get started.
Part Two – Darken The Sky (2:10 min)
For his, I just used a combination of different curve adjustment layers, which can be found just above the layer thumbnails. After adjusting the darkness accordingly, I used the same technique as above to make it visible only in the sky.
Part Three – Blur The Foreground (3:10 min)
These crops in the foreground were nice, but the ground which you could see through the flower heads was too sharp, taking away the attention from the centre of the image. That’s where the sheep are, so they need attention! Therefore, I wanted to gradually blur from the bottom up. For this, I hit CMD+Alt+Shift+E on the keyboard which creates something called a stamp visible. In other words, it copies everything that is visible onto a new layer. With this layer selected, I went to Filter-Blur-Gaussian Blur and blurred that new layer. Then I created a layer mask, hit G on the keyboard to get the gradient tool, and dragged from the bottom up with the layer mask selected. Awesome, now the lower foreground is blurred.
Part Four – Pimp The Grass (5:30 min)
The grass looked a little too soft at this point. So I created a stamp visible again (CMD+Alt+Shift+E), changed its blending mode to Overlay and created a Hue/Saturation layer. I then clipped the Hue/Saturation layer to the Overlay layer by hitting CMD+Alt+G to make sure any changes only affect this layer. After reducing the Saturation a good bit, I used a layer mask to remove the effect from the sky and the mountains.
Part Five – Add A Glow (7:10 min)
I like a little bit of a glow every now and again. So, I hit CMD+Alt+Shift+E to create a stamp visible and changed the blending mode of the layer to Soft Light. Then I went to Filter-Blur-Gaussian Blur and chose something I liked. To make sure the effect is not too strong, I removed it from certain areas using a layer mask. Simple as that!
Part Six – Change The Colour In The Foreground (11:30 min)
For whatever reason, I thought I change the colour of the crops in the foreground to a more orange kind of colour. For this, I created a new layer by hitting CMD+Alt+Shift+N. Then I hit G to get my gradient tool again and dragged from the bottom up using a nice orange. The gradient mode has to be Colour to Background to work though! Once this was done, I changed the blending mode of the layer to Hue and used a layer mask to hide the effect where it was too strong.
Part Seven – Resize The Sheep (13:30 min)
The sheep are nice, but a little too small for my taste! So lets make them bigger. After all, big sheep can never harm an image! So I created a Stamp Visible (CMD+Alt+Shift+E) and hit L on the keyboard to get my Lasso Tool. With this, I made a rough selection around the sheep I wanted to resize. After hitting CMD+J (places them on a new layer), I hit CMD+T to be able to free transform the sheep. Then I held Shift and dragged one of the corners to do the resizing. The Shift will make sure you resize proportionally, so its a good thing to use! Once I was happy with the placement, I used a layer mask to make sure there is a nice transition between the grass the sheep stand on and the actual grass.
Part Eight – Create A Vignette (16:00 min)
I used a quick self-made Photoshop vignette here – which failed a little bit in the video, but the principle applies haha. So, I hit CMD+Alt+Shift+N for a new layer, hit Shift+G to get the Paint Bucket Tool and painted black onto the whole new layer. Then I created a layer mask and pressed M to get the Marquee Tool. With that, I drew a rectangular selection in the middle of the image and hit Shift+Backspace to fill that with the opposite colour than the layer mask. With the layer mask selected, I went to Filter-Blur-Gaussian Blur and blurred the hell out of the layer mask until I was happy. The mask can then also be adjusted using the brush tool if needed.
Part Nine – Remove Noise From The Sky (18:30 min)
Noise removal is sometimes necessary and sometimes it isn’t. It really depends where the noise is and what feeling the image should convey. In this case, I didn’t like it too much in the sky. So a simple and fast way to use Photoshop to remove it is to create a stamp visible (CMD+Alt+Shift+E) and go to Filter-Camera Raw Filter. There, I went to Detail and just moved the Noise Reduction Slider. That is it! That is all there was to use Photoshop to edit this landscape image.
All done, this was all there is to turn a normal day into a magical shot. Remember, shortcuts make your life easier and can speed up your processing a lot! Here is what I used in this and many others of my Photoshop tutorials:
CMD+Alt+Shift+E to create a stamp visible
B for the brush
CMD+Alt+Shift+N to create a new empty layer
CMD+I to invert anything
CMD+J to duplicate a layer or a selection
C to Crop
Shift+G for the paint bucket tool
G for the gradient tool
M for the marquee tool
L for the lasso tool
CMD+T to free transform
CMD+Alt+G to create a clipping mask
If you like my images, make sure to check out my portfolio!
Don’t forget to get out there and take some pictures yourself! I hope you enjoy my Photoshop tutorials!