How to Create a Panorama in Photoshop – Example: Ross Castle
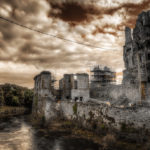
Welcome back! This is one of my favourite photographs taken in Ireland. The castle is called ‘Ross castle’, an eye catcher in the very south. Usually the place is full of tourists, but the weather was with me – occasional rain kept the place relatively empty. I just had to wait about 5 min to get a shot without anyone in the frame. Awesome! If you have watched my videos before, then you know I am a huge fan of dramatic scenes. With this sky, I just had no other choice. I had to do it! So today, I will show you how to create a panorama. If you like the video, make sure to subscribe for more weekly Photoshop and Photography action!
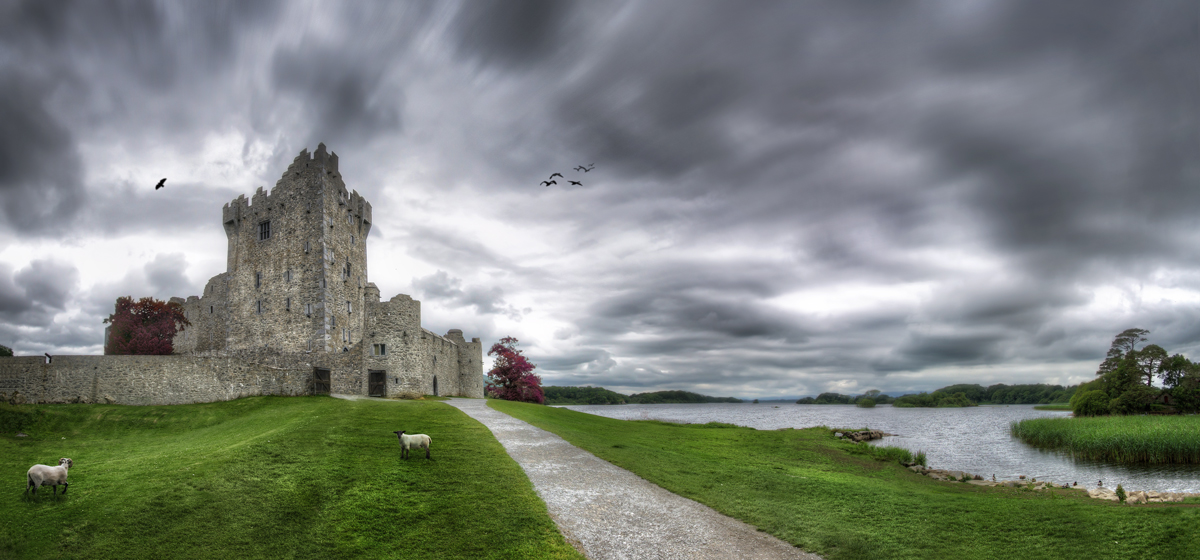
So here is the final image:
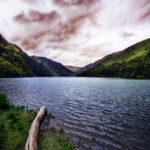
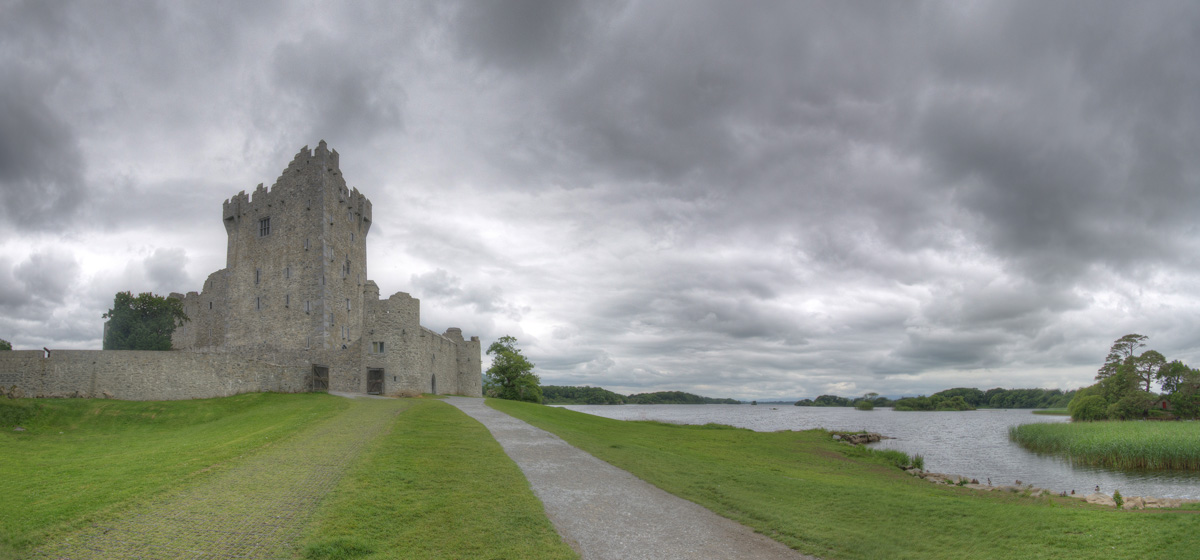
And this was the original:
But first things first. This image is not a single shot – it is a panorama composed out of 4 images. Even more, these 4 images were not any random images, they were HDR (high dynamic range) photos. If you haven’t heard about HDR before, just check out this post from earlier, it’ll give you a good idea. Briefly, an HDR image is the result of the combination of multiple images taken at different exposures. For example, if you have one image with a great sky but a dark foreground, and another image with a great foreground but a washed out sky, then HDR software such as Photomatix can combine these to give you both a nice sky and a nice foreground. One of the biggest influences on my ‘stile’ in photography is a guy called Trey Ratcliff – he is great at using the software and is more qualified to teach you about it. You can find his tutorials right here.
Part one – Creating the Panorama (2:15 min)
Ok, so I used 4 HDR images to create this massive panorama. How? Easy! In Photoshop, go to File-Scripts-Load Files into Stack. There, select the images which will make up the panorama and hit Ok. Photoshop will load all these images as layers, one above the other. Then, select all layers and go to Edit-Auto Allign Layers. You have a couple of options there and it might be that you will have to try some of them to see which one works best for you. After trying once or twice, you’ll get the panorama you want. Nearly there! Now select the top image, create a layer mask (hit the little Japanese flag in the lower right). If you are unfamiliar with layer masks, watch this first 😉 Then use a brush (B on the keyboard) and paint with black around the edges to create a nice smooth transition. You can do this for all layers until you’re happy with the ‘raw-panorama’. Now it’s time to work in the image.
Part two – Fix the Grass and Other Small Bits (10:00 min)
There was an ugly patch of grass in the image. This has to go! The Patch Tool works just fine in this particular case. So, first I suggest to create a so called stamp visible (CMD+Alt+Shift+E) which will copy everything visible onto a new layer. Then use the Patch Tool and select an area of the grass you don’t like and pull it over to an area you do like – Photoshop will try to use the texture of the good area and replace the bad area. One selection after another you can get rid of the ugly grass. While we’re at it, we might as well get rid of other small obstacles. Hit J on the keyboard to get the Spot Healing Brush Tool. With this, just click on little things which you don’t like. If this doesn’t work, you can also use the Clone Stamp Tool (hit S) to just replace parts of the image with another. For this, hold Alt pressed on the keyboard and select a source. Then start painting over unwanted areas to replace them. Bit by bit you can clean up the image until you’re happy. Perfectly on the road to learn how to create a panorama!
Part three – Create a Dramatic Sky (12:30 min)
Start out with creating a curve adjustment layer (located mid right in the Photoshop window or at the bottom under the layer thumbnails at ‘fx’) and decrease the brightness. To make sure you just affect the sky, invert the adjustment layer (CMD+I), select the brush (B) and paint with white on the sky to reveal the effect. To take it to the next level, create a stamp visible (CMD+Alt+Shift+E) and go to Filter-Nik Collection-Colour Effex Pro. Of course, you will have to have the plugin installed for this to work. The Google Nik Collection is free and a great tool to save time on some common effects one could want to create – I recommend installing it! So, there is a filter called ‘Tonal Contrast’ which I use often to enhance any drama in an image. It could be done manually as well, but the filter is faster. Select the filter and just hit Ok. The whole image will suddenly have increased in drama – great! The last step for the sky is to give it some movement. This can be done by creating a stamp visible (you don’t have to, that’s just what I do) and go to Filter-Blur-Radial Blur. There, select ‘Zoom’ as the blur method and select an appropriate pixel value. I used 10 here, but this will greatly depend on your image. Hit Ok, and just as before, use a layer mask to make the effect visible where you want it. The sky, that is hehe.
Part four – Add Clarity to the Image and Fix the Colour and Texture of the Grass (15:45 min)
Photoshop has a neat tool to increase the clarity of an image, a great addon when you are trying to learn how to create a panorama. Create a stamp visible (CMD+Alt+Shift+E) and go to Filter-Camera Raw Filter and have a look at the bottom of the upcoming window. There is a slider named ‘Clarity’ which, once dragged to the right, will work some magic. Once happy, hit Ok and use a layer mask to reveal the effect where you want it.
After using the Patch Tool to fix the grass, some brown patches showed up with make the grass look dead. In this case, I didn’t want this, which is why I changed the colour of this grass. To change the colour in Photoshop is easy – create a new layer (CMD+Alt+Shift+N), press G to get the Paint Bucket Tool (or Shift+G if the Gradient Tool comes up) and select a nice green colour on the right. Then click on the new layer once, which will fill this layer with the selected colour. Just above the layer thumbnails you can select the Blending Mode – with the filled-in layer selected, choose ‘Hue’ as the Blending Mode. Using a layer mask, you can then place the new colour anywhere you like, such as in the grass!
The grass still seems a little bit flat, right? Let’s fix that: Create a stamp visible (CMD+Alt+Shift+E) and change the Blending Mode to Overlay. Also, create a Curve Adjustment Layer and increase the brightness – but clip this adjustment to the Overlay Layer by hitting CMD+Alt+G. Then use a layer mask to bring the effect into the grass.
Part five – Add Some Birds to the Sky (22:00 min)
Why not? So, I went to google and asked it to please give me some free bird brushed for Photoshop. And this is exactly what I got! You could also create your own brush based on an image of a bird – but I don’t have such an image. So, just load a free brush into Photoshop and create a new layer (CMD+Alt+Shift+N). On this layer, paint in some birds using any colour you like. With he layer selected, go to Filter-Blur-Gaussian Blur and give the birds a nice little blur to make them fit better into the background. If you got a similar brush to the one I used, then some birds are further away and some are closer. Therefore, they won’t all be visible similarly. So, create a layer mask like before and decrease the visibility of the birds which are further away.
Part six – Add Some Sheep (24:00 min)
Every image gets better with a sheep in it. It is easiest if the lighting conditions were similar for the two scenes (sheep and castle in my case). So, open the sheep image in Photoshop; choose the Move Tool (V button) and drag and drop the sheep into the ‘old’ image. Continue to use the Move Tool and reposition the sheep. Here is a crucial part: you have to decide on a way to separate the animal from it’s background. In the video, I used a very crude layer mask to save some time. However, a Pen Tool selection would have been way better! Never used the Pen Tool? Check out these awesome tutorials by Aaron Nace, the founder of Phlearn.com – he is so much more qualified to teach you this and many other tools! They do make Photoshop and Photography Fun, hehe. Another option would probably have been to use the Magic Wand Tool to select the sheep – should have thought on that during the video (damn). Anyhow, however you want to cut out the sheep, the next step is to adjust the brightness of the sheep using a Curve Adjustment as before. Using another Curve, you can place a shadow under the animal to make it fit the scene better. But keep in mind, that this way of creating a shadow is crude and will not work the moment there is a direct light source. In this image, the light was rather diffuse, so a darker ground did the job just fine.
Part seven – Create Some Magic (34:45 min)
How about a nice magical purple tree next to the castle? Let’s do it. Create a Hue/Saturation Adjustment Layer, select the Yellow Channel (depends a little on your image though hehe) and madly increase Saturation and Hue. All that goes nuts in the image now is what you are affecting with this adjustment layer. On the bottom of the adjustment window, there is a little slider. If you move this slider, you can change what is the selection you make based on the colour of the objects in the image. Once you hit the tree perfectly, decrease Saturation and Hue and change the Hue again to a nice purple. Use a layer mask to limit the effect to the tree if needed.
Awesome! The image was a lot of fun to process. It took ages to do it, but this is mostly due to me not knowing where I am going while I process hehe. Remember, shortcuts make your life easier and can speed up your processing a lot! Here is what I used in this image:
CMD+Alt+Shift+E to create a stamp visible
B for the brush
J for the Spot Healing Brush Tool
S for the Clone Stamp Tool
CMD+Alt+Shift+N to create a new empty layer
CMD+I to invert anything
CMD+J to duplicate a layer or a selection
CMD+Alt+G to clip a layer or adjustment
V for the Move Tool
G for the Paint Bucket Tool
C to Crop
If you like my images, make sure to check out my portfolio!
Don’t forget to get out there and take some pictures yourself!