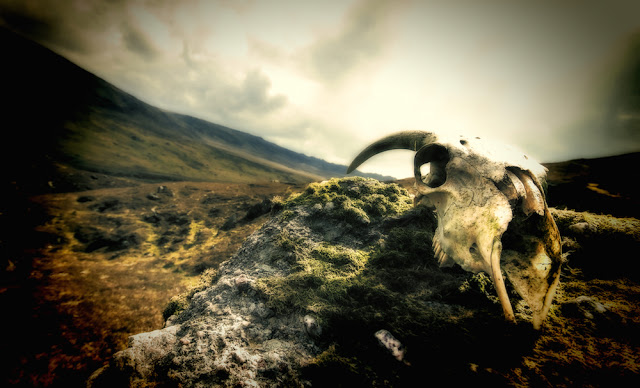
I got this image about a year ago when I went to a photo tour through Ireland:
The original looked like this:
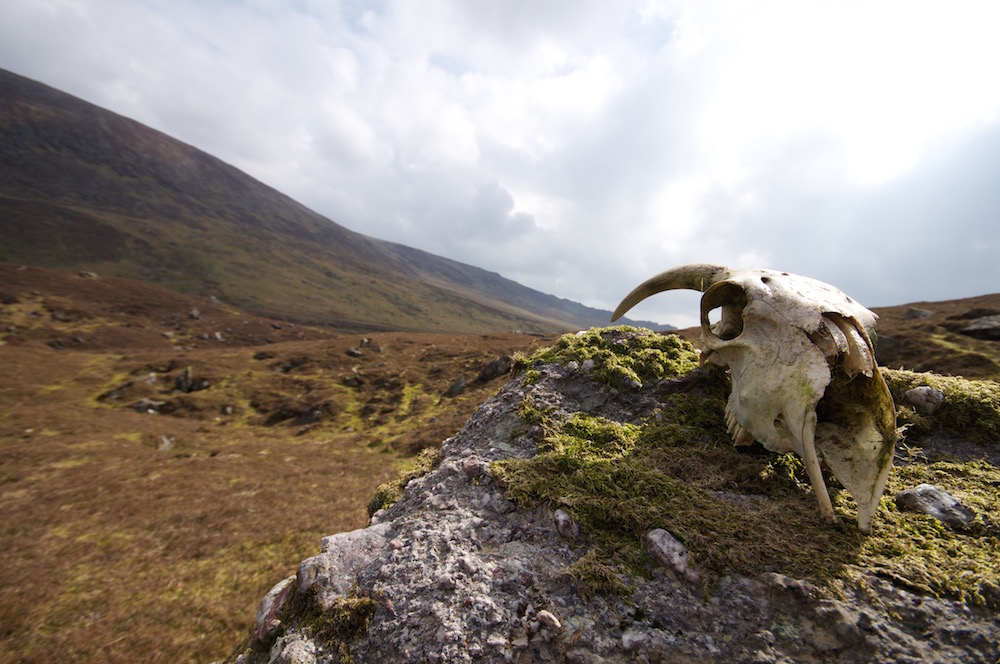
I liked the original version already, but wanted to go a little further and add some drama and darkness. After all, its a skull, hehe.
So thats, in short, how I did it:
I increased the contrast and increased the vibrance a little.
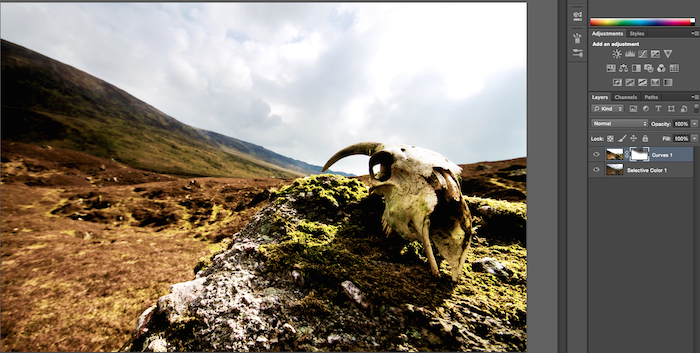
Then I used the curves tool and changed the shape of the line like this:
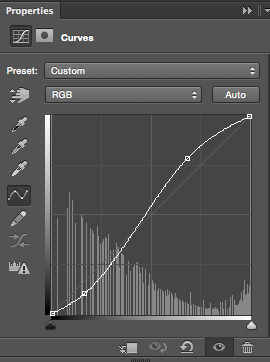
If you have a look at the bottom of this curve window, you’ll see that to the left the blacks start and on the right the whites are located. Pulling the curve to an S-shape will darken the blacks and lighten the whites a little bit which generally adds towards general contrast. Doing this (and some other minor adjustments) changed the original to this:
So nearly there! The clouds disappeared because we increased the brightness – but as I copied the original layer before modifying it, they can be brought back:
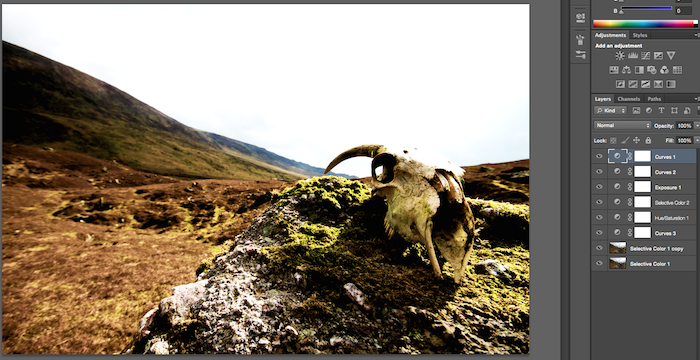
Select all the adjustments and the top layer, right click and select merge layers (see my “Understand Photoshop Layers” tutorial if you are having trouble with he layers). That gives us two layers: one original and the one we modified with curves and contrast. Select the upper layer and create a layer mask. Press B on your keyboard to select the brush. I chose an opacity of 50% and started to brush over the sky area to bring back 50% of the clouds from the layer beneath:
Then I pressed CMD+E to merge all layers as you see them (or STRG+E with Windows). After duplicating the resulting layer, I selected the top one and selected Overlay as the blending mode (check here to see how to use blending). I used layer masks to brush the effect to the parts I liked and added some vignetting – cest ca! Thats it!
Like the image? Make sure to check my complete portfolio here!