How to Use Photoshop to Create a Dramatic Scene – Example: The Hair Model Horse
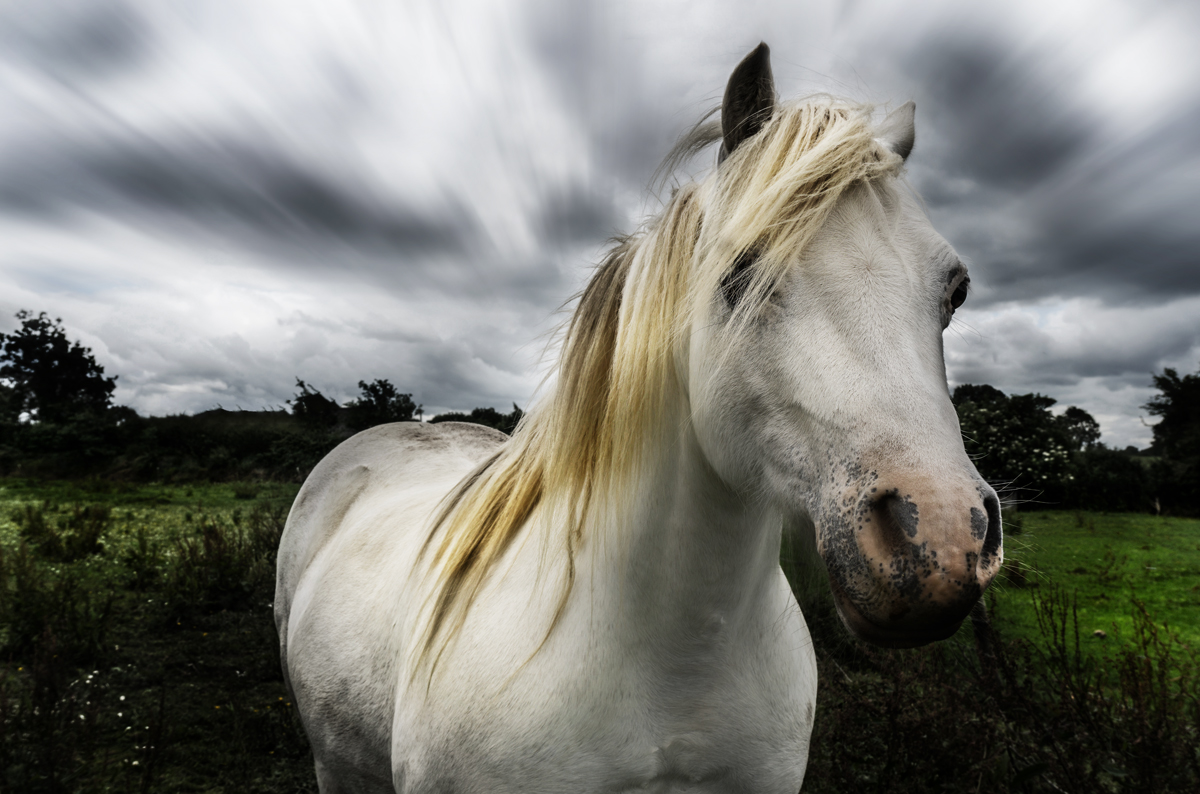
Welcome back to another landscape image! While I am not necessarily a horse person, I did love this horse! So today, I will show you how to use Photoshop do create this dramatic scene with the little fella. Remember, if you like the video, make sure to subscribe for more weekly Photoshop and Photography action!
Here is the final image:

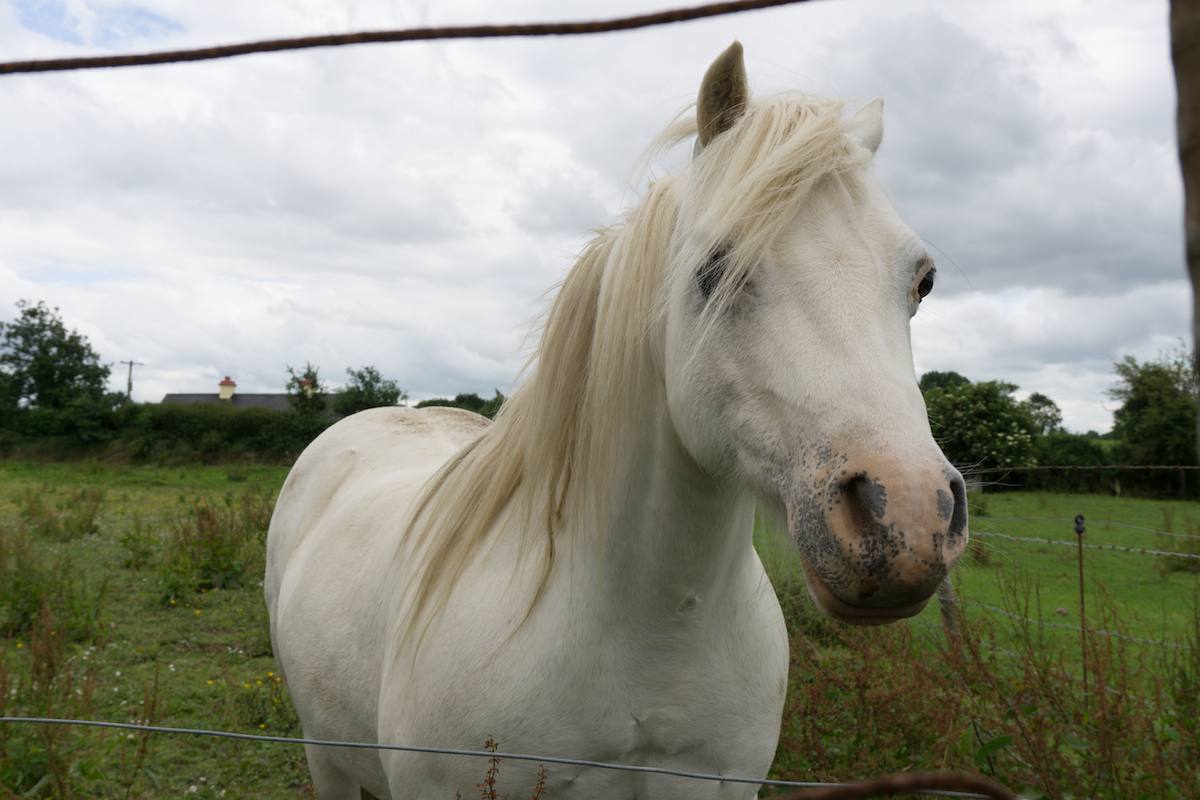
And here is the original:

Part One – Removal of Fences
So there was a fence, great. It is easy in Photoshop to remove those – I did it using two tools: the Spot Healing Brush Tool and the Clone Stamp Tool. For this, I created a new layer (CMD+Alt+Shift+N on the keyboard) first (1:40 min). Then I used a combination of the two tools mentioned to carefully remove all the fences. Begone fences!
Part Two – Reduce the Saturation
It may be a little bit counterintuitive, but I first removed some of the color to add it back later (5:30 min). Why? Removing some colour lets me see the image more plain which makes it easier for me to decide where I want colour in the image. That’s just a personal thing, of course hehe. So, I hit the Hue/Saturation Layer adjustment and just reduced saturation.
Part Three – Adding Drama to the Sky
Creating a dramatic sky is not hard – here is one way of doing it. Create a Curve Adjustment Layer and decrease the brightness there (5:45). The adjustment (and most of the others I use) can be found on the right site above the layer thumbnails. Then create a Layer Mask (little Japanese Flag below the layer thumbnails) and paint the effect through wherever you feel like – such as in the sky. For this, I hit B on the keyboard and, with the layer mask selected, painted black where I wanted to hide the effect.
Here is a thing: When creating a dark dramatic sky, it is important to get the right balance between blue and cloudy sky. When making dramatic skies by darkening the whole thing, then it would look strange if there would be a good proportion of blue in that sky. So I removed a good bit with the Spot Healing Brush Tools (J on Keyboard). That just made it look cleaner.
Part Four – Darkening the Scene
White horse, dramatic sky. That is where I want the attention to be. So there is no need for super bright ground, which is why I used simple curve adjustments to darken the whole thing a notch (8:30 min).
Part Five – Transforming the Sky into an Eye-Catcher
The clouds are nice, but they could be better! I aimed to enhance them by adding a nice Radial Blur (9:20 min). It is a really nice step to create a dramatic scene in Photoshop! Therefore, I created a so-called stamp visible (CMD+Alt+Shift+E) which copies everything visible onto a new layer. Great function! Then I went to Filter-Blur-Radial Blur and selected that one. There, I changed Radial to Zoom in the options and selected the pixel amount appropriate to the image. Hit Enter. The effect is now visible all over the place, which is not the intention. Using a layer mask and the brush just as before, I then made sure the effect is in the sky.
Part Six – Add Color to the Hair
Let’s give the horse some nice natural hair colour (12:00 min). One way of doing this (and there are so many!) is to create a stamp visible (CMD+Alt+Shift+E) first. Then change the Blending Mode to Overlay. The Blending Mode is just above the layer thumbnails, have a look at the video if you can’t find it. Once done, go to Filter-Blur-Gaussian Blur. Select something that looks nice, hehe. This will bring out some of the natural colours and also increase the contrast in the hair and the ground. Using a layer mask, I then selected the areas where I wanted the effect. Using a Hue/Saturation Adjustment, I then increased this effect just a little bit more.
Part Seven – Sharpening
Simple. The image was already super sharp, but I wanted a little more in the hair (15:35 min). So here is one way of sharpening: Create a stamp visible (CMD+Alt+Shift+E) and change the blending mode to overlay again. Then go to Filter-Other-Highpass. Select a small amount (around 1px) and hit OK. When you duplicate this layer, the image will become a little sharper. Every time. Once you have reached a good sharpness, group the layers (CMD+G) and create a layer mask to adjust where the effect should be visible.
Part Eight – Remove Noise
Some noise in the clouds? No trouble, let’s see how to use photoshop to get rid of it! . Create a stamp visible again (yes, I do that often) and go to Filter-Camera Raw Filter-Detail (17:25 min). There just play with the noise reduction slider until you’re happy, and use a layer mask to determine where to add the noise removal. Done! That is all there is to how to use p to create a dramatic scene.
Remember, shortcuts make your life easier! Here is what I used for this image:
CMD+Alt+Shift+E to create a stamp visible
B for the brush
J for the Spot Healing Brush Tool
S for the Clone Stamp Tool
CMD+Alt+Shift+N to create a new empty layer
CMD+I to invert anything
CMD+J to duplicate a layer or a selection
For more images and processing examples, head over to www.letsimage.com
For my complete Portfolio, have a look at www.letsimage.smugmug.com! I hope you enjoyed this tutorial on how to use photoshop!
Don’t forget to get out there and take some pictures yourself!


