Hey there landscape photography lovers! You are just getting into landscape photography, or you’re doing it for a while and think ‘mh, somehow I don’t quite get it the way I want to get it’, or you might not get the response from viewers that you are looking for. I made all the landscape photography mistakes you could possibly make – and I still do, sometimes. So, let’s go over 10 common landscape photography beginner mistakes that I did, using my own images, so you don’t have to make them! I am not afraid to admit that I make mistakes all the time – but the important part is that one keeps learning from them!
#10 Reading Too Much
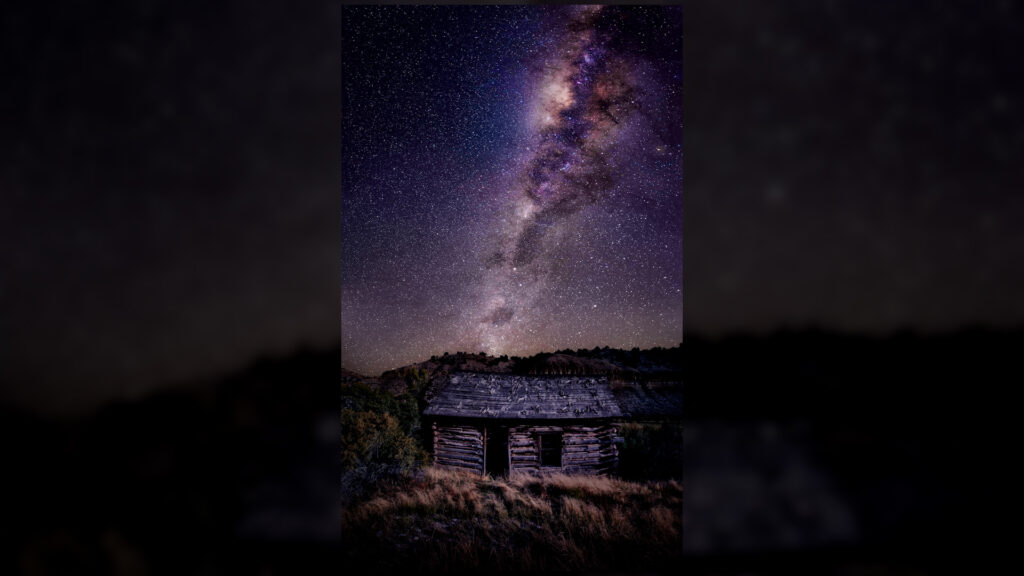
… or over-studying! When I started out, I spent days and days reading about how the camera works, which settings to use in which situation, how to edit images, and how to position tripods – but I never actually went out and practiced taking shots. When I did, I realized – crap, obviously the info I tried to absorb didn’t stick because I didn’t practice. Don’t be me – if you are getting into landscape photography at this moment, sure, read a bit, but also get out there and practice what you read. If you are learning about shutter speed, get out there and take an image in low light conditions. Or if you are learning about astrophotography, actually go and shoot that Milky Way! It’s the only way to properly solidify what you have learned.
#9 Shooting Mode
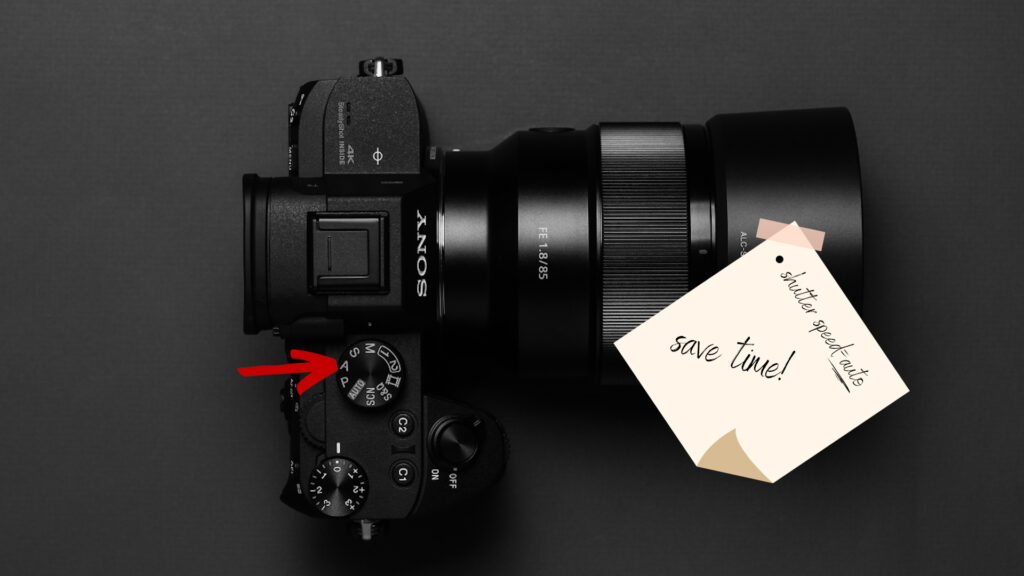
Do not shoot in auto mode. Of course, you can, but in the best case, you’ll have more work during editing, in the worst case the camera might screw up your shot. I also wouldn’t shoot in manual mode – simply because it’s a lot of settings to control for a potentially fast-changing scene in front of you. If you are on a hike or somewhere with different motives close and far, changing every setting again and again is tedious and in my opinion simply not needed – I recommend shooting in aperture priority mode instead – this way you know exactly what is in focus by checking depth of field, and you can still adjust your otherwise automatic shutter speed using exposure compensation if needed. So you can jump from scene to scene, and as long as changes aren’t extreme like day to night, you’re fine with keeping an eye on your histogram and on your aperture and focus.
#8 Not Understanding The Camera
After you learn what the buttons do, learn about the exposure triangle – shutter speed, aperture, and ISO. Learn how to use a histogram and how to display that on your camera. The number of times I blew out a sky … check out the image below from eight years ago! This is one of my very first, very over-edited photos. Apart from the composition being weird, there’s basically nothing in the sky – and I couldn’t hide that with editing back then either. Even the main subject is partly blown out … catastrophe. Granted, I drifted into HDR photography where exposure has become a less important issue for me now, but for anyone taking single images – you need to make sure you get the information into that photo. Get the exposure triangle down and learn the buttons of your camera! Here is an article of mine that should get you there.
#7 The Stop And Shoot
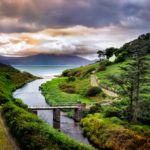
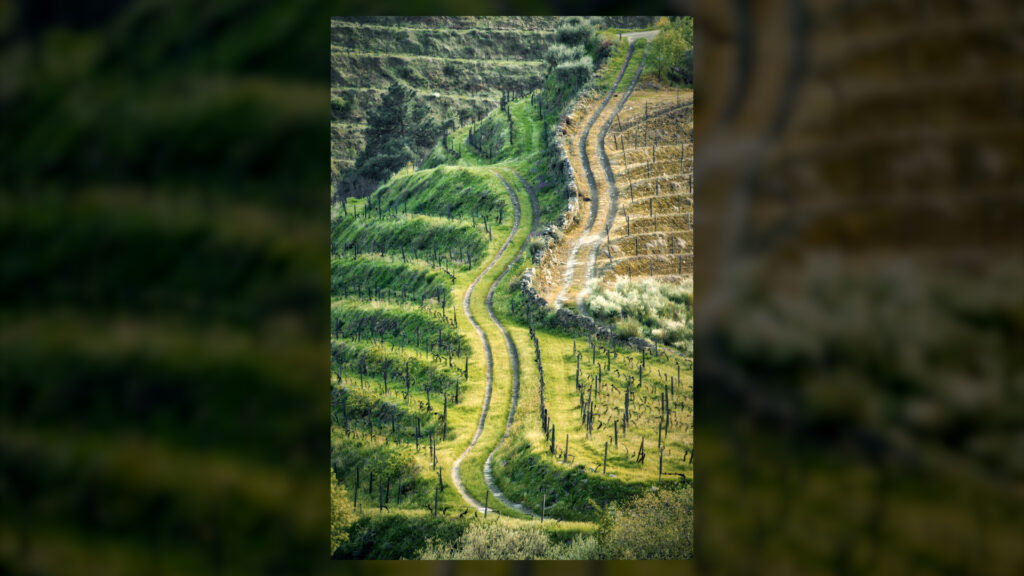
Tell me if this sounds familiar. You arrive at a place, see nice scenery, lift your camera, and take a photo. You are happy, smile, and move on. This is bad! Next time you do this, check if taking the photo from up high or from below your usual point makes a difference in composition! Like the image below, I walked along that path but looked around if there is a vantage point that can change my perspective a little.
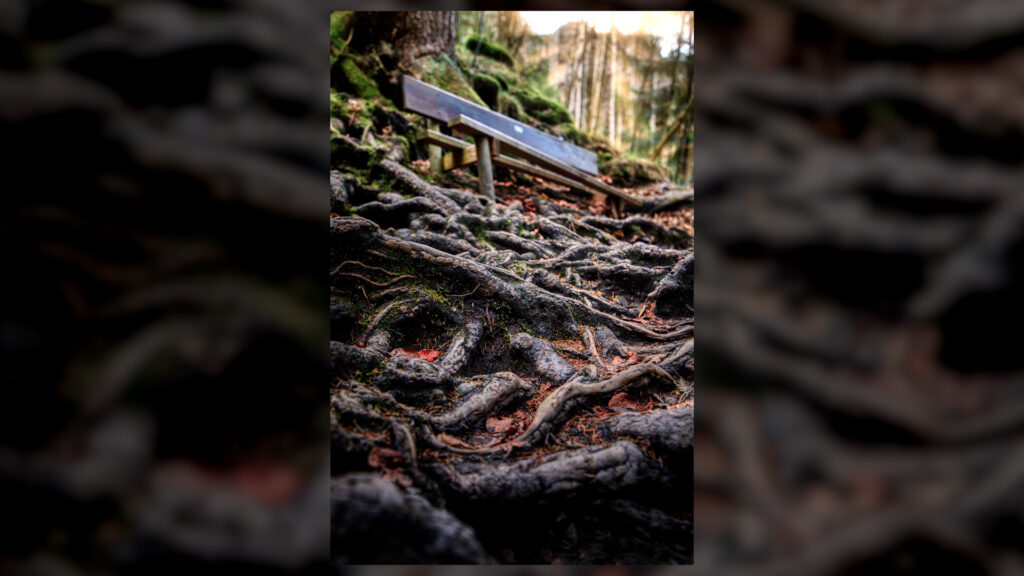
Or the one below, instead of just pointing at the roots and that bench from a standing position, I went all the way down to get a much better visual effect here.
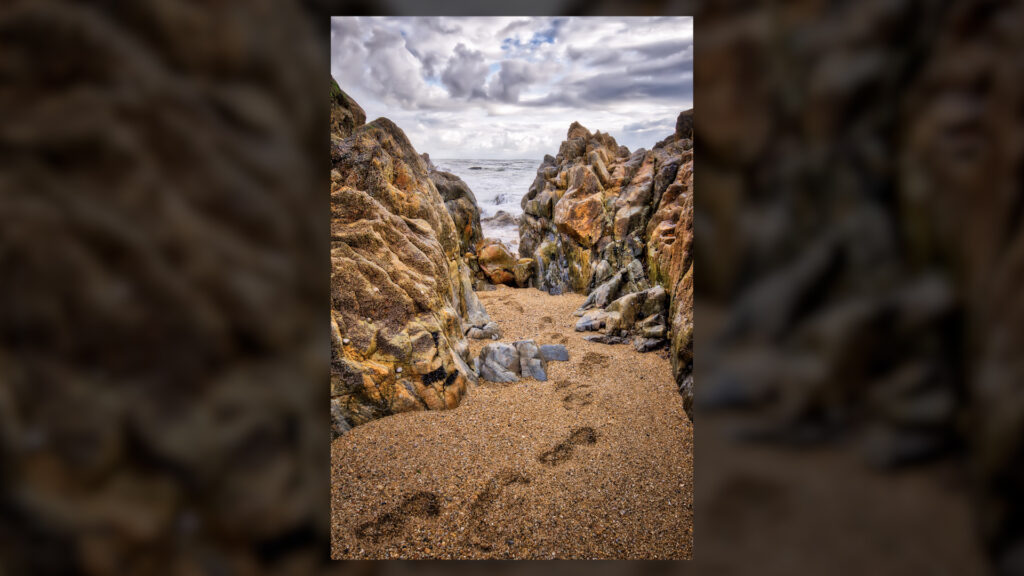
Similarly in this one, getting up close to the footsteps made for a much better composition rather than just pointing and shooting. So, why not get low, or high next time you’re out?
#6 The Right Time Of Day
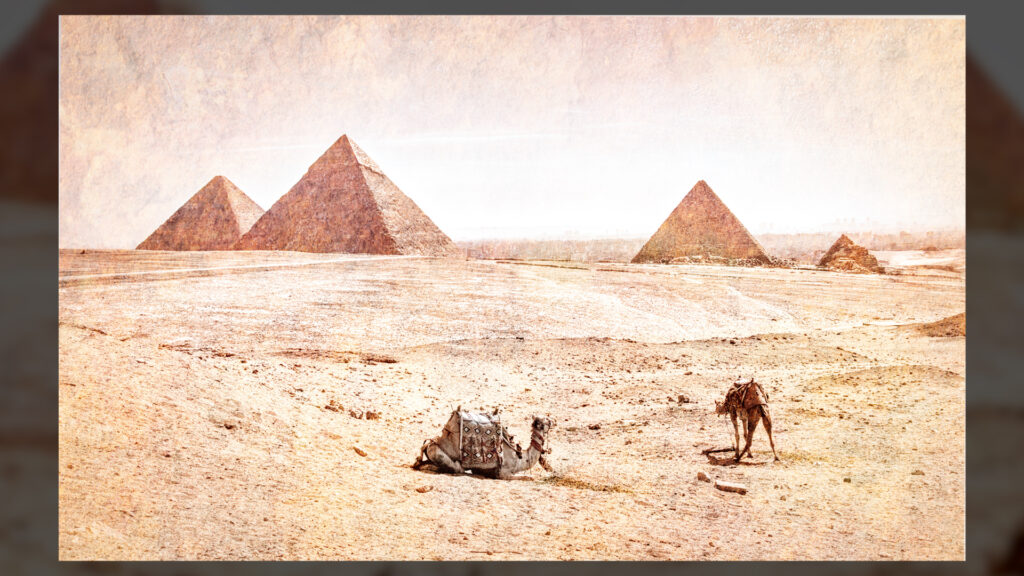
Here is where opinions might be divided a bit. Usually, unless your scene has something weirdly unbelievable in it, they say don’t go and shoot at lunchtime when there is no cloud in the sky. Shadows are gonna be harsh and the viewer response is usually better on sunset and sunrise images. So, the advice would be to get out during sunset, sunrise, or blue hour, right? Yes – generally, IF YOU CAN, this is what you could try to aim for. However – it depends on your kind of photography. I am often moving on the artistic and fantastical side of things, so, for example, the below shot I took in Egypt in the middle of the day, there were no clouds in the sky and the light was relatively terrible. But as I love editing and I do it a lot, I just create something else to create interest in the image if natural light doesn’t help me.
Or the image below, I also took it in the middle of the day. But if the sun creates harsh shadows, then a moon would certainly do something similar. No? Cool, let’s create a night image.
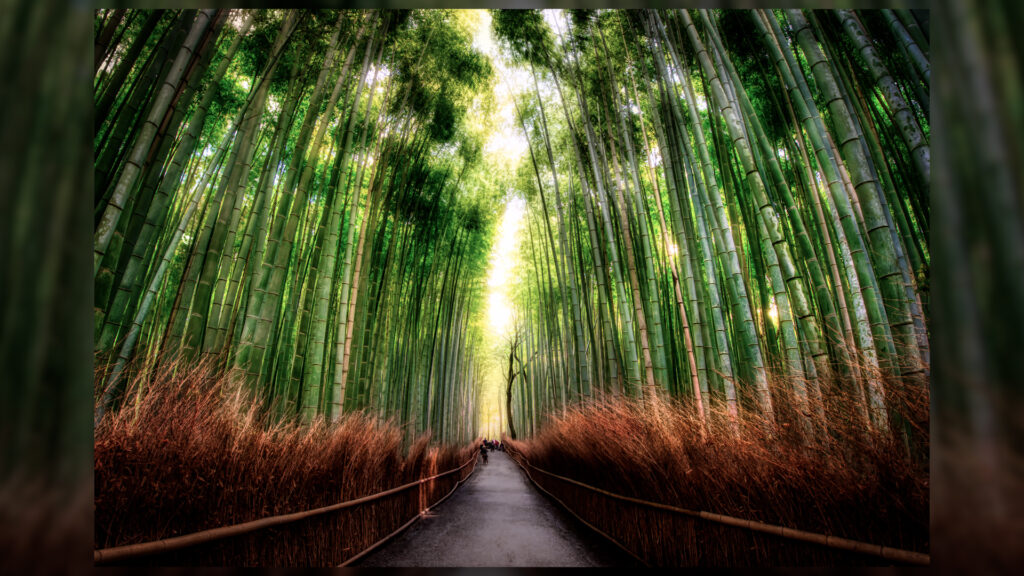
There might also be scenarios where you don’t have to care about light much, like here for example – I was in Japan, this is early morning, but I’m in a bamboo forest so I don’t give a crap about the light.
SO! In the beginning, I listened a lot to ‘plan your shoots around golden hour and blue hour’ – and that is solid advice, but don’t let that take away some amazing opportunities to get creative. I certainly don’t anymore and I shoot anytime.
#5 Composition
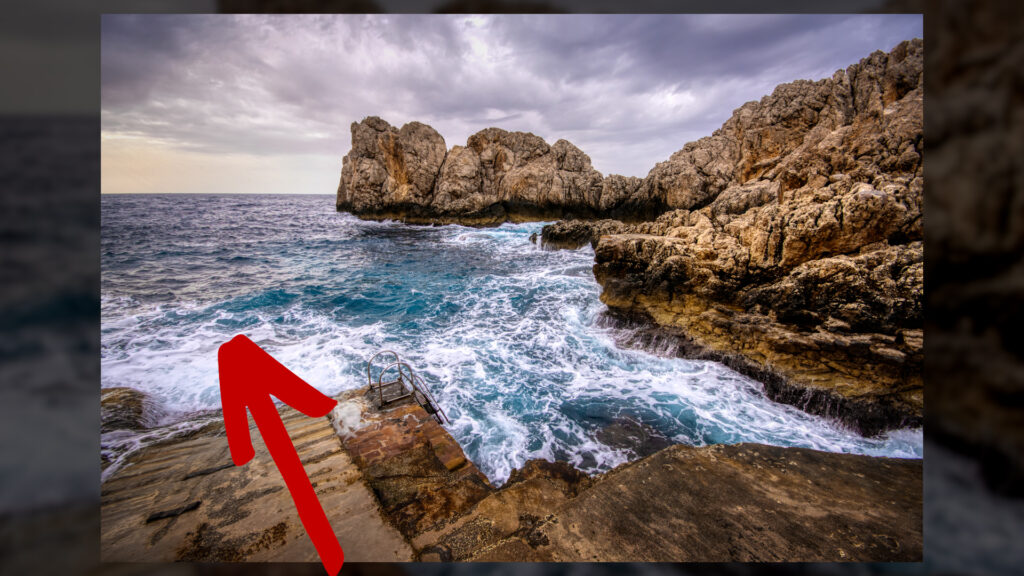
The aim of a photo is often to draw the viewer in – so check out the below image. Do you feel drawn in? Probably not – I thought I was very clever, ’cause the ramp there leads the eye of the viewer into the water – but that’s it. I remember being there, the rough sea and the smell, but a viewer doesn’t have that memory. If you don’t give your viewer something to draw them in, their eyes will bounce around – and naturally move to the brightest or the most saturated part of your image. And that’s it, they will abandon the image because thats not pleasing to the eye.
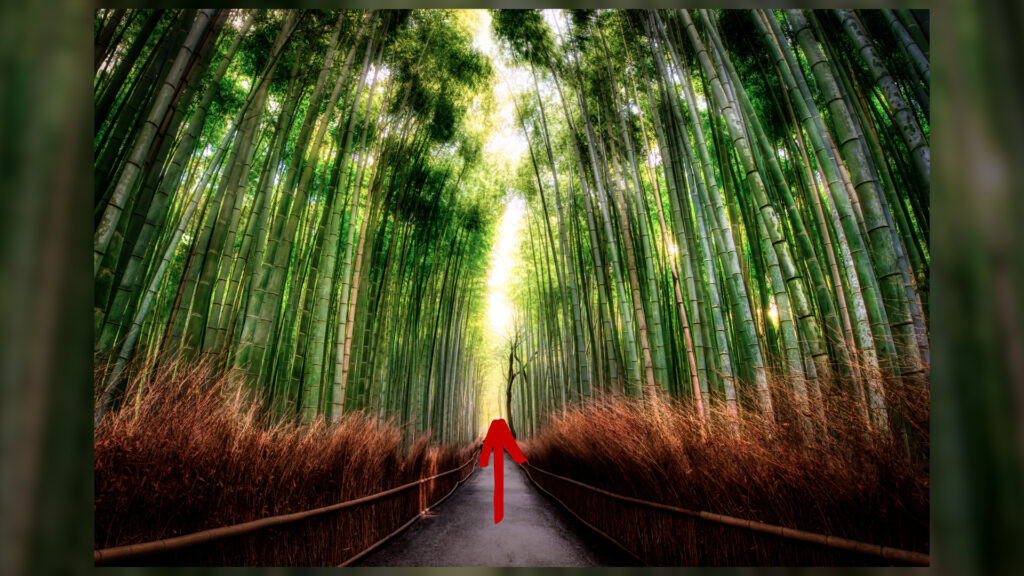
Instead, look around and try to create interest in the image. Check out the below – we’ve seen this picture, but see how the path clearly leads the eye into the image and up to the brightest point, the canopy.
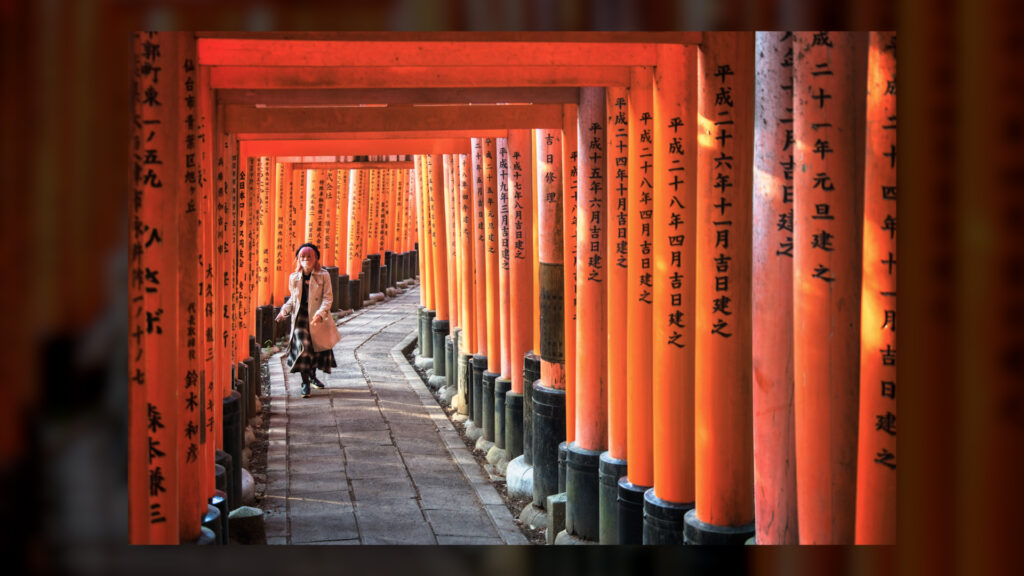
Or like in this one, where I made sure the subject is on one of the corner points of the rule of thirds. The repeating tori gates that get smaller in the distance also create a sense of space. Of course, you can also crop in post, but you might either lose image quality if you crop too much, or you layer realize that a broken composition can’t be fixed.
#4 Image Edges
Don’t forget your edges! In landscape photography, what’s not in the image is just as important as what is! Have a look below – This old image of mine, from Utah again, has some issues, but one of them is that I didn’t take care of the edge, so now I have things on the right-hand side here poking into my image.
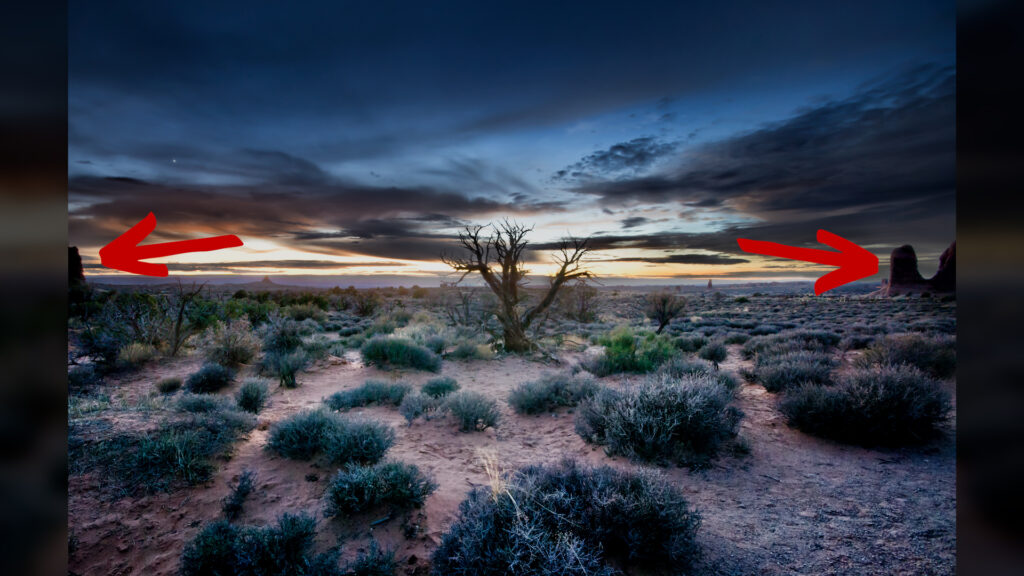
Or in the photo below, where I have not one, but two rock formations peeking into my image. Keep your edges clean, don’t have things cross the edge if you can avoid it – and give your viewer a calm image they can be pulled into.
#3 The What Now?
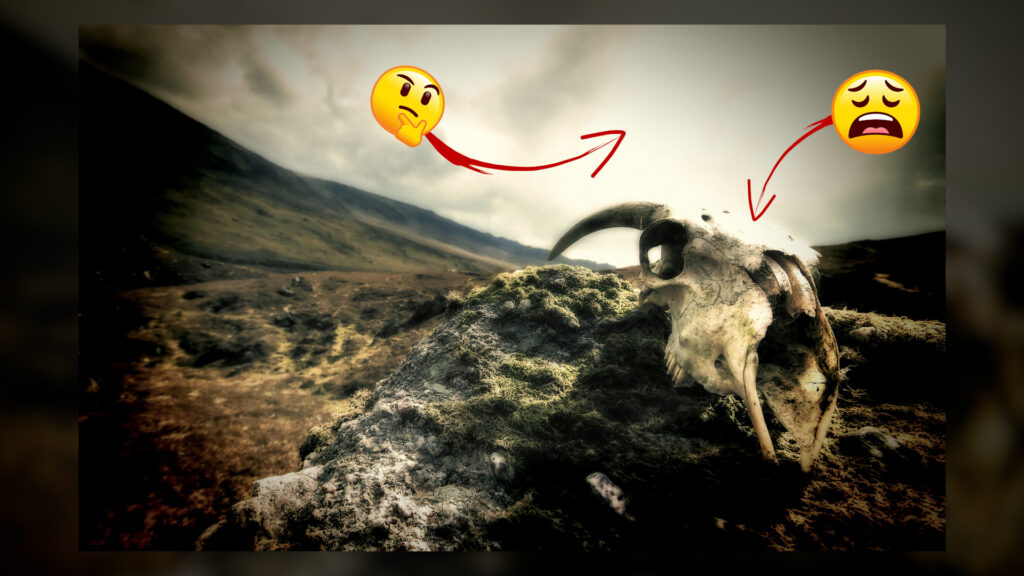
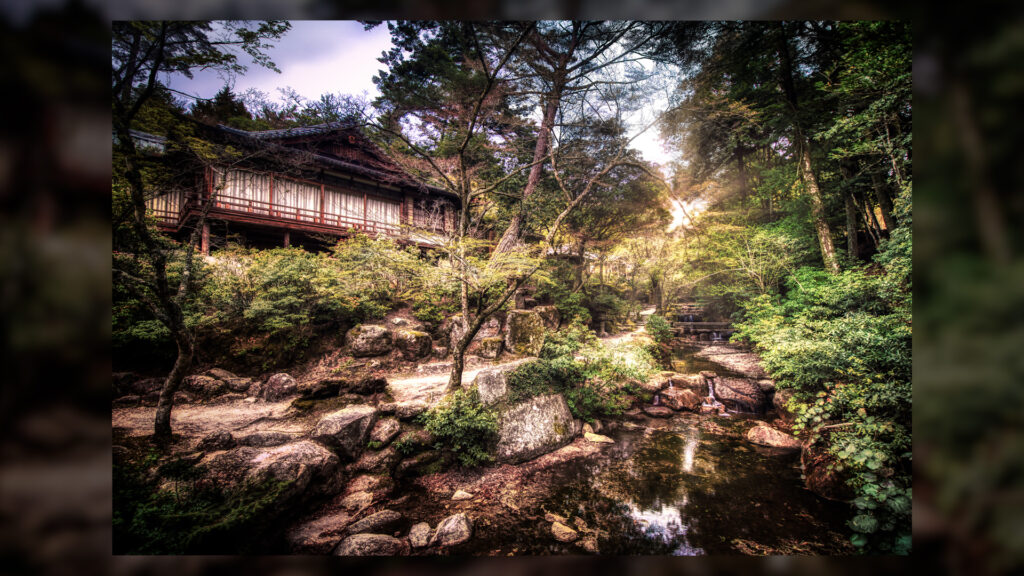
Let’s check out the below over-edited image – what am I trying to showcase here? Hell if I know – especially with this editing, this image is super busy. But am I showing the house? The river? The trees? No idea. Sometimes it makes sense to have a busy scene, like in city photography, but landscapes often benefit from a clear focus on something or at least keeping the photo as simple as possible.
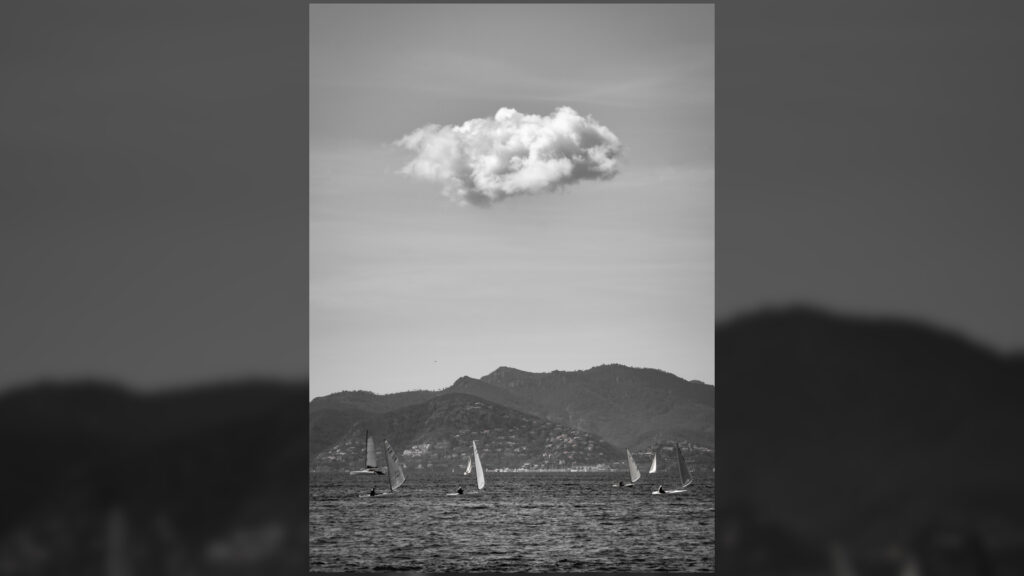
Like below – there is barely anything in the image, but it still works well cause that cloud is weird. Sometimes, having less in an image can be a better choice to not confuse the viewer – it’s not their job to find what you want to show, it’s ours to make that clear in the photo and tell a story.
#2 Thinking You Can Fix It In Post
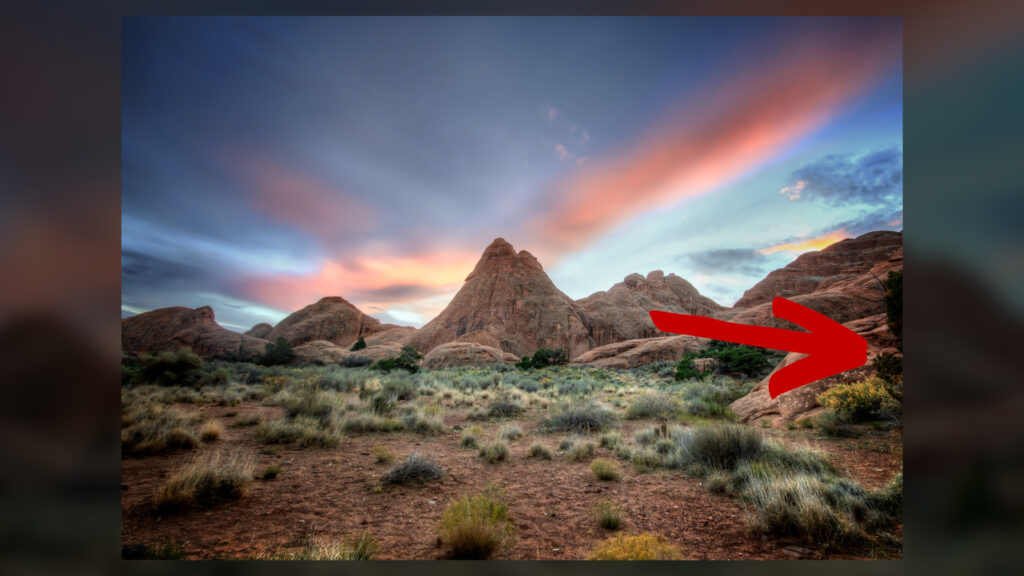
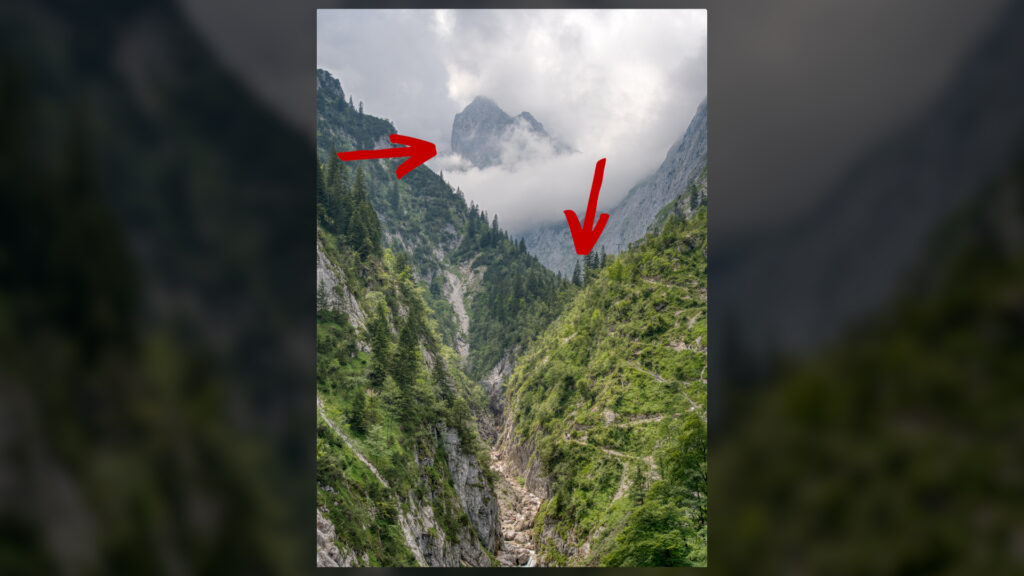
HA! I am an avid user of Photoshop and often edit the hell out of my photos – because I enjoy the process, it’s simply part of my art, so to speak. But I learned the hard way, not everything can be fixed in post! Check out the photo below – I took this shot and I even realized that the lineup isn’t great. If I would have stepped maybe 20 meters to the right, I would have lined up that mountain with the marked area and could have zoomed in for a great composition. However, I, somehow stupid for a hot second, thought I can fix that in post. Generally, fixing composition is barely possible. Next time you think ‘I fix this in post’, ask yourself – do you know how? If the answer is no, then just fix it in real life.
#1 Editing And Over-Editing
Look, I did it. We all over-edited our photos at the beginning. Don’t get me wrong, there is a market for basically every kind of photography, but especially beginners tend to go a little overboard with the editing initially. Don’t over-sharpen, it’ll look unnatural, see below. Don’t over-color, it looks like a unicorn couldn’t find the bathroom (see below).


You get the idea. A good practice when you are done with your edit is to check one of your favorite photographers that does similar work and just see if you are deviating by 2000 saturation units from what you see there, or on the internet in general. Either case, you do you.
And a bonus mistake that I still do often – try to keep having fun. Sometimes a shoot doesn’t work out for many reasons – that’s ok. Remember that you’re doing this because you like it – and if a shot doesn’t work out, stop. Enjoy the moment of being there instead, and move on. Or have a drink or so – but don’t be super disappointed. Sometimes things are outside of our control, and that ok.
There we go, these were 10 mistakes that you need to avoid as a landscape photographer – these are just my opinion, of course. Let me know what other things you see people do that ruffle your feathers – and until next time, stay safe, and have a good one.
Catch you in the next article!
Phill