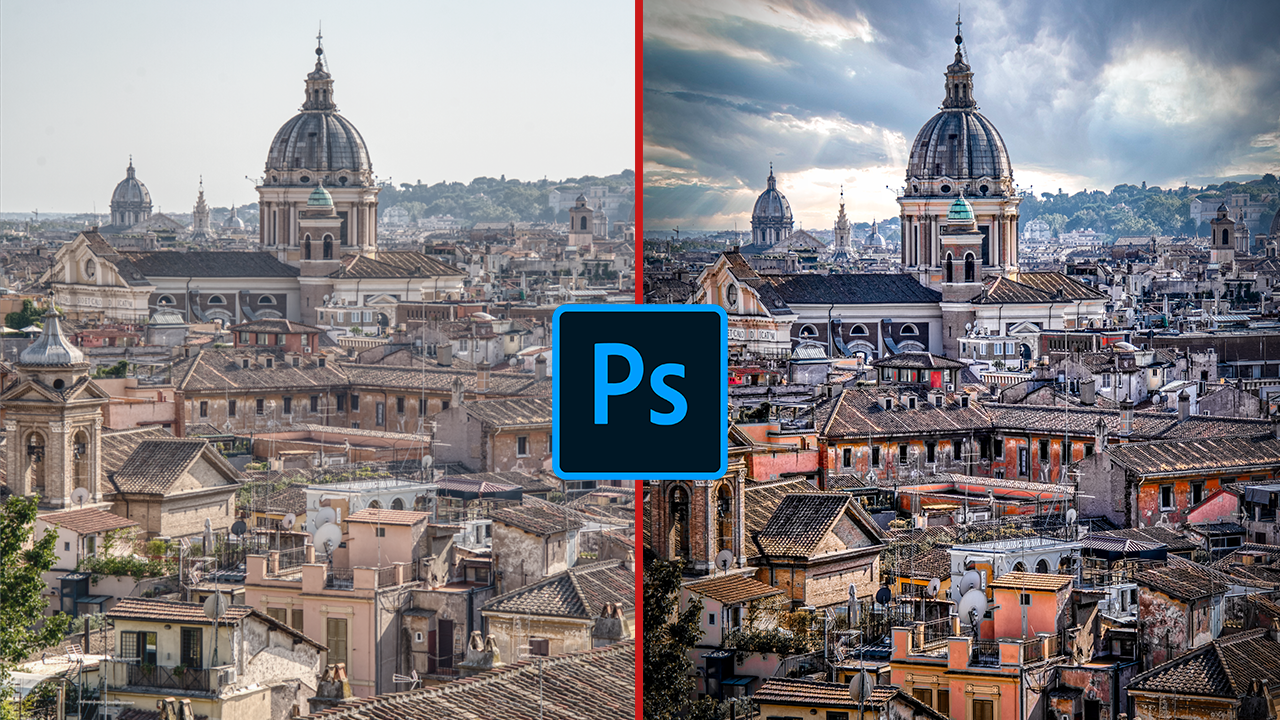
Welcome back! Today we will use Photoshop to do some very beginner-friendly photo editing on a city image. Editing City Photos in Photoshop can be easy! You can create color feels, selectively enhance structures, add some drama and more. In this video, we will:
1. Transform the photo using the transform tool – 00:35 min
2. Change the sky with one click in photoshop – 01:15 min
3. Add contrast to the photo using curve adjustments – 02:40 min
4. Change the color feeling of the photo using Hue/Saturation layers and curve adjustments – 03:00 min
5. Add a vignette using the camera raw filter – 04:20 min
6. Selectively add clarity to the buildings to make them pop – 08:00 min
If you like these sorts of videos and posts, make sure to hit the like button and consider subscribing for more Photoshop and photography tutorials! Also, let me know in the comments what you struggle with when it comes to making your city images pop!
The photo btw is from Rome – taken at around 35 degrees C! Rome was one of my few travels between the lockdowns – and as everything was basically closed, I walked a lot, as you do. This image was taken from the Villa Borghese and offers a really great view of the city. Actually, that’s not entirely true – one thing that was open was a little van shop kinda deal that sold ice-cold beer. I think I had several to cool down, hehe.