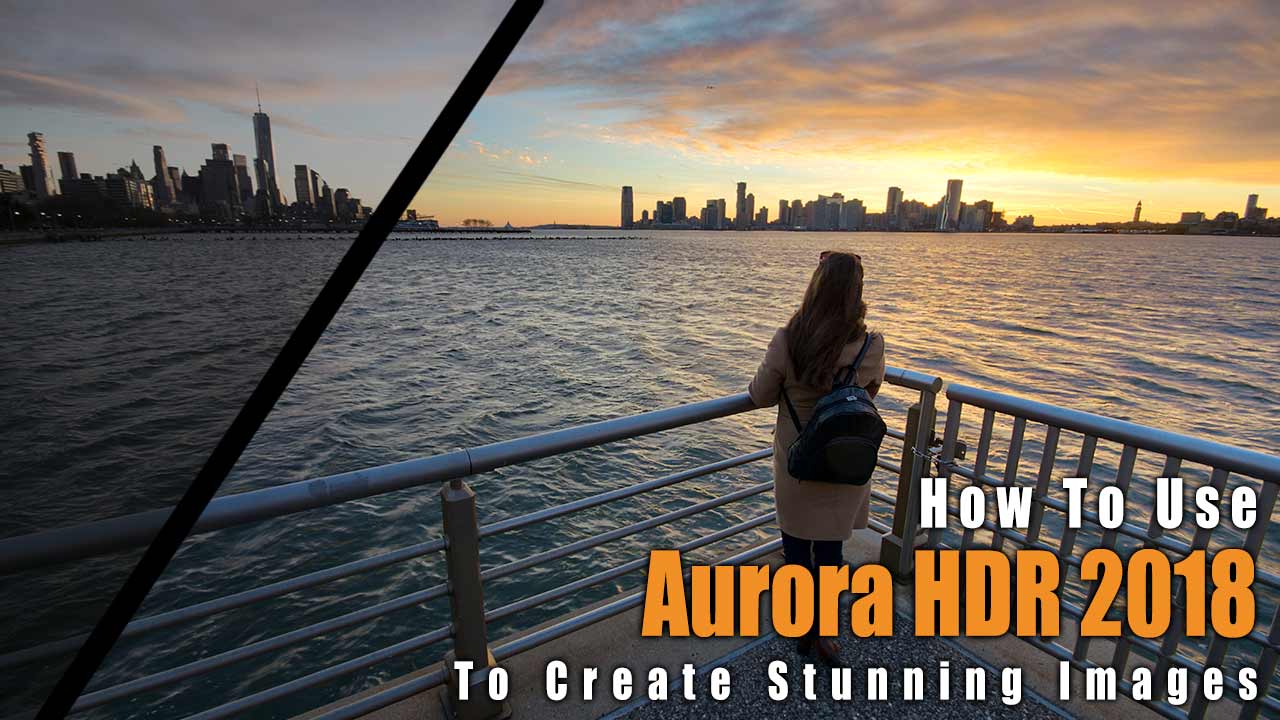
How To Use Aurora HDR 2018 – Example: A Sunset in New York
Welcome back! If you are stopping by regularly, you know that I love HDR photography – and recently found my new go-to software called Aurora HDR 2018. This is a dedicated software that does nothing else than to create HDR photos. Never heard? Read my introduction to the software here. You can also get 10% OFF Aurora if you use my Promo code ‘LETSIMAGE’ at checkout 🙂 Not sure what HDR Photography is? No worries – all you ever need to know can be found here.
Today, we will use Aurora HDR to do some basic editing to bring a sunset image that I took in New York Recently to the next level. You will love it – simple, fast, beginner friendly… what else could one want. Let’s jump right in!
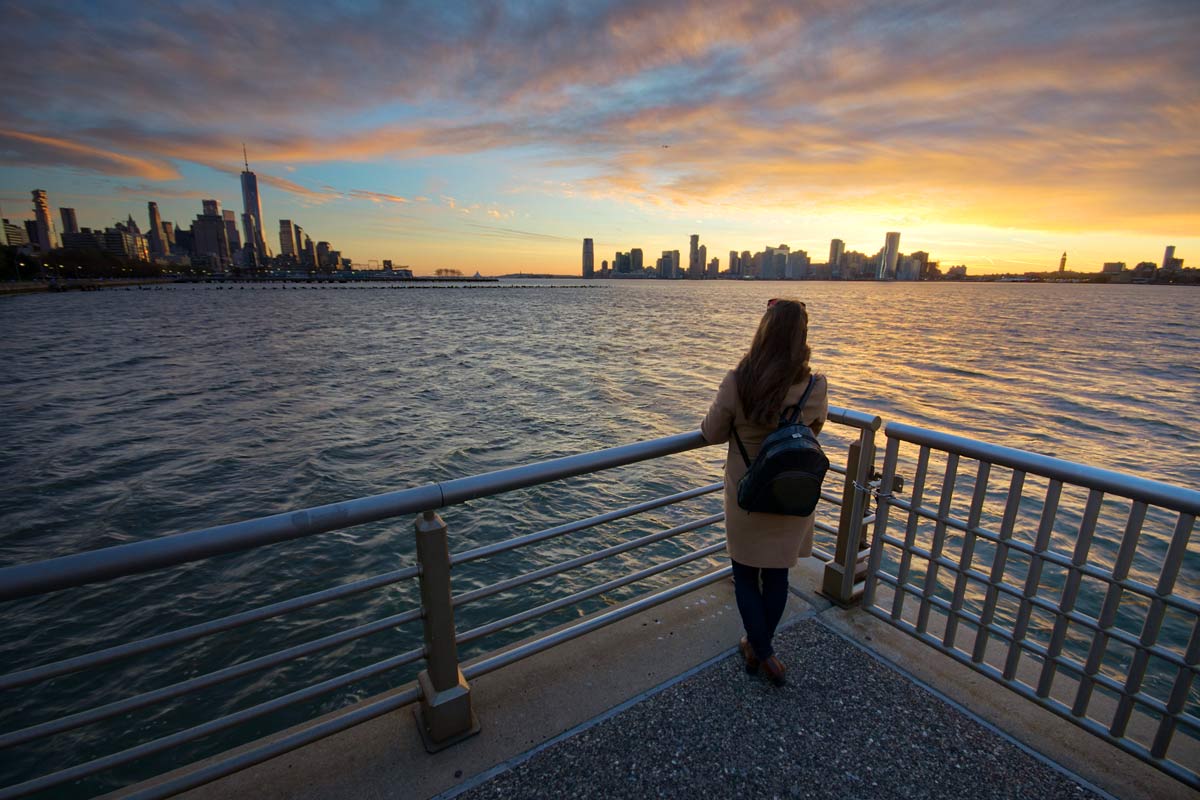
Here is the final image:
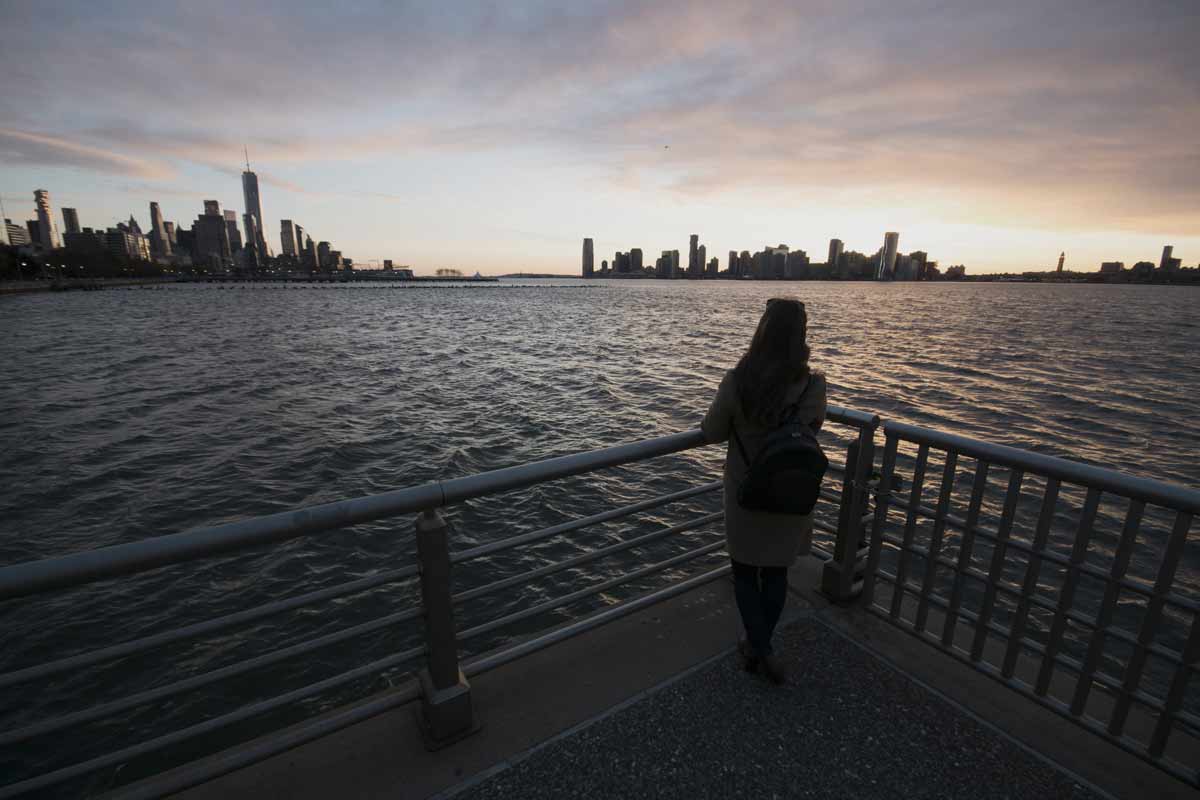
And here is the original (0-Exposure):
Step One – Fix the Sky in Aurora HDR 2018 (3:00 min)
On the top left of the image, I found some noise or grain which probably came from one of my three source images. There are several ways to get rid of it, and I decided to utilize one of Auroras great features – to bring in one of the original images as a layer. For this, I hit the ‘add layer’ button on the top right and selected ‘bracketed image’. There, I selected my 0-exposure image – Aurora will now bring this image on top of the HDR photo it created. To make sure I only bring this original image into the top left corner, I hit the little brush symbol next to the layer and selected Gradient Mask. The only thing left to do was to drag the layer into the top left and done!
Step Two – Enhance the Sunset (6:00 min)
While the HDR Photo that Aurora HDR came up with was already great, I felt like I needed to enhance the sunset a little bit to make sure it is the most prominent feature in the image. For this, I created a new adjustment layer and simply enhanced the saturation, HDR Enhance (comparable to Clarity), and the temperature. Once done, I used a gradient mask to make sure the changes are only affecting the sunset area.
Step Three – Fix the Lighting in Aurora HDR (7:10 min)
At this point, there are few things left to fix – especially related to the lighting situation. I wanted the subject to be way more lit than it was originally, but I also needed to force the eye of the beholder more towards the sunset.
So, first I created another adjustment layer, in which I increased the exposure until the subject looked nicely lit. This layer was then made visible only in the lower half of the image using a gradient mask.
Once this was done, I needed to darken down the bottom left corner – which was done in nearly the same way! I created a new adjustment layer, decreased the exposure, and painted the effect into the lower left-hand corner. All finished up.
To draw the eye even more towards the sunset itself, I finally created a vignette and placed the center on the sunset.
If you like my images, make sure to check out my portfolio! Also, if you like photography, get out there and shoot! Anything, anytime.