How to Mirror Parts of an Image in Photoshop
Hello friends of photography and Photoshop! Today I will show you how I processed an image taken in the south of Ireland. Whats that thing in the middle, you ask? It didn’t have a door, so your guess is as good as mine.
I used some simple techniques to answer the question of how to mirror parts of an image in photoshop – why? I wanted to create an arch with the clouds. Just that. So here is the final version:
And here is the original:

Part one – cleaning
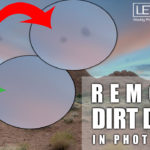
So, to start off I removed some people using the spot healing brush tool. In the video, you can see where exactly to find the tool (1 min). Here is a tip when using it: The more uniform the background is, the better the tool will work. Uniform in that sense means a consistent pattern (like water or a wall). A person standing in a crowd is going to be hard to remove, but in front of a building, this tool will do the trick.
Part two – mirror
There are – as always in Photoshop – several ways to address the question of how to mirror parts of an image in photoshop. Here, I used a very simple way because the aim was simple: mirror half the image. So, this can quickly be done using the Marquee tool (have a look around 1:50 in the video to see where it is). Draw a selection around the area you want to mirror and hit CMD J on your keyboard. This will create a new layer from the selection. Then press CMD T to just flip the new layer over (drag the corner from the image to change its orientation). Done! Couldn’t be more simple.
Part three – adjustments and cleaning up
The last steps are simple: adding some colour and contrast (after 4 min). This is a matter of simply using the adjustment layers on top of your normal layers and using layer masks to adjust whatever you want. Too fast? First, get familiar with layers before you do anything with that. Have a look here, I explain how layers work for someone who hasn’t used Photoshop before.
I used a radial blur to give the impression of the clouds actually moving slightly. For this, I made a layer which contained all and everything which had happened before. Such a so called stamp visible can be done by pressing CMD alt shift e. Then, with this layer selected, I went to Filter->Blur->RadialBlur. Then I used layer masks to remove the effect from the ground and the water (too fast? Have a look here first). That is all there is on how to mirror parts of an image in photoshop.
Here is a list of keyboard shortcuts I have used during the processing. I encourage you to use them too, they will speed up your work (or pleasure?) quite a bit!
- CMD J to duplicate a layer or selection
- b to select the brush tool
- c to select the crop tool
- CMD alt shift e to perform a stamp visible (all that is visible onto a new layer)
- x to change between black and white when having the brush selected
- CMD T to transform a layer or text (anything, really)
If you like my images, make sure to check out my complete portfolio here!