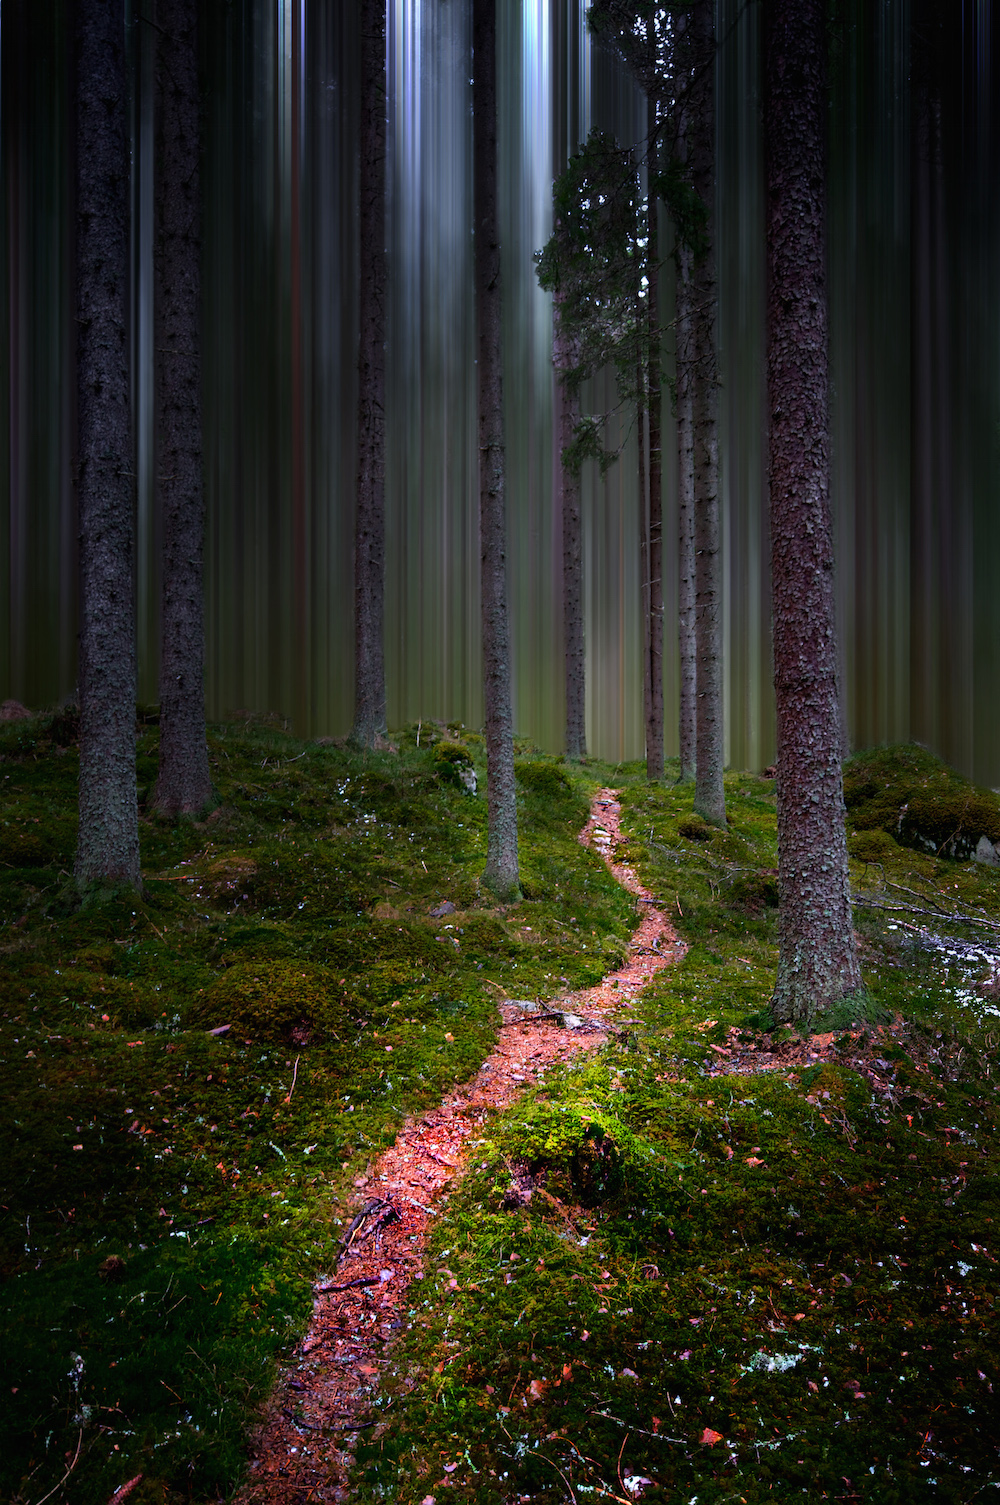
First I will show you the final image, then where I started and how I did it:
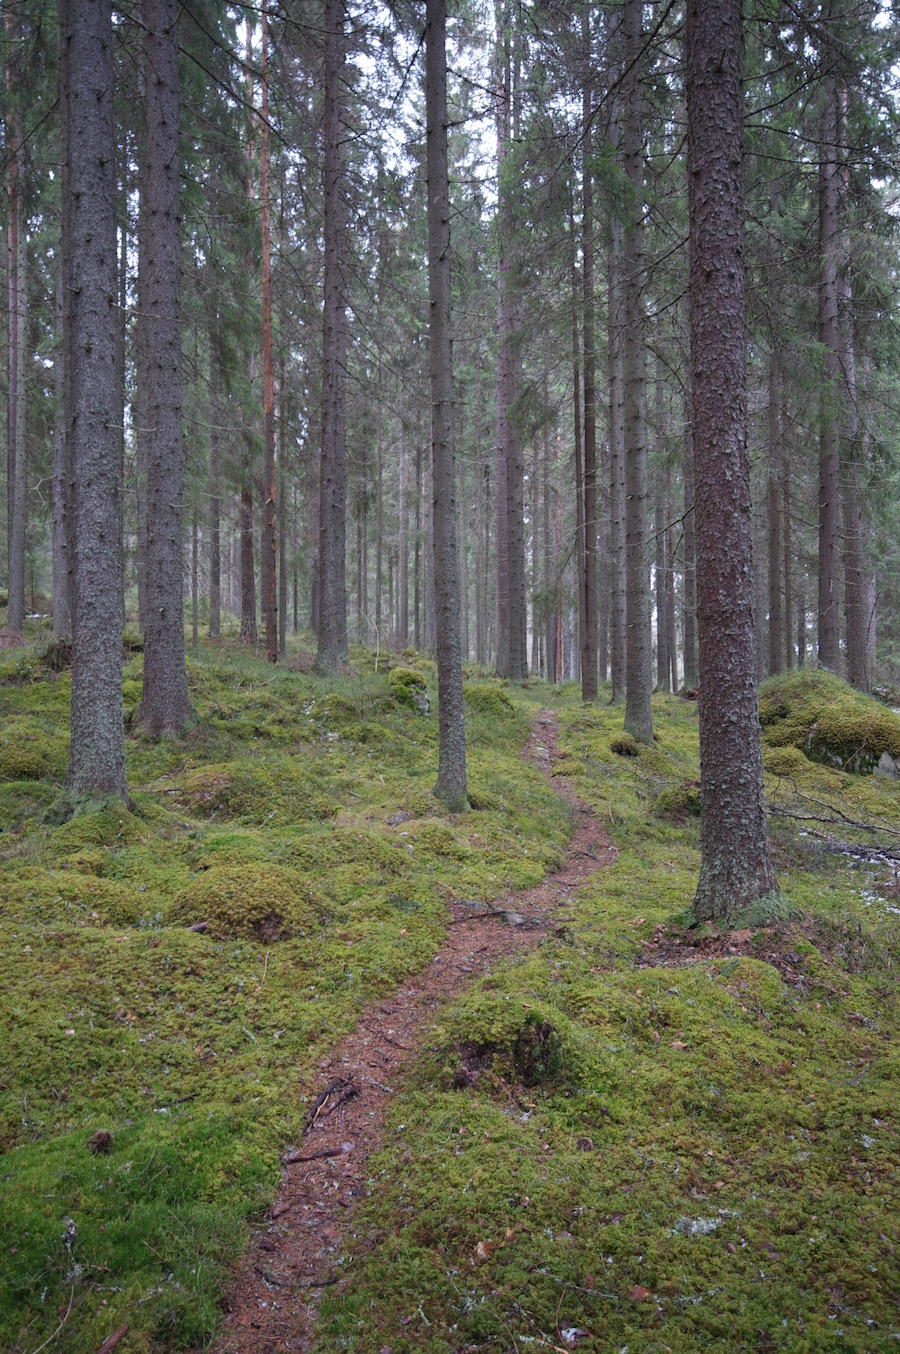
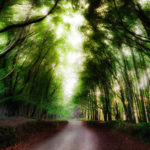
The original was taken in Norway, close to a place called Hytialla. It actually felt a little bit magic to be there in this massive forest where this little path was going through constantly. This is the Original Image:
When I looked at the original image I wasn’t happy at all! It looked dull, grey and boring, but with a little photoshop now can reshape an image to the hearths desire. Have a look (later this week) at my tutorials to see some explanations of layers and HDR! So here is how I did it.
I used a software called Photomatix to create an HDR version of the original. This enhanced the overall saturation, contrast and clarity and I ended up with a very colourful version. I then loaded the original and the HDR image into Photoshop as layers. First I concentrated on the grass and the path which in the original was just too boring. In the HDR version, the grass looked quite dramatic so I used the HDR version as the top layer and the original version as the second layer. I doubled both of these layers by clicking on one after the other and pressing STGR+J (or CMD+J on a Mac). I put the copies at the bottom of the layer stack and made them invisible by clicking on the little eye icon on the left go the layer. I always do that to safe my original layers in case I screw up hehe.
Having the HDR layer on top followed by the original version under it, I enhanced the contrast a little more using the contrast adjustment (above the layers is the adjustment pallet, one of these symbols there is the contrast and the brightness). I doubled this HDR layer and enhanced the brightness just in the top one using curves. So now I had two HDR layers: one with enhanced brightness and one without. I moved the one without enhanced brightness on top. Then a layer mask was created (the symbol looks like a small Japanese flag just at the bottom of the layers) and I used a brush (press b if you want to use a shortcut) to bring up the brighter path from the layer beneath. This way I got this dark grass around the path with the path itself being so bright.
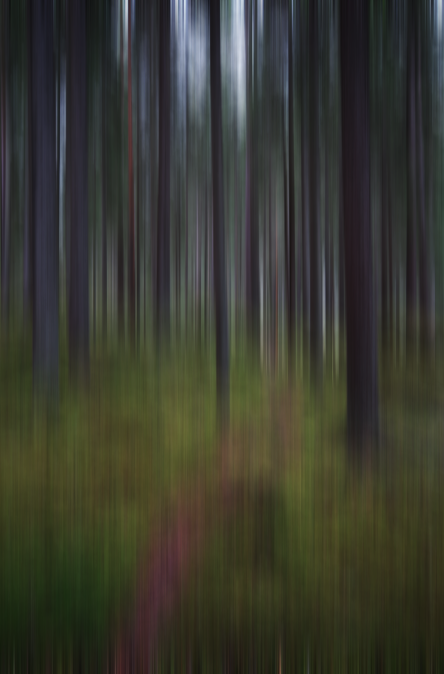
The trees were a little tricky and, to be honest, I had to experiment a lot to figure out how to do that. I combined all my layers into one (except the two invisible ones I made at the start as a backup) and copied the resulting layer 3 times (CMD+J x 3). I selected the top layer and went to Filter – Blur – Motion Blur. There I chose a vertical blur and moved the slider in the middle. If you press OK, all the image will look a little strange:

But no worries, thats all part of the plan! This blurry layer is now on the top, which is not what we want. I moved a normal version of this layer to the top again. Then create a layer mask, choose the brush on full opacity. Now I moved the brush over the areas between the trees to bring up the blurry background. This was a little tricky since you have to go back and forth to see where to brush, but with a little patience I got the version you saw on top of this post. I finished with some vignetting, which in this case I did by doubling my final layer, darkening one a lot and brush the areas I wanted to be dark through. And thats it!
If you like my images, make sure to check out my portfolio! Want to know something in particular? Leave a comment!
Related Posts
-
-
-
-
-
The TowerI love towers. All of them. The taller the better hehe. This one was in…