
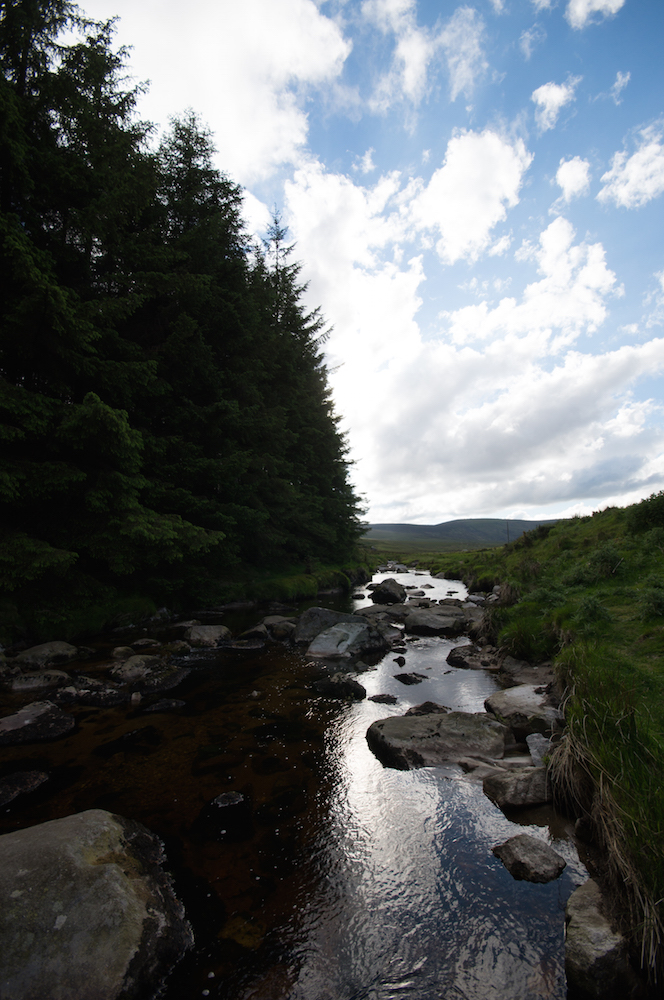
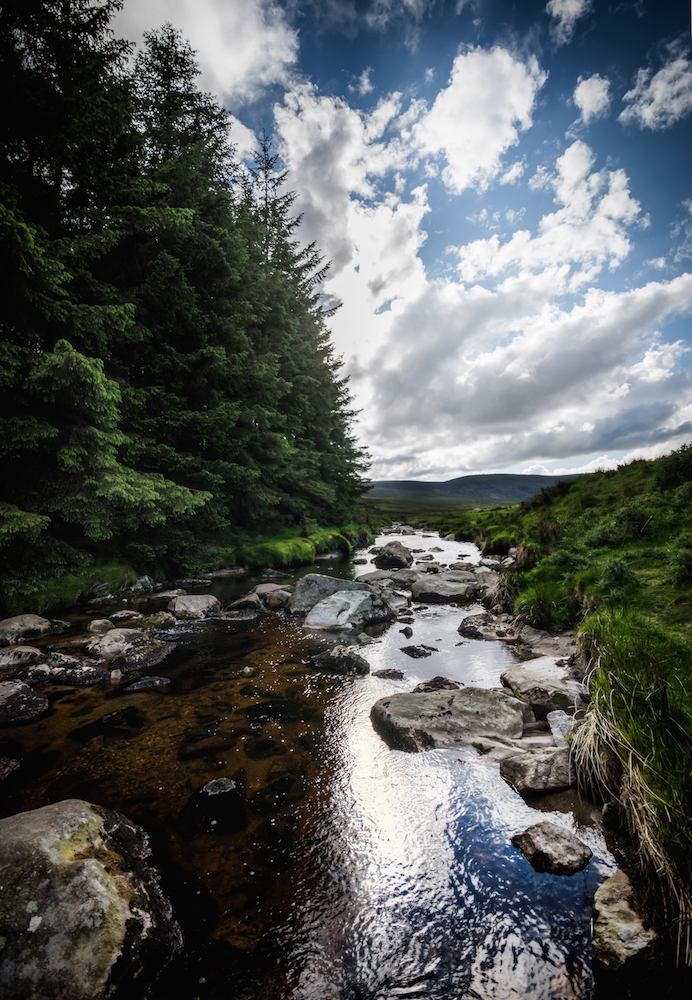
Nature shots are still my absolute favourite! It is indeed a little tricky to get out often if you have a job as well, but when I do I am like a little child, running around and shooting away constantly. This one was a quick shot while crossing this neat river – the final version looks like this:

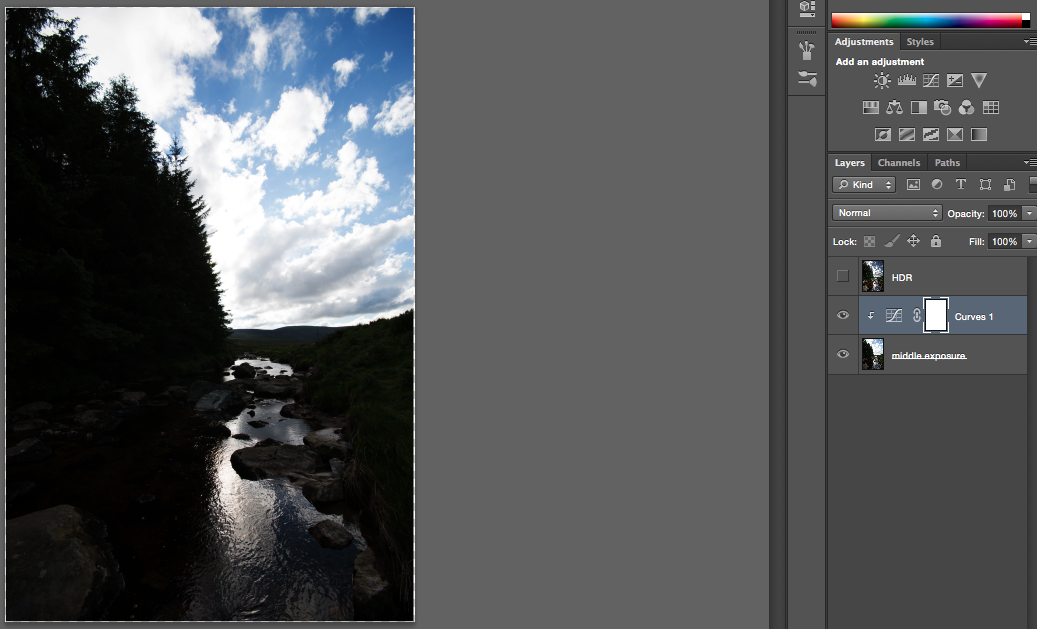
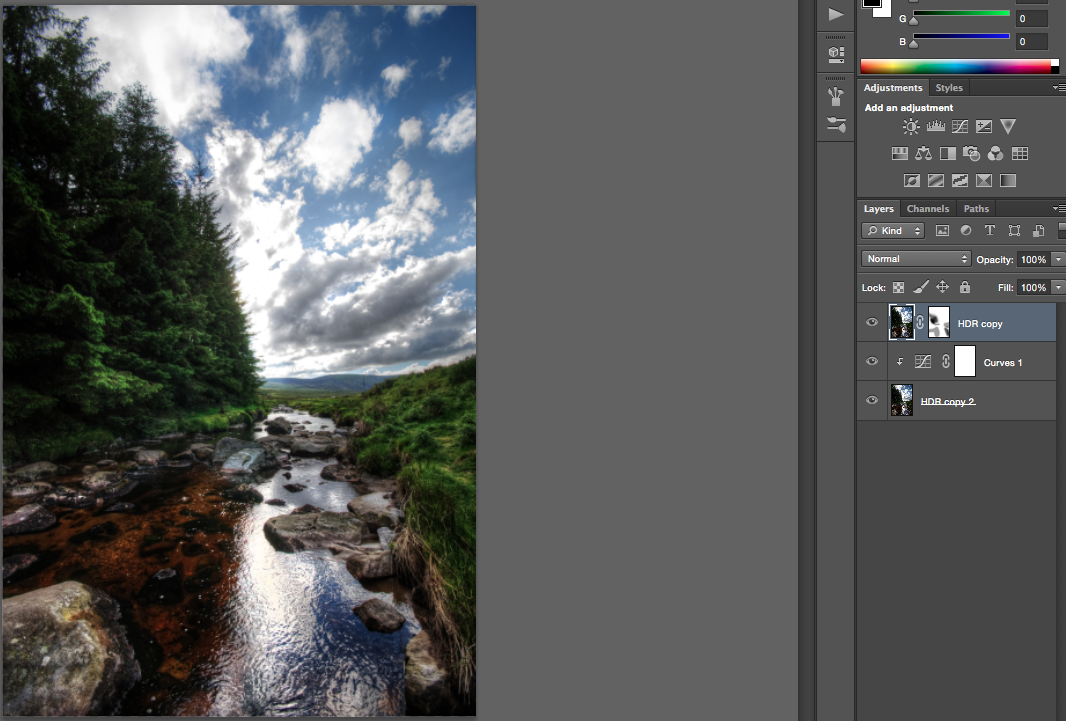
The original (I used HDR techniques, so this one was the 0 exposure – never dealt with HDR? Read this first) looked like this:
So thats how I did it:
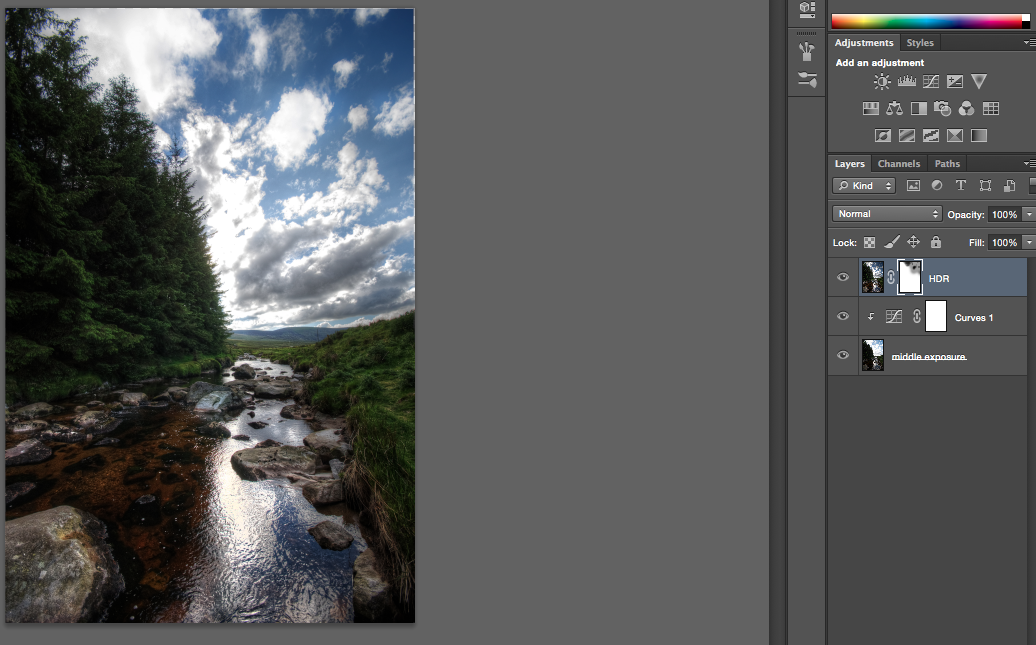
Using HDR style, I used three shots, a 0, -2 and +2 exposure image. I fed them to Photomatix to create a HDR version and loaded this version and the 0 exposure image into photoshop as layers.
Never used Photoshop and would like to understand how to work with layers? Read this first!
Once in there, I selected Edit-> Auto align layers, which did a good job as always. I then compared the HDR to the original version and concluded that the only thing from the original I liked was the sky – it wasn’t all that dramatic and crazy as it was in the HDR version.
So, first I selected the second layer and reduced the brightness by using the curve adjustment tool. To do so, I just changed the line in the curve tool to a U-shape to reduce the general brightness.
Then I created a layer mask by selecting the first layer again followed by the little Japanese flag at the bottom of the layer panel. I pressed B on the keyboard to select the brush and then I went over the areas of the clouds I wanted.
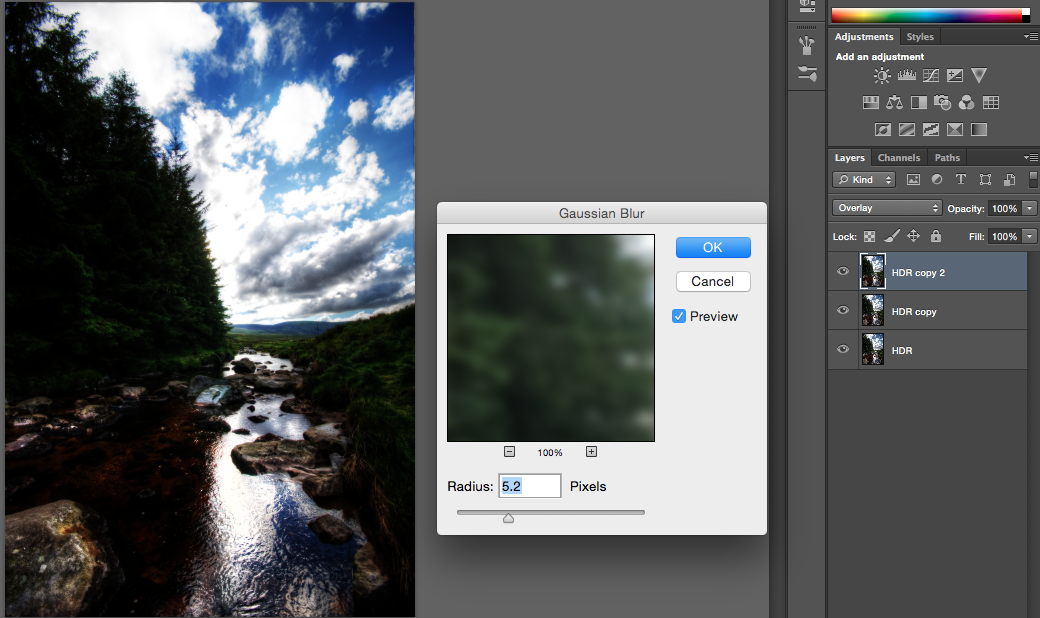
After doing so, I merged everything by pressing CMD+SHIFT+E and copied the resulting layer 3x with CMD+J.
I selected the first layer and used overlay as the blending mode, followed by some gaussian blur.
That made it a little dark, so I used the curve tool again to increase the brightness and tied the curve to the layer (little arrow at the bottom of the adjustment window).

I then brought up the layer at the bottom to the top, created a layer mask and used my bush at 50% opacity.

The trees were still a little too dark, so I used the curve tool once more to increase the brightness for one layer.

I put the dark layer on top and used a layer mask again to brush through the brighter areas I liked.
I did some cropping and a little bit of vignetting and that was it!
Like my images? Have a look at my complete portfolio and follow me on any social media known to mankind!

This is a topic that is near to my heart…
Take care! Exactly where are your contact details though? http://www.yahoo.net
Thanks 🙂 You can always just pop a comment below any post or head to the ‘About Me’ page, at the bottom is a contact form. Happy processing!