How to Boost Your Landscape Images using Photoshop and Aurora HDR 2018 – Example: The Incredible
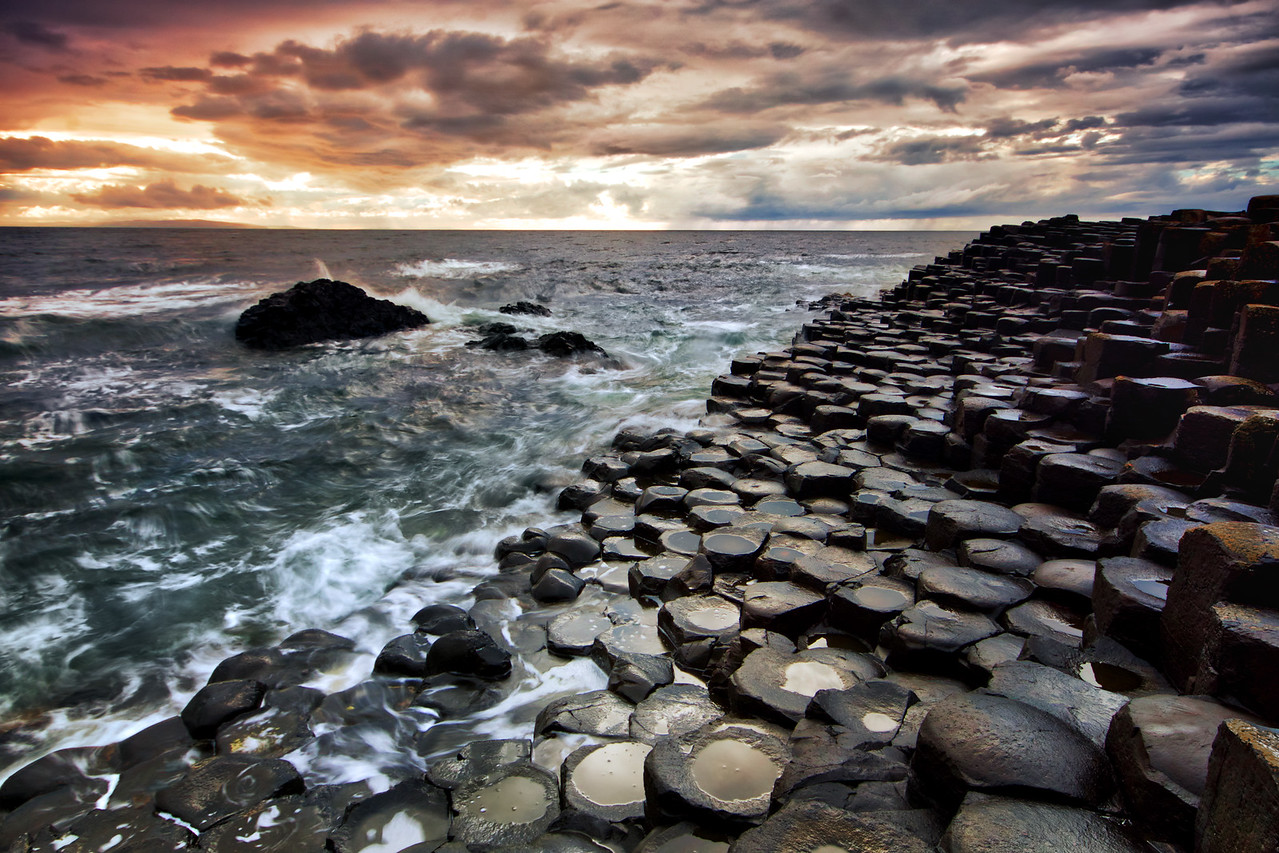
Welcome back! Today I will take you with me to one of the most amazing places that I have ever seen – The Giants Causeway in Ireland. You will see it at the beginning of the video, but the stone formations that you can find there are absolutely unreal. I am still wondering how this can be a thing to be honest haha.
Now, as I came home with something like 40 GB worth of images, I am finally digging through to filter out the ones that I really like – which leads us to today’s image processing tutorial. We will use Aurora HDR 2018 as well as Photoshop CC to pimp a shot from the Giants Causeway by enhancing and adding sunset colours, fixing the lighting situation a little and giving the image an overall crisp and contrasty look. Let’s go and boost that landscape image!
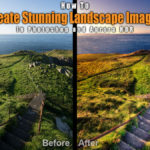
Here is the final image:
And here is the original (0 exposure):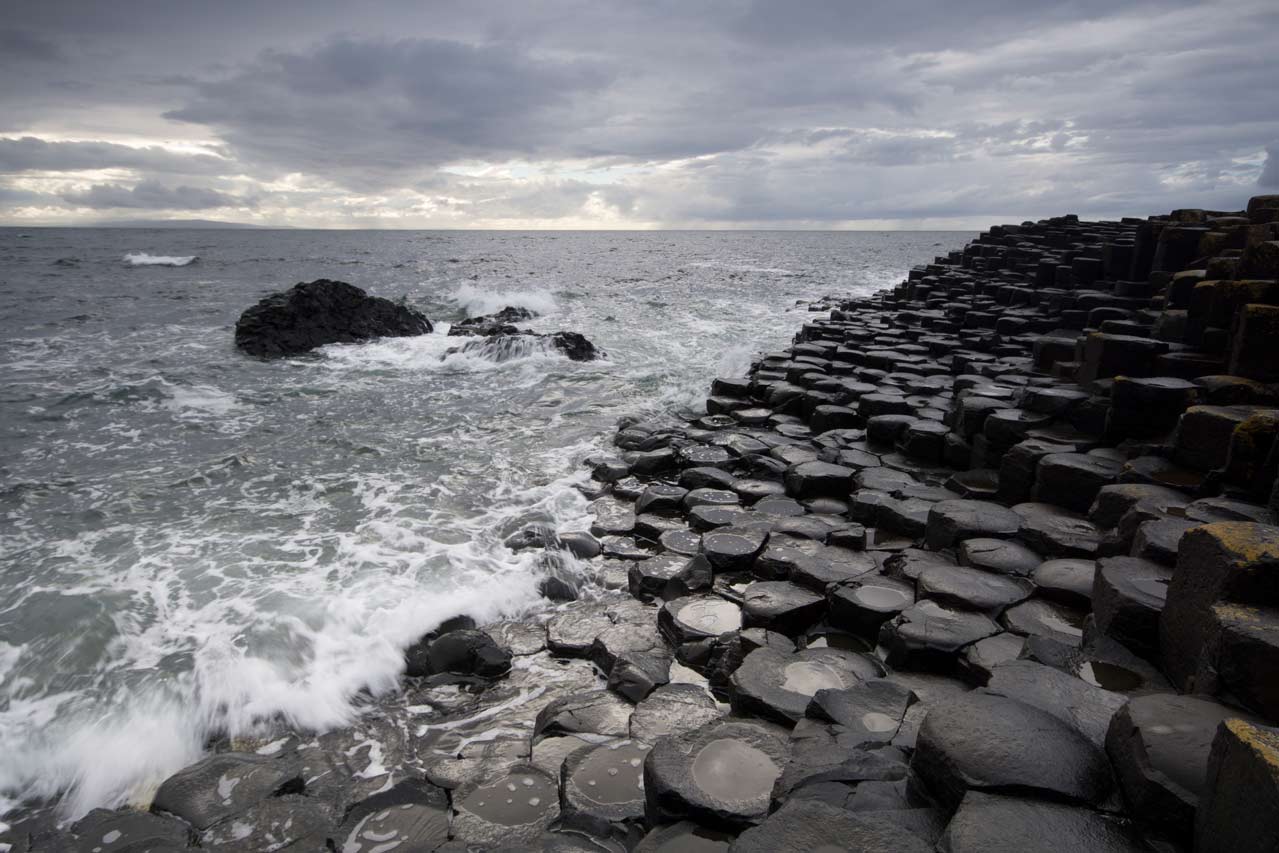
Step One: Create an HDR Image in Aurora HDR 2018 (2:30 min)
The reason for us having to use two softwares is the use of a technique called HDR Photography. In such, you take 3 (or more or less) shots with different exposures and combine them later to get an evenly exposed image. You can do this combination with many softwares such as Photomatix, Lightroom, Photoshop itself – but I am a massive fan of MacPhun and Aurora HDR so I will use this one in this tutorial. Keep in mind that you can use any other HDR software out there if you feel like – I will just show you what I did 🙂 For the Aurora HDR creation part, head to the video to get a better idea as I really just moved some sliders along which would be difficult to describe here.
Step Two: Darken the Edges of the Image in Photoshop (7:00 min)
When the image came out of Aurora HDR, it looked great already but had edges were a little bight. To get a better feeling of the image for further processing, I decided to fix this first.
Creating a dark edge in Photoshop is easy. First, I created a Curve Adjustment layer where I dragged the curve downwards. This darkens the whole image, so the next thing was to use a layer mask and a nice soft white brush to paint the darkness into the image. I did this a couple of times dur9ing the editing process, whenever I realised that the image is still too bright.
Step Three: Create Sunset Colours in Photoshop (9:00 min)
If you know my work, you might have seen quite often that I create my own sunsets. This happens sometimes more and sometimes less drastic, but in this case, I needed (well, wanted) to add some nice sunset colours into the sky using Photoshop.
For that, I first created a new layer (an empty one) and filled it with a nice orange. You can, of course, use any colour once you do this yourself. Once the colour was in, I changed the blending mode to soft light and used the Blend-If function to show the orange only in the mid tones. To get this done, just click on the layer twice and the blend-if will open up (check the video for details and my specific settings). Using a layer mask, I made sure that the effect os only visible on the top left of my image. I then intensified the colours a little using a Hue/Saturation layer as well as a curve, in which I darkened down the image.
I threw all these adjustments that were connected to the sunset colours into a separate folder and used a layer mask on the folder to paint the effect into the sky and parts of the foreground.
That was it, really! There were some little bits and bobs that I used as well, but they did not really have any significance for the image, especially not for the tutorial! In any case, I hope you enjoyed the use of Aurora HDR as well as Photoshop and this landscape tutorial 🙂
Remember, shortcuts make your life easier and can speed up your processing a lot! Here is what I used in this image and most of my landscape and outdoor Photoshop tutorials:
B for the brush
X to change foreground colours
V for the move tool
G for the bucket tool or the gradient tool
Shift Backspace to fill a layer mask with black or white
CMD J to duplicate a layer or a selection
CMD I to invert
CMD Alt Shift N to get a new layer
CMD Alt Shift E to get a stamp visible
On a Windows PC, just replace the CMD with Ctrl.
If you like my images, make sure to check out my portfolio!