How to Add Stars in Photoshop – Merlins Home| Photoshop Tutorials
Welcome back to the next of my Photoshop tutorials! Recently, my buddy Shane and I went on a road trip through the south of Ireland for a long weekend. It has been a super long Saturday and an even longer Sunday – driving for 9h a day does come at a cost, especially when the car has to stop every 150m for us to grab the tripod and head into the land. Anyway, on the way back to Dublin on Sunday night, Shane suddenly stopped the car and jumped out as if he has seen the greatest motive of all times.
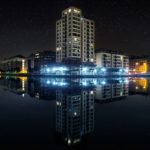
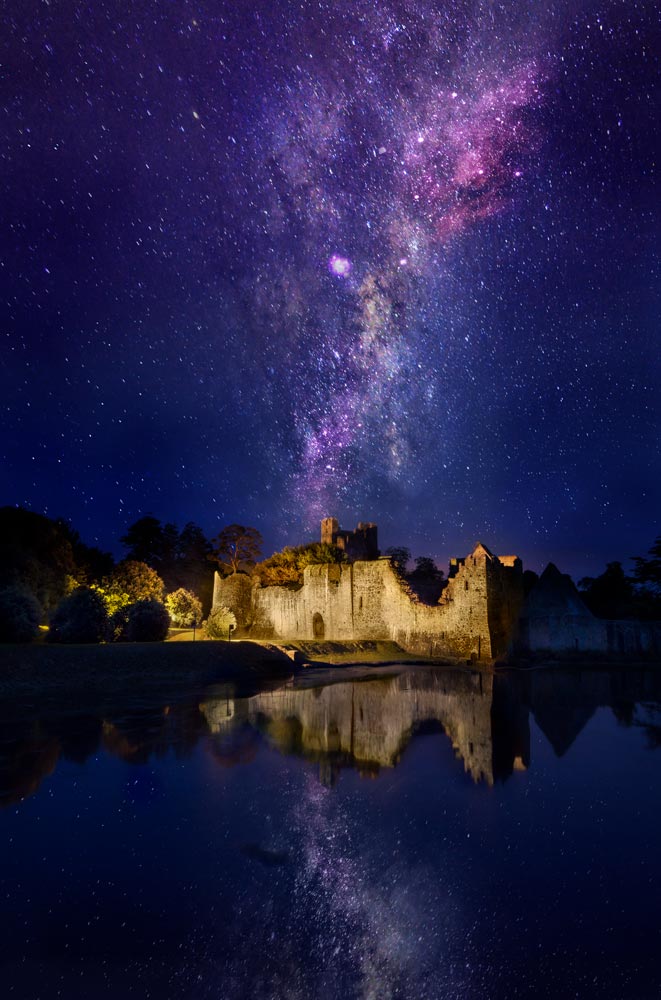
I realised what he saw when I looked down from the bridge where we stopped the car (!) – this castle, I am sure it is very famous, just stood there with a perfect reflection and an incredibly uniform sky. In my mind, I just saw this place with the milky way across, which is why this post and the image below exists.
I hope one day I will actually know the name of the place – I might even have been there before, but it was dark and I was trying not to be hit by passing cars, so I did not even try to figure it out in the moment. Well, it is done now! I have loads more processing examples where I work on night images – check them out! Remember, if you like the video, make sure to subscribe for more weekly Photoshop and Photography action!
Here is the final image:
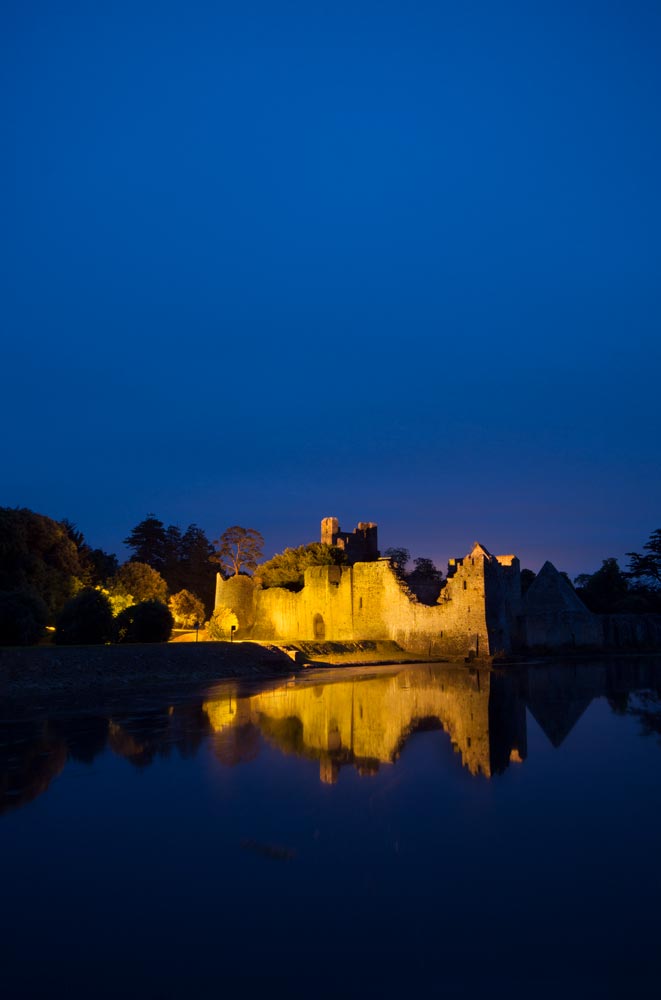
And here is the original:
Part One – Darkening the Sky (1:00 min)
In order to make sure the stars have a nice and dark background, I first needed to darken the sky. For this, I used first a Level Adjustment where I dragged the Darkness Sliders to the right. Once the sky was a little darker, I hit CMD+I (invert mask) and then G on my keyboard to get the Gradient Tool. I dragged from the top down with a white colour to make the effect only visible in the sky. I did the same thing with a Curve Adjustment to darken the sky further.
To go even darker, I created a so called Stamp Visible (Cmd+Alt+Shift+E) which copies everything that is visible onto a new layer. After changing the Blending mode of that layer to Overlay, I copied the layer three times and used a layer mask and a Brush to bring the effect up where I needed it. For one of the Overlay copies, I also brought the effect out in the water area to make sure this place is kind of dark as well.
Have you ever worked with layer masks? If not, have a look at this first to get started. You can also check out the awesome work of Aaron Nace, he explains awesomely.
Part Two – Add the Stars (6:00 min)
First I had to find myself some nice images of a Milky Way. I usually do not like to use anything I have not produced myself when it comes to images, but in this case, I am not sure I will ever get the chance to take a shot in the style I need. So, I went on pexels.com and downloaded two images of the stars (you can take any you like!). I used the Transform Tool (CMD+T) and the Move Tool (V) to get the star images in the places where I want them.
To make sure that only the stars are visible in my image, I changed the Blending Mode to Screen. This will hide dark places in an image and only the bright ones remain. You can adjust this effect by creating a Levels Adjustment layer and tieing it to the Screen layer (CMD+Alt+G) – meaning that the Levels Adjustment will only affect the Screen layer. Changing the levels will then hide or show certain areas in the image. I finished the stars off using a simple brush and layer mask. I combined both of my star images this way!
Part Three – Creating the Reflection (12:45 min)
It is time to bring these stars into the water. For this, I grouped all my previous work I have done on the sky (CMD+G) and duplicated the group (CMD+G). Having this group selected, I hit CMD+T to transform the group and used right click to flip the group over. The reflection should not be as strong in colour as the original in the sky, which is why I reduced the opacity a little and used layer mask and brush to hide the reflection (or at least weaken it) in some places.
The colours should be a little more blue in the actual water, therefore I thought I adjust them very slightly. I created a new layer (CMD+Alt+Shift+N) and changed its Blending Mode to Colour. Then I used a brush and a colour from the water and painted this over the water with a low opacity.
Part Four – Blurring the Reflection (22:00 min)
To make sure the reflection is not as sharp as the original, I decided to blur the stars a little. For this, I created a Stamp Visible (Cmd+Alt+Shift+E) and went to Filter-Blur-Motion Blur to create just a little bit of Blur. I also used a Hue/Saturation layer to reduce the colour in the water just a tiny bit – I wanted to have the attention on the sky! Once this was done, I used a layer mask and a brush to bring the effect through only in some places.
In my original processing, I also added some minor waves to the water using the Displacement Method – but this I will leave for another time as the video was running long without that part already haha. And that is all there is to add stars in Photoshop.
Remember, shortcuts make your life easier and can speed up your processing a lot! As always in my Photoshop tutorials, here is what I used in this image to add stars in Photoshop:
CMD+Alt+Shift+E to create a stamp visible
B for the brush
G for the gradient tool
X to change between background and foreground colours
CMD+I to invert anything
CMD+J to duplicate a layer or a selection
Shift+M to get the Ellipse tool
CMD+Alt+Shift+N to get a new layer
Shift+Backspace to fill a selection with black or white
Alt+Drag to relocate layer masks
CMD+Alt+G to clip a layer to the one beneath
V to get the move tool
If you like my images, make sure to check out my portfolio!
Don’t forget to get out there and take some pictures yourself! I hope you enjoy my Photoshop tutorials, see you next time.