Photoshop is great when it comes to post process your images – but it can be hard to start at times as there are hundreds of functions and tools to be used. One great thing you wanna consider to get familiar with is the principle of layers.
What are layers?
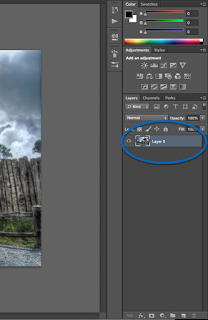
Layers in Photoshop can be seen as a stack of images. Imagine having several printed photos from a landscape on a table and you put one on top of each other – same thing. In Photoshop, you can see the layer panel here:
If you load an image into photoshop, it’ll show up there. For most people, this is sort of the operation base from where you control everything! Around the panel, there are tons of features from which I have picked some (for me) important ones which can help you a lot working on your images. The 5 things you need to know to understand and work with layers are:
1. Visibility
2. Adjustments
3. Opacity
4. Blending
5. Layer mask
Lets go through them one by one, starting with
1. Visibility
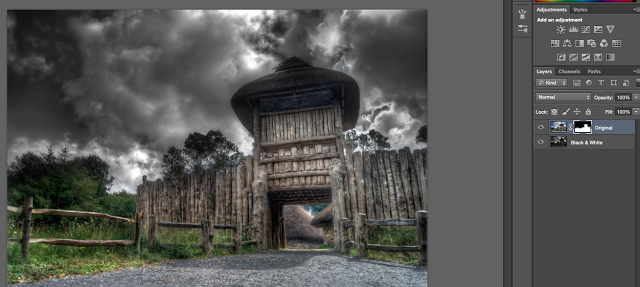
In the above image, you see three layers: Dark on top, Black and white in the middle and the Original layer on the bottom. If you remember the “printed images on a table” rule, these 3 versions of my image are stacked with the Dark on top – so only the dark one is visible as it “covers” the other two.
If you click on the little eye symbol on the right of your top layer (see number one in the image above) you are going to hide this layer and make the one beneath visible. If you have different versions of an image and slowly accumulate several layers, its very handy to be able to go through them by making others invisible.
2. Adjustments
In the adjustment panel you have 16 symbols which can deliver a whole lot of magic. So how do you apply these things to a layer?
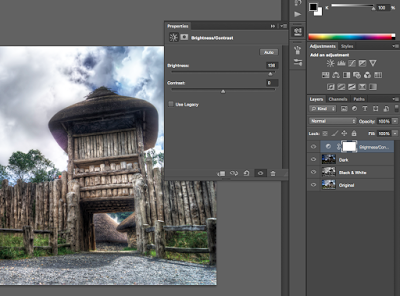
Say the top layer – called Dark – is too dark (hehe) and you wanna light it up. Select the layer and click on the little sun symbol which can change the brightness and the contrast. A panel will open where you can change the brightness and if you increase it, you will brighten the layer. See how the dark layer became bright:
If you look closely, you’ll see that above the layer “Dark” another thing appeared: an adjustment mask or adjustment layer! This mask does the following: Every layer under the adjustment mask will have an increased brightness. If you want just the one below to have an increased brightness, click this little symbol:
This will tie the brightness adjustment to only one layer.
So how can you use that? You can load an image into photoshop and copy the initial layer 3 or so times (press CMD/STRG + J). Then select the top layer and choose an adjustment, for example increased contrast. Lets use the image above with the wooden fort – Increasing the contrast maybe does a little too much to the wood and the clouds, but looks just nice for the path. What do you do? ideally you’d combine the layer with the enhanced contrast and the original. One way is:
3. Opacity
Opacity is a nice tool to combine two layers. If you select the top layer of however many you have and you reduce the opacity to say 50%, that means that 50% from the top layer will be visible and 50% from the layer under. Once you’re happy with a certain combination, press CMD/STRG + shift + E to combine everything into one layer the way you see it.
4. Blending
This point deserves a tutorial on its own at some time and I can really just recommend one thing: experiment, experiment, experiment!
If you have two layers (even if they’re the same!) and you click through the different blending modes you see some really cool stuff.
Tip: Want to have some super contrast and saturation effect? Choose the top layer and select Overlay as the blending mode. You’ll love it.
5. Layer Mask
Best for last. Remember Opacity? The slider which lets you combine two images by blending one into the other? It can be even better (but a little more complicated).
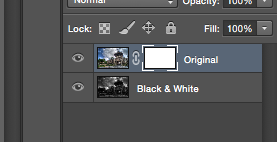
Say you have two layers. Your original and a black and white version and, for some reason or another you want to combine parts of them.
Lets say the sky is the thing you want to have in black and white. Do this:
- Select the top layer
- Select layer mask at the bottom of the layer panel (little Japanese flag)
- Then press b on your keyboard to select the brush. If you want to have 100% of the layer beneath visible, set the opacity to 100% like this:
- Now simply hold your left mouse button pressed while you go over the regions where you want the black and white version to appear.
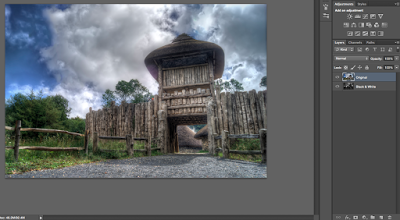
- If you go over the sky, you could get something like this:
Notice, if you look at the layers panel, you see the layer mask next to the top layer. This layer mask is half black and half white. The black areas are where you basically cut away the top layer and made the one beneath visible. When you think on the images stacked on a table, this is like taking scissors and cutting out areas from the top image to see the one under.
You now know what layers are and how to use them, so go for it!
Load an image into Photoshop, create 10 layers, work on all of them and combine them in any way you want.
Like the Wooden Fort image? Check the final version and some other great HDR images at my portfolio!







6 Replies to “Understand Photoshop Layers”
Comments are closed.