https://youtu.be/K-r8eoDbG78
How to Create an Old Photo Effect in Photoshop – Example: Old Stones | Photoshop Tutorial
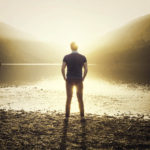
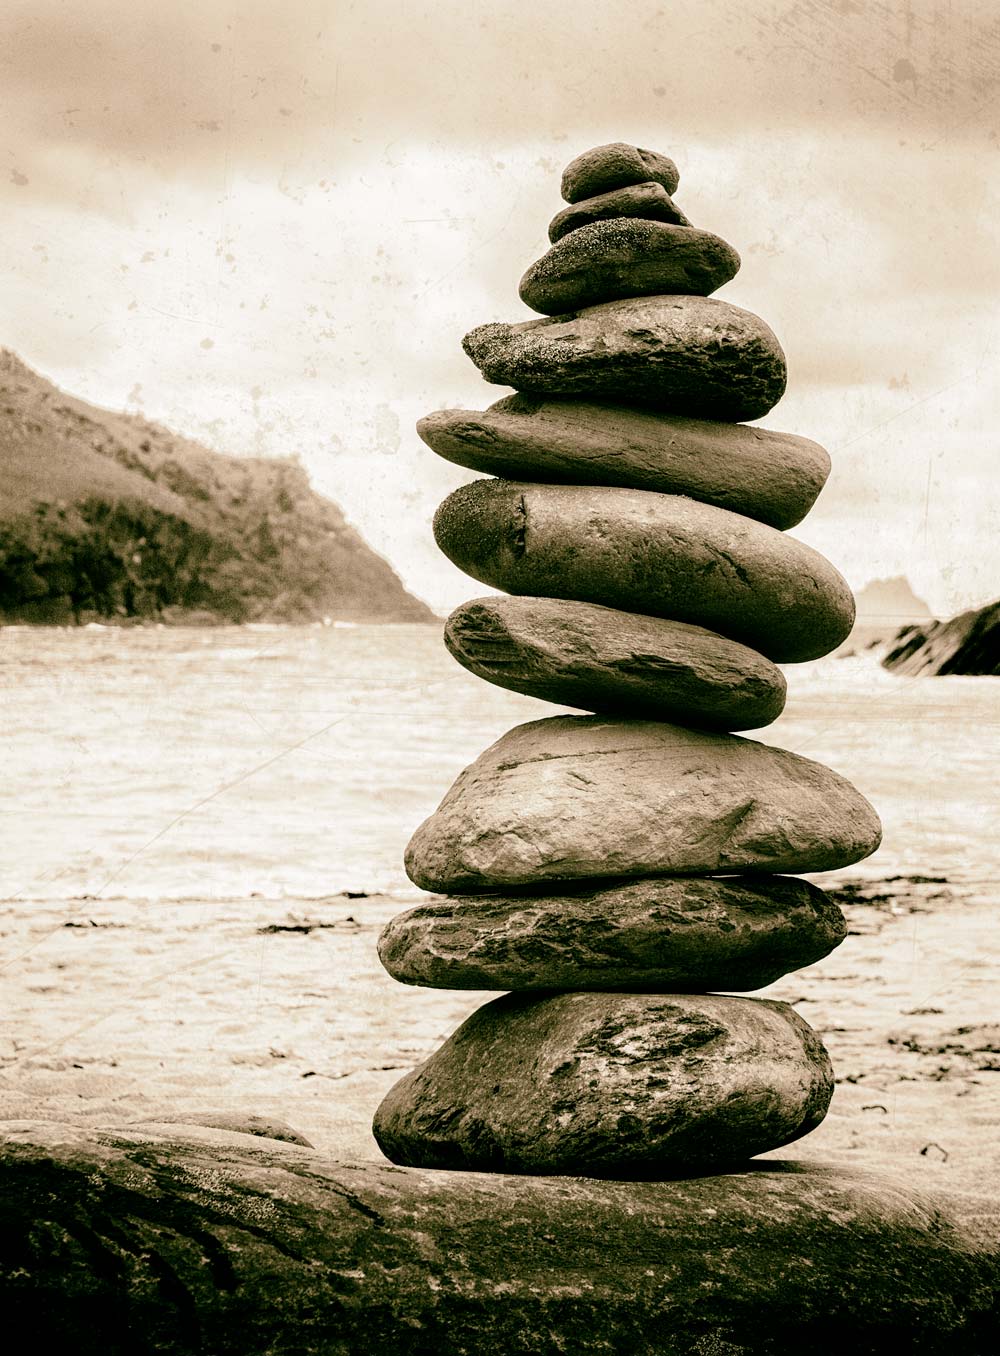
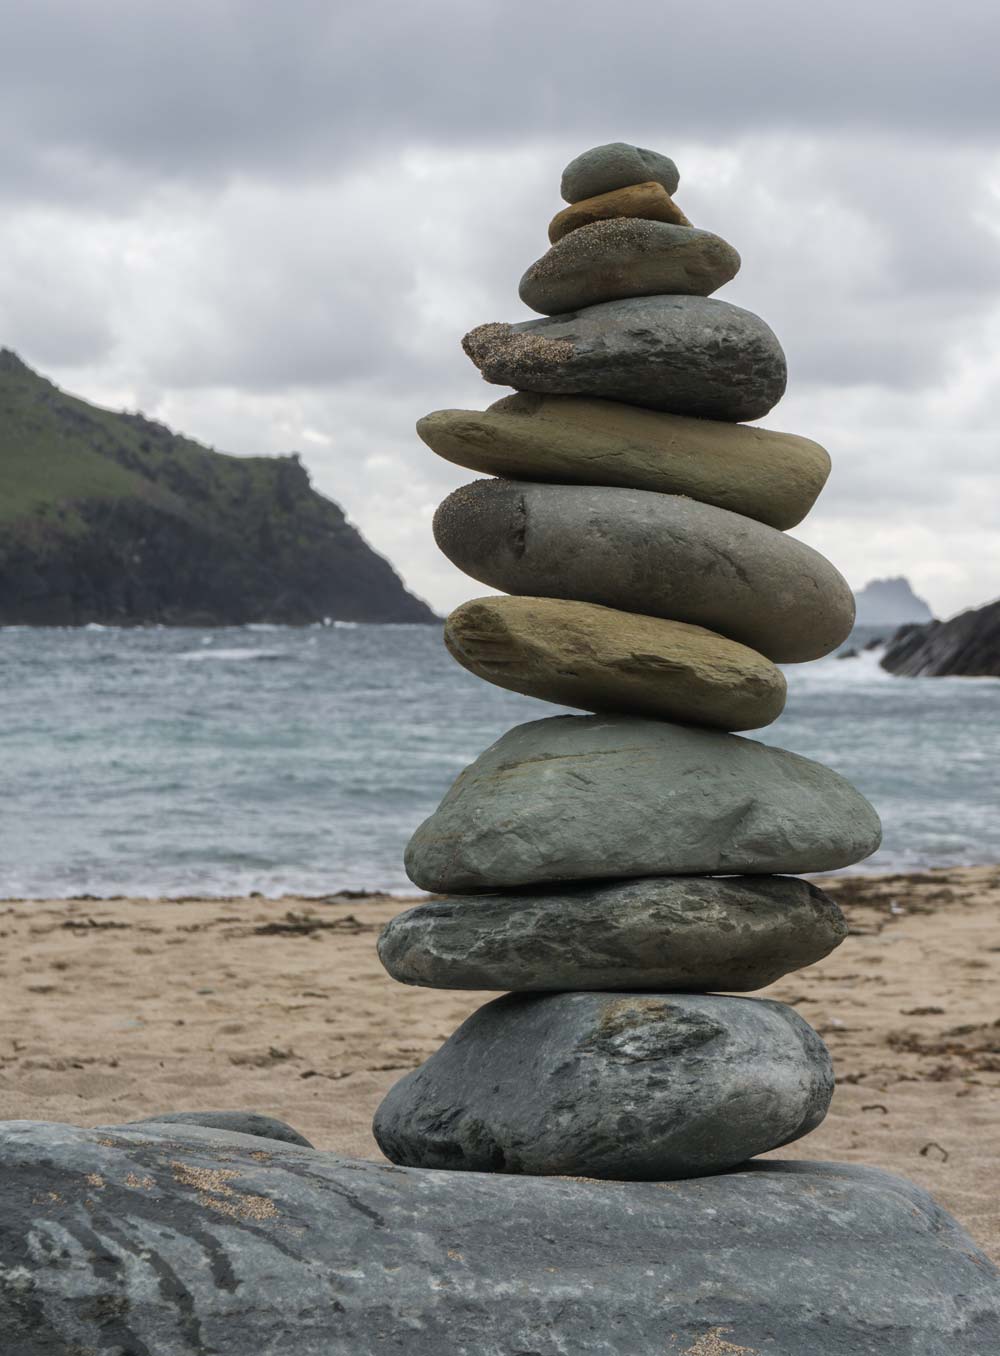
This image is from the south of Ireland, a place called the ring of Dingle – an area that I regularly travel to for some days because the landscape is just so0 much different from the Dublin area. We do not really have mountains, just some hills, and the south is full of awesome landscape. For this image in particular, I didn’t actually have to do much. I arrived at a small beach just off the road and found the stones stapled in this way – minus two stones, that is. I spend about 10 min trying to balance more stones on it, but there was no way, haha. Once I was done, I thought right away on an old style picture – which is why today I will show you how to create an old photo effect in photoshop.
I love the image as it is a perfect example how something very simple can create a great memory and an even better image. This is the second time I have done this, and I hope I can do it many times more. Have you ever tried to staple stones like this?
Remember, if you like the video, make sure to subscribe for more weekly Photoshop and Photography action!
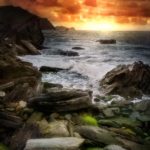
Here is the final image:
And here is the original:
Part One – Adding a Monochrome Color in Photoshop (1:00 min)
Before you start, make sure that you prep the image in any way you like. For instance, I like to blow out the brights in such an old image before I apply the effects.
The most important part is to get the color right. I suggest to choose from a dirty brown to a dark yellow, but it really depends on the image you are using. In any case, I created a Hue/Saturation layer, selected the Colorize button and selected the Hue I liked. In fact, that is all I had to do for this, hehe.
Part Two – Add Scratches to an Image in Photoshop (2:15 min)
There are essentially two widely used methods to add scratches or patterns to an image in Photoshop. One is to find an image that has a texture on the webs, and then bring it into Photoshop and change it. This is a lot of work, and in this case, not needed. Instead, I went to use the Nik Collection, which is a free filter assembly from Google (no sign-up or anything). In there is the Analog Effex Pro 2 system that has some of the textures already in it. It is not like there are a thousand, but enough to be used every now and again.
So, I created a stamp visible, in which I copy all the changes we have made before (CMD/Ctrl + Alt + Shift + E). I went into the filter system and disabled all but scratches – picked one that I liked – and done! You can fully control the strength of the effect, so it could not be any easier, haha.
Remember, shortcuts make your life easier and can speed up your processing a lot! Here is what I used in this image and most of my landscape Photoshop tutorials:
B for the brush
X to change between background and foreground colors
CMD+I to invert anything
CMD+J to duplicate a layer or a selection
CMD+Alt+Shift+E to get a stamp visible
On a Windows PC, just replace the CMD with Ctrl.
If you like my images, make sure to check out my portfolio!
Don’t forget to get out there and take some pictures yourself, maybe even create an old photo effect in Photoshop? – let me know if you have any awesome images in the same style!