How to Make Quick Edits in Photoshop – Example: Venice Boats | Photoshop Tutorial
Welcome back! Today I will tell you a little bit about an image that I had taken in Venice around February this year – see, sometimes you go to holidays and you end up at super touristic places. This is normal, I AM a tourist, but this means you will shoot an image that has been taken a thousand times before.
It is a curse and a blessing at the same time! Think about it, you can go crazy with such images and just edit them creatively to put your own stamp on the image and make it stand out of the crowd. This image was taken around San Marco in Venice, super touristic, so let’s get creative and have a look at how to make quick edits in Photoshop!
Remember, if you like the video, make sure to subscribe for more weekly Photoshop and Photography action!
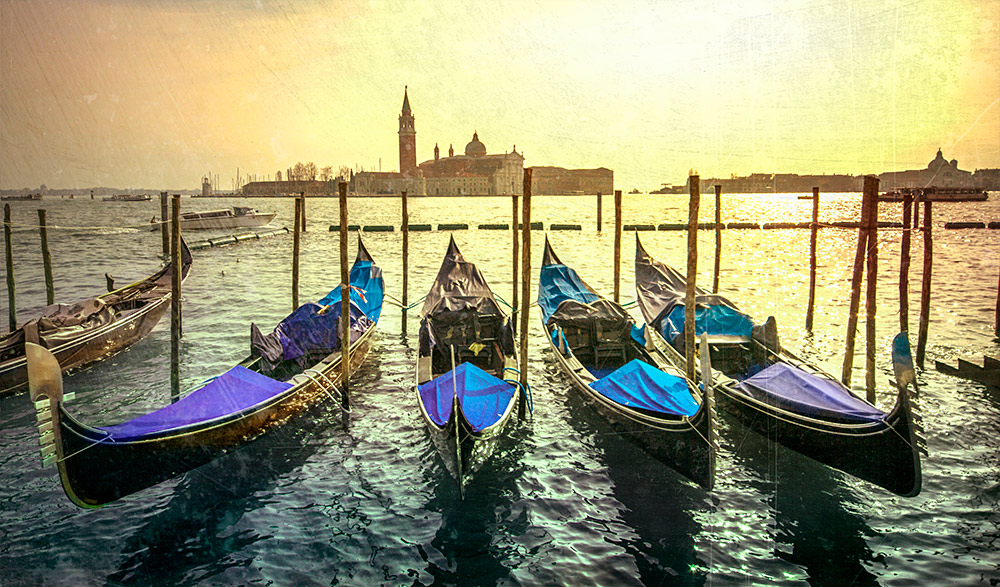
This is the final image:
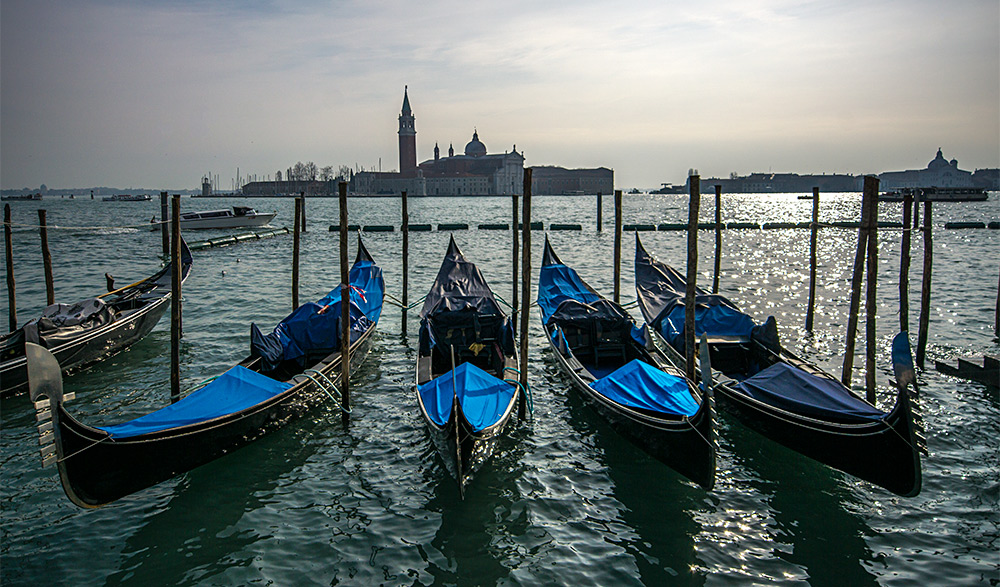
And here is the original:
I wanted to keep it simple, but I wanted to crush this image to really make it personal. So I went for a nice bright light that wakes the image up as a whole and then a nice grungy texture put on top of this. So, let me show you how to make quick edits in photoshop.
Part One – Add the Light Source (1:20 min)
The first part was the fastest – we need more light, so let’s create it. I selected my layer within the layers panel and clicked on Filter-Render-Lighting Effects. There, you can choose between colored and versions of light sources, where I went with a nice point light in a super warm orange color. Hit Ok, and it is done! It could not be any faster. You can move the light around and place it wherever you feel like, too!
Part Two – Adding the Texture to the Image (2:30 min)
There are two ways of going about adding a texture, one is fast and easy but less flexible, the other one takes a little longer but is fully customizable. Let’s start with the automatic one.
Select your filter and you can go to Filter-Nik Collection – Analog Effex Pro. Indeed, this is a pre-prepped filter set from Nik, but it is totally free and you can just download it here. Once you are in the Effects, just select a texture you like on the right and hit Ok! Simple, nailed it.
The manual way is to use a texture from somewhere on the internet and place that on the image. You can use free sites such as texturelib.com and download whatever you need – awesome site! Bring the image into your file using drag and drop and change the blend mode of the layer to for example Multiply and use a level or curve adjustment to mace the texture more and more invisible until you are happy. Done! Takes a little longer, but you can use any texture you like. Feel the freedom?
Remember, shortcuts make your life easier and can speed up your processing a lot! Here is what I used in this image and most of my landscape Photoshop tutorials:
V for the move tool
CMD+J to duplicate a layer or a selection
CMD+Alt+Shift+N to get a new layer
CMD+Alt+Shift+E to get a stamp visible
On a Windows PC, just replace the CMD with Ctrl.
If you like my images, make sure to check out my portfolio!
Don’t forget to get out there and take some pictures yourself – Have you been to Venice? Show me your images! One day I hope I get the chance to go back and see all the corners I have missed the first time. I hope you enjoyed this video on how to make quick edits in Photoshop.