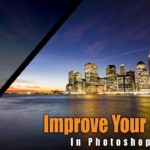
How to Edit Landscape Images in Photoshop – Bryce Canyons Guardian | Photoshop Tutorial
Welcome back! Recently, I have spent some months in beautiful Utah, United States. Being there has been an awesome experience – there are so many national parks accumulated in this place that it can never get boring. A camera freak like myself has no other choice than to take the camera and get out of the house as often as possible.
One of my many stops was Bryce Canyon, a national park for lazy people. While, usually, one has to hike a lot to get to the nice elevated places in the national parks around there, this one offers an alternative. You can just sit in your car and drive around from one awesome spot to the next! And that is exactly what I did.
Have you been to Bryce Canyon? Show me the images you took there!
Remember, if you like the video, make sure to subscribe for more weekly Photoshop and Photography action!
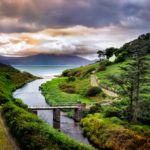
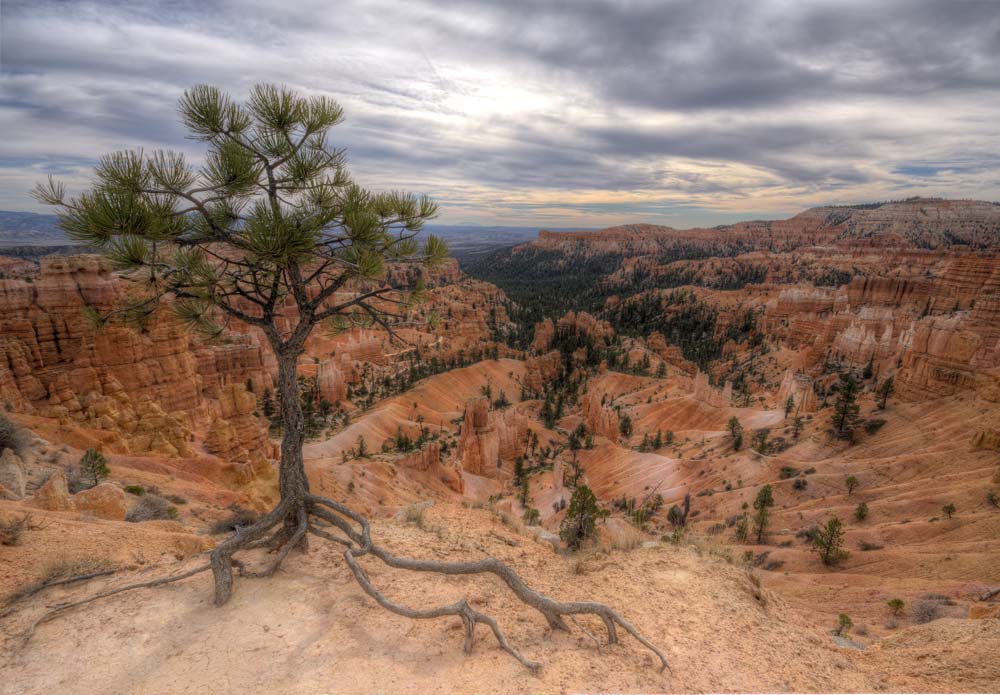
Here is the final image:

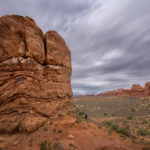
And here is the original:
The Photoshop tutorial below is basic and therefore a great opportunity for any beginner to jump in. So, let’s begin, shall we?
Part One – Darken the Image (2:30 min)
Darkening can be done using many different ways. Today, I chose to use a simple curve adjustment layer to accomplish our goals. To do this, I simply created the curve adjustment layer and dragged the curve down in the middle. Now that the effect was visible everywhere, I had to make sure I only darken certain areas – with the layer mask of the curve adjustment layer selected, I went to hit CMD+I on the keyboard to invert the layer mask. Using a white brush (B on the keyboard) I could then brush the effect through where I wanted. In the end, I had a nicely darkened edge in the foreground as well as a nice dark edge. Great!
Part Two – Change Color of the Tree (4:45 min)
While the tree was great the way it was (I mean, come on, this tree is awesome!), I wanted to give the needles a little more of a soft and fresh green. For that, I had to make sure I only select the actual needles to adjust the color, not everything around them. This can simply be done by selecting the color range of the needles. For this, I created a stamp visible (CMD+Alt+Shift+E) and selected Select->Color Range. There, I was able to sample multiple spots of the needles using the Shift key. After hitting Ok, I just had to click on the hue/saturation adjustment symbol – Photoshop will automatically take the selection I made and make sure that whatever I do in this adjustment will only be visible in the needles. So, I changed the hue slightly and increased saturation. Done. Changing colors is something I do 90% of the time when I edit landscape images in Photoshop.
Part Three – Create a Custom Vignette (10:30 min)
In such wide landscape images, it is very important to draw the eye somewhere – otherwise, the image is “too busy”. A good way to do this is to create a vignette. Creating a custom vignette in Photoshop is super easy. First, I created a curve adjustment layer and dragged the curve down in the middle. I then used the marquee tool (M) to draw a circular selection around the center of the image and hit Shift+Backspace. This will open a dialogue, where I chose to fill the selection with black. As this created a quite hard blurb in the center of the image, I had to blur the layer mask with Filter-Blur-Gaussian Blur.
Next, I created a curve adjustment which was complementary to the one before. The two made it so, that the center of the image was brighter and the edges of the image were darker. There was only some minor work left to do, but this was easily done using a brush.
Part Four – Minor Clean Up (15:00 min)
To wrap up, I only had to do a couple of things. For one, I created another stamp visible (CMD+Alt+Shift+E) and used the free transform tool (CMD+T) to stretch the image a little in the lower left. Next, I used another curve adjustment as before to darken some other areas – I always realize this at the end when I edit landscape images in Photoshop, hehe. Also, there was an unclean edge at the bottom of the image due to the HDR processing in Photomatix. For this, I created a stamp visible (CMD+Alt+Shift+E) and hit J on the keyboard to get the spot healing brush tool. Using this, I simply removed the line.
Remember, shortcuts make your life easier and can speed up your processing a lot! Here is what I used in this image and most of my Photoshop tutorials:
CMD+Alt+Shift+E to create a stamp visible
B for the brush
X to change between background and foreground colors
CMD+I to invert anything
CMD+J to duplicate a layer or a selection
CMD+Alt+Shift+N to get a new layer
CMD+G to group things
M for the Marquee tool
On a Windows PC, just replace the CMD with Ctrl.
If you like my images, make sure to check out my portfolio!
Don’t forget to get out there and take some pictures yourself – time for some landscape photography? I hope you enjoy my Photoshop tutorials and this landscape image in particular and I see you next time. Have fun when you edit landscape images in Photoshop.