How to use Photoshop to Edit Your Landscape Images – Example: Rocks and Bushes | Photoshop Tutorial
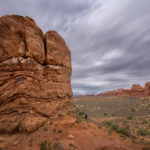
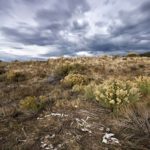
Welcome back! This image was taken in Utah, USA. I have spent some months there and can say that the landscape is just something else. Apart from its amazing national parks, it also has a lot of nothing. I do not mean this in any bad way, I mean there are extremely wide bush landscapes that have only that: bushes and rocks. In itself, I find that quite amazing and it reminds me on Ireland, where you also have tons of wide grassland areas with nothing in them (sheep, maybe). The place shown in the image is nowhere in particular – I think it was only a random stop on the site of the road, but it was worth the stop, hehe.
The processing I will show you today is very basic and mostly includes changing or increasing the color of certain parts of the image – so I am taking my time going over the stuff I do, a perfect time for beginners to stay a while and listen.
Remember, if you like the video, make sure to subscribe for more weekly Photoshop and Photography action!
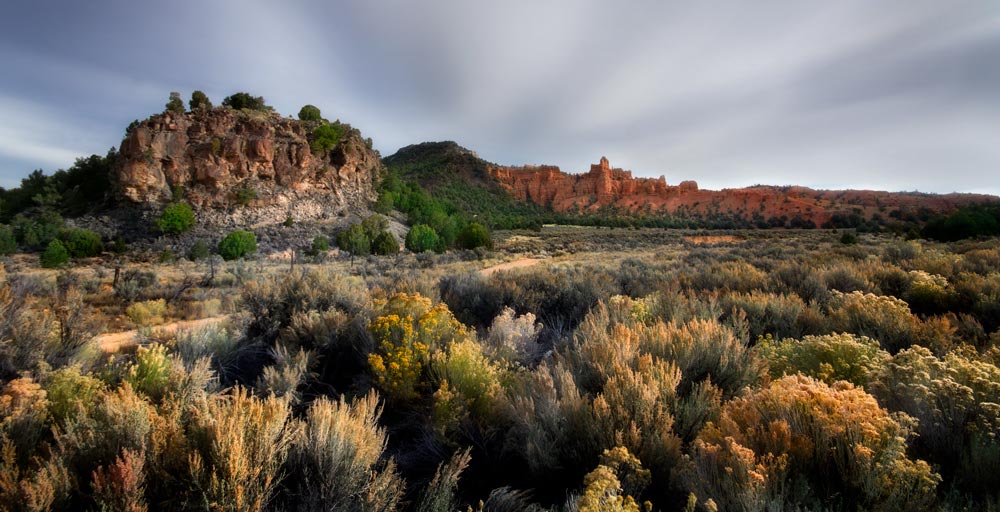
Here is the final image:
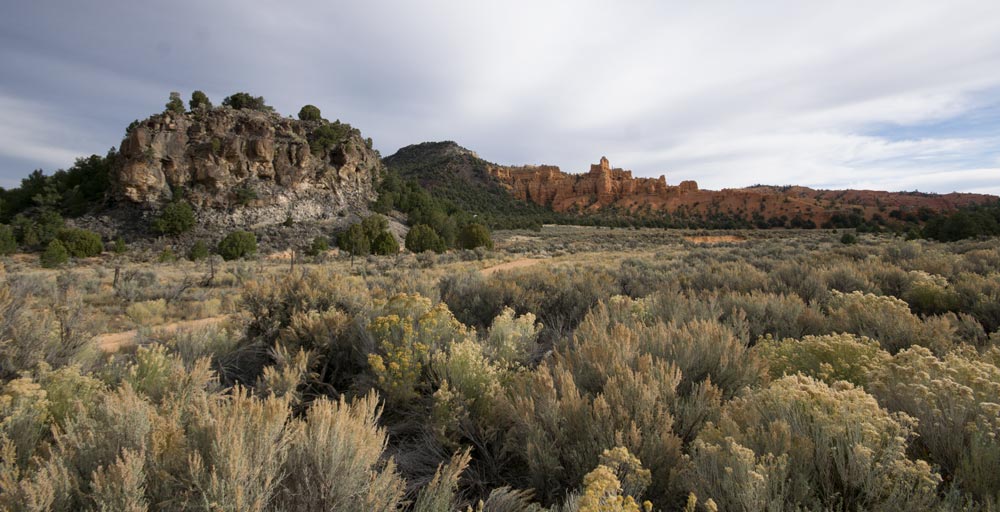
And here is the original:
Part One – Saturate the Color in the Mountain (1:45 min)
To start off, I felt like this nice red rock (Looks small? It’s super far!) in the back could take some more color. Therefore, I created a Hue/Saturation layer by clicking on the little symbol on the right. There, I just increased the Saturation. To make sure I do not increase the Saturation of the whole image, I created a layer mask (the little Japanese flag in the lower right), inverted the mask (CMD+I) and used a white brush (B) to get the effect where I wanted it.
If this sounds foreign to you, you probably have not worked with layer masks before. No problem, just read this to get started!
Part Two and Three – Intensify the Colors in the Trees and the Foreground (3:30)
Now, after finishing with the mountain in the back, I did the exact same thing for the trees on the left-hand site of the image as well as the plants that are in the foreground. For the trees, I also changed the Hue, not only the Saturation. This is great if you are having plants that look a little plain and red-ish – just give them a little twist in the Hue, they’ll be fine, hehe. For the foreground, I also created a very soft Orton Effect – meaning I created a Stamp Visible (copies everything onto one layer) and changed its blend mode to Soft Light. This adds a nice effect to the foreground as it adds some contrast – I usually try how it looks in any image I create haha.
Part Four – Modify the Sky (6:00 min)
While the sky was generally nice, I had some issues with it (as always when I do a Photoshop tutorial). For one, I did not like the super bright patch in the middle and thought right away that it would make sense to blur the sky to make it look more uniform and cleaner. Therefore, I started out by creating a Curve and a Levels Adjustment layer which I used to darken the spot in the center of the sky. Just a little, not too much. I then created a Stamp Visible, which copies everything that you can see onto a new layer (CMD+Alt+Shift+E). This was followed by the use of the Lasso Tool (L), which I used to draw a rough selection of the sky (you could also use the Pen Tool, I was just lazy and fast). With this selected, I hit CMD+J to copy the selected sky onto a new layer, after which I went to Filter-Blur-Radial Blur.
The amount of Blur you use is completely up to you of course 🙂 I had to do it three times to make sure I get the amount I liked!
Further, there was a blue spot on the right-hand site – generally, this is something nice of course, but in my case, it did not fit the mood I wanted to set with the image. To remove it, I created a new layer (CMD+Alt+Shift+N) and took out the Clone Stamp Tool (S). With this, I held Alt on the keyboard and selected another cloud part that I liked. Subsequently, I just drew a new piece of sky onto the new layer, moved it over the blue sky (V for the move tool) and used a layer mask as described before to make sure the effect is not visible everywhere.
Part Five – Remove the Yellow Color Cast from the Image (17:00 min)
As the image got a little bit yellow during the processing, I just manually removed the color cast a little bit. For that, I created a curve adjustment layer and went from the Master Section to the different colors Red, Green and Blue. Increasing some of them did the trick just fine and the image looked clearer in color composition now.
And that was it! In the original, I also did some cropping to remove a little bit of the sky (C for the Crop Tool), but that was all there was to do. Sometimes it is nice to do only some simple processing, especially if the image has everything it needs!
Remember, shortcuts make your life easier and can speed up your processing a lot! Here is what I used in this image and most of my Photoshop tutorials:
CMD+Alt+Shift+E to create a stamp visible
B for the brush
X to change between background and foreground colors
CMD+I to invert anything
CMD+J to duplicate a layer or a selection
CMD+Alt+Shift+N to get a new layer
CMD+G to group things
C for the crop tool
S for the clone stamp tool
L for the lasso tool
If you like my images, make sure to check out my portfolio!
Don’t forget to get out there and take some pictures yourself – time for some landscape photography? I hope you enjoy my Photoshop tutorial and this landscape image in particular and I see you next time.