https://youtu.be/Z50O4a2NVok
How to Use Photoshop CC – Example: London’s Fire Dancer | Photoshop Tutorial
Welcome back! Today’s image comes from London, where I had the pleasure of staying for an extended weekend just some days ago. London, like most large cities, is a great place to stay, especially for photography purposes. There is always something going on for those willing to search for it!
While I was walking through the city with some friends of mine, we ended up at a show from (what I call a) fire dancer. The man was incredible, and I spend a good 15 min there to observe his show. The finale was absolutely stunning – he spits fire into the air, but straight up! And he kept the flame up for several seconds, which impressed me even more. So while my friend Sasha recorded the whole thing with a GoPro (thanks for that Sasha!), I went into continues shooting mode on the camera and just held the shutter button, in the hope I get the moment. And so I did. I did pay him, of course!
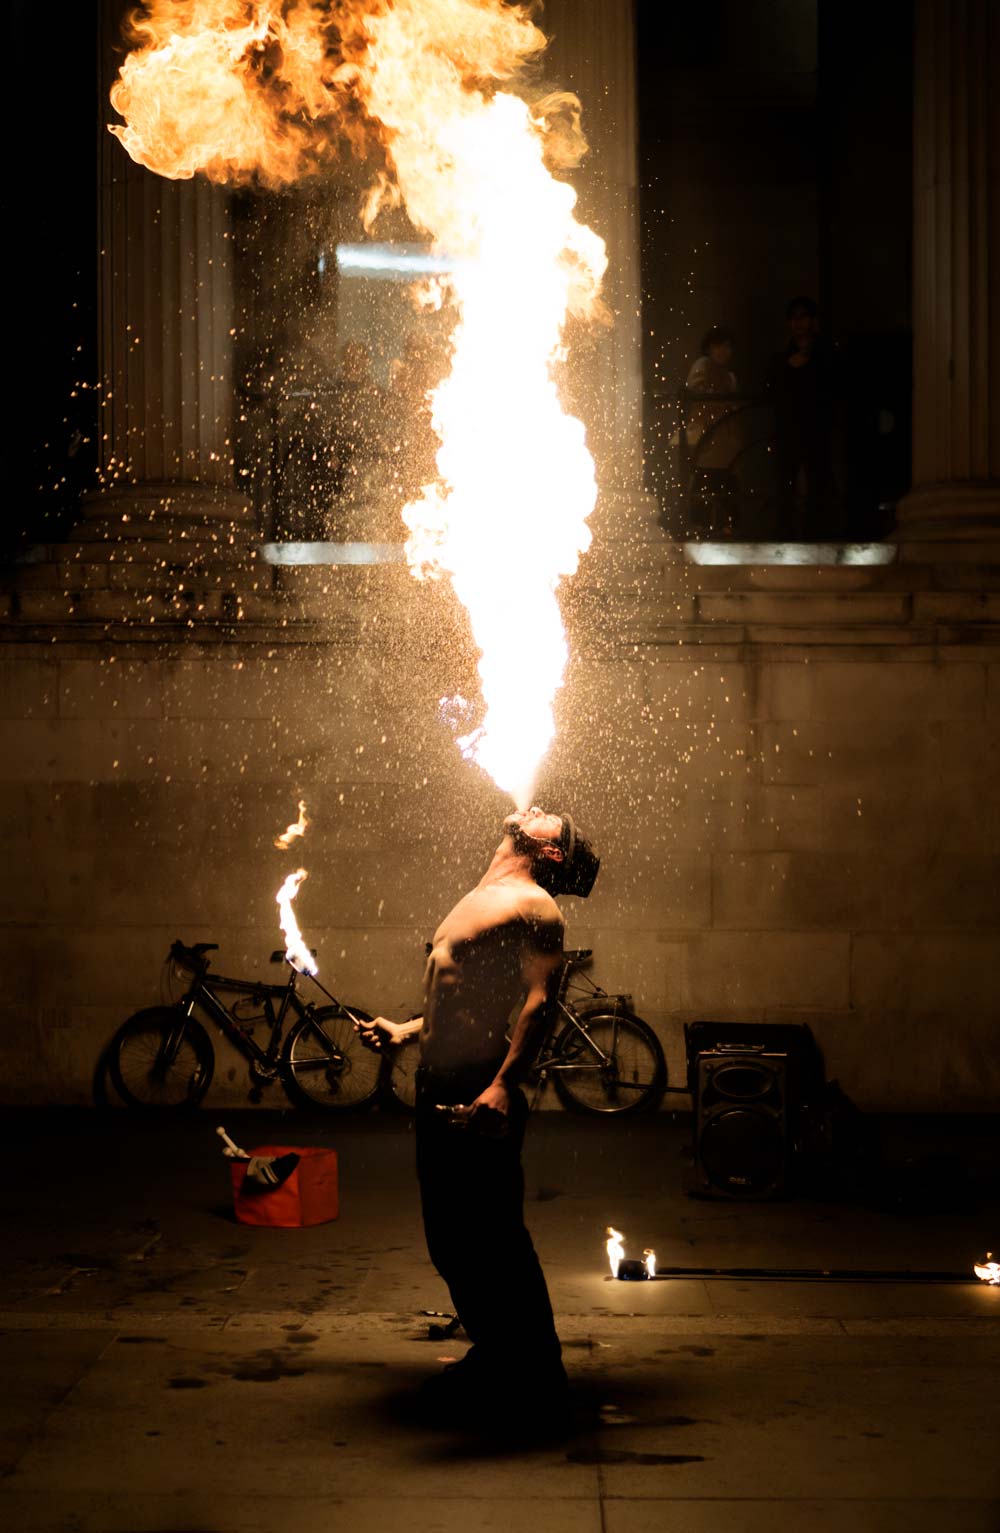
So, here is the final image with objects removed and darkened edge:
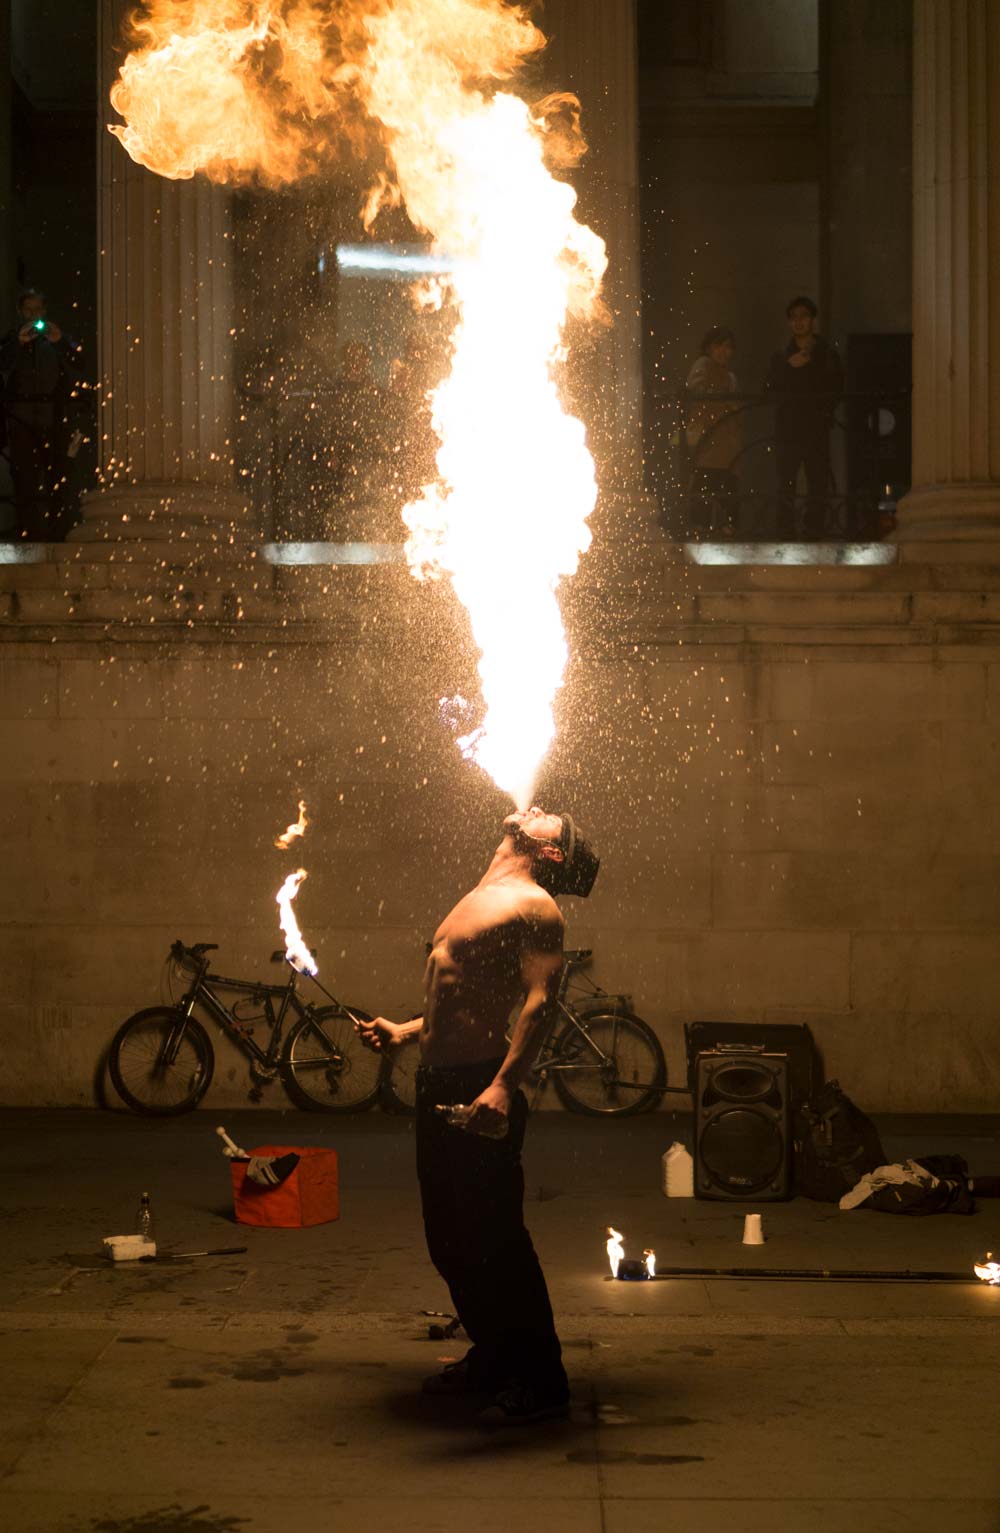
And here is the original image:
Part One – Removing Objects in Photoshop (4:00 min)
These kind of show guys need a lot of equipment – I totally get that, but I really do not need it in my image, hehe. There is stuff such as a bottle, a cup – this stuff has to go. Removing all this was super fast and super easy, perfect for any beginner as well! I started out with a new layer (CMD/Ctrl+Alt+Shift+E is the shortcut – use them right away when learning how to use Photoshop CC) and selected the spot healing brush tool (J). I then zoomed in and simply circled around the objects I needed to remove. This can sometimes work and sometimes it does not – it is a little try and error. In this case, it worked like a charm and took just a few minutes to clean the image up.
Part Two – Darkening the Image (6:20 min)
I wanted to make sure I place all of the attention on the dude that actually spits the fire. For this, I needed to darken down the sites of the image a little but, which in turn would make the fire dancer stand out a little more. There are many ways to darken stuff down in Photoshop – I chose the easiest, as usual! For this, I created a curve adjustment layer and dragged the curve down a little. To make sure I only darken the edges of the image, I used the blend if options every layer has. For this, I double clicked on the layer within the layers panel and used the sliders at the bottom of the dialogue to merge the dark edges nicely. I did this a couple of times until I was happy with it.
Part Three – Removing Noise from the Image (14:00 min)
There are also many ways to remove noise in Photoshop, but instead of writing it, I instead show you the tutorial I made in my earlier days 🙂 It is still valid and works just fine, also when learning how to use Photoshop CC.
Remember, shortcuts make your life easier and can speed up your processing a lot! Here is what I used in this image and most of my landscape Photoshop tutorials:
B for the brush
X to change between background and foreground colors
CMD+I to invert anything
CMD+Alt+Shift+N to get a new layer
CMD+Alt+Shift+E to get a stamp visible
On a Windows PC, just replace the CMD with Ctrl.
If you like my images, make sure to check out my portfolio!
Don’t forget to get out there and take some pictures yourself – time for some London city Photography? I hope you enjoy my Photoshop tutorials and this image in particular and I see you next time. Enjoy learning How to Use Photoshop CC to edit images.